4.Release the mouthpiece, and turn the locking ring counterclockwise to close the inflator valve and lock the mouthpiece in place.
5.Complete repacking of the LP – see Repacking the LP.
Re-arming the LP
CAUTION: The MD 1250 LP must be deflated before being
1.Open the zippers completely, wipe off any water, and place the LP on a smooth, flat surface with the hydrostatic inflator facing the user.
2.Hold the CO2 cylinder through the fabric and insert the metal key between the black locking ring and the inflator cap.
3.Twist the key
4.Remove and discard the yellow inflator cap.
5.Elongate the inflation cell sealing ring by carefully squeezing it.
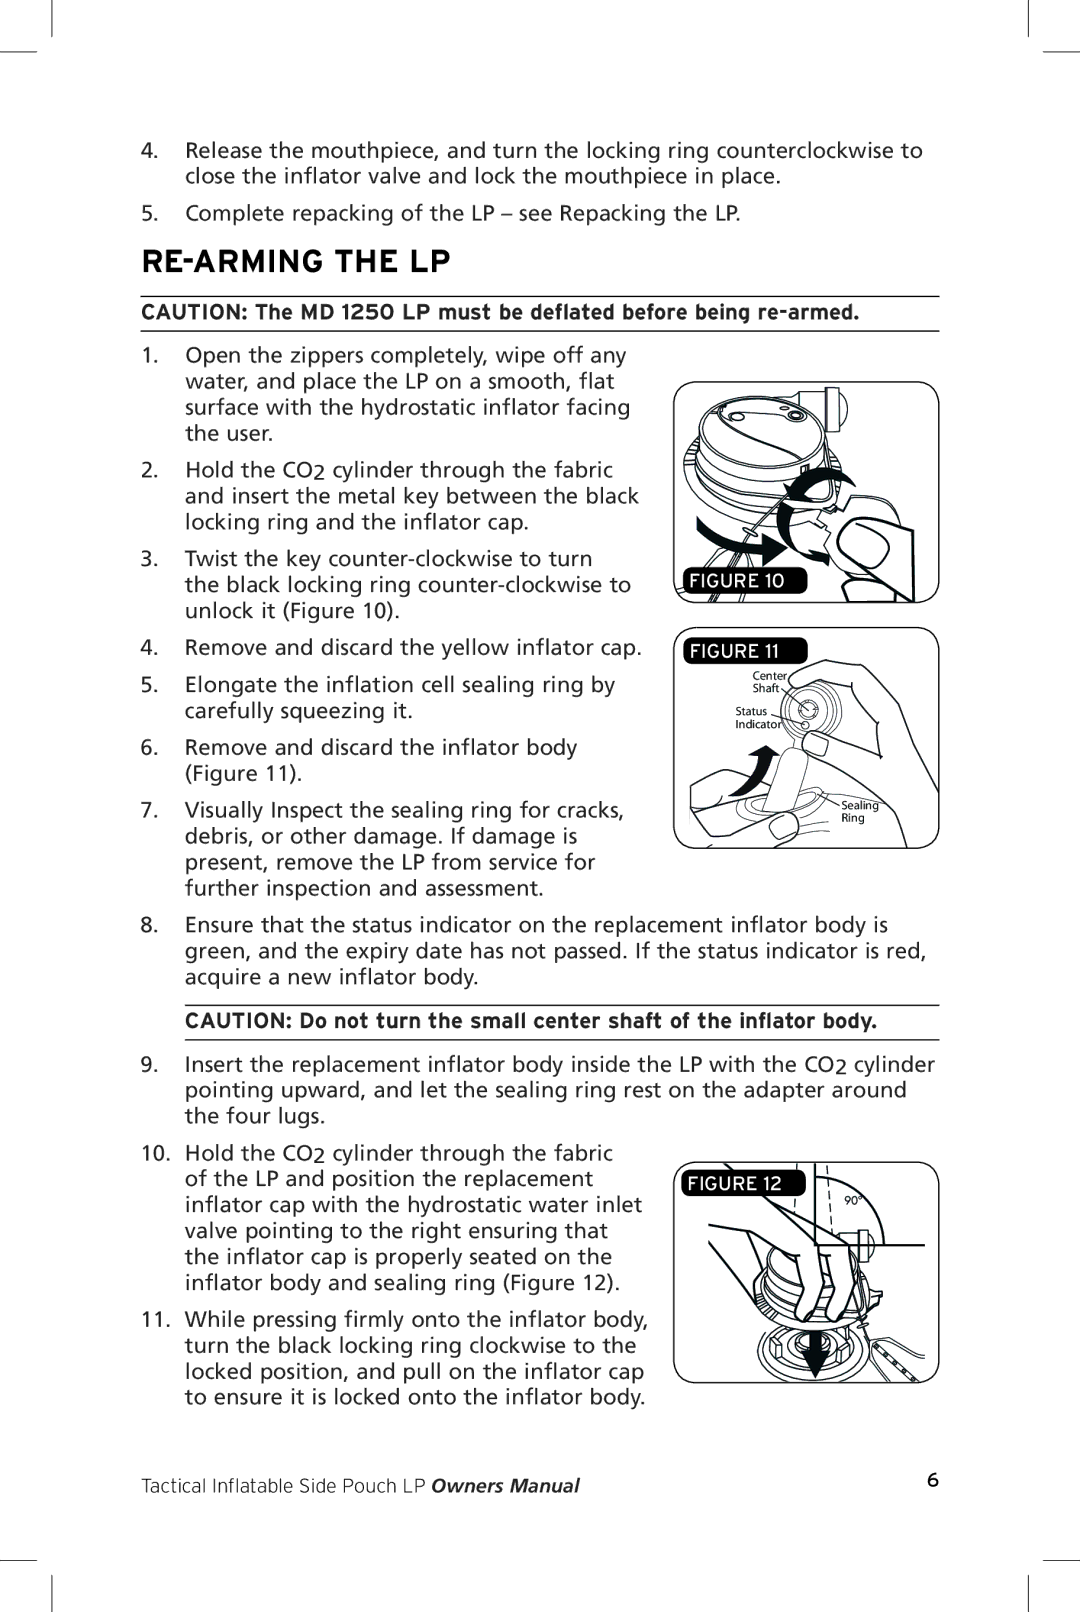
6.Remove and discard the inflator body (Figure 11).
7.Visually Inspect the sealing ring for cracks, debris, or other damage. If damage is present, remove the LP from service for further inspection and assessment.
Figure 10
Figure 11
Center
Shaft
Status
Indicator
Sealing Ring
8. | Ensure that the status indicator on the replacement inflator body is | |
| green, and the expiry date has not passed. If the status indicator is red, | |
| acquire a new inflator body. |
|
| CAUTION: Do not turn the small center shaft of the inflator body. | |
9. | Insert the replacement inflator body inside the LP with the CO2 cylinder | |
| pointing upward, and let the sealing ring rest on the adapter around | |
| the four lugs. |
|
10. | Hold the CO2 cylinder through the fabric |
|
| of the LP and position the replacement | Figure 12 |
| inflator cap with the hydrostatic water inlet |
|
| valve pointing to the right ensuring that |
|
| the inflator cap is properly seated on the |
|
| inflator body and sealing ring (Figure 12). |
|
11. | While pressing firmly onto the inflator body, |
|
| turn the black locking ring clockwise to the |
|
| locked position, and pull on the inflator cap |
|
| to ensure it is locked onto the inflator body. |
|
Tactical Inflatable Side Pouch LP Owners Manual | 6 |