Identification of controls
FRONT PANEL
ENGLISH FRANÇAIS DEUTSCH NEDERLANDS ESPAÑOL ITALIANO PORTUGUÊS SVENSKA
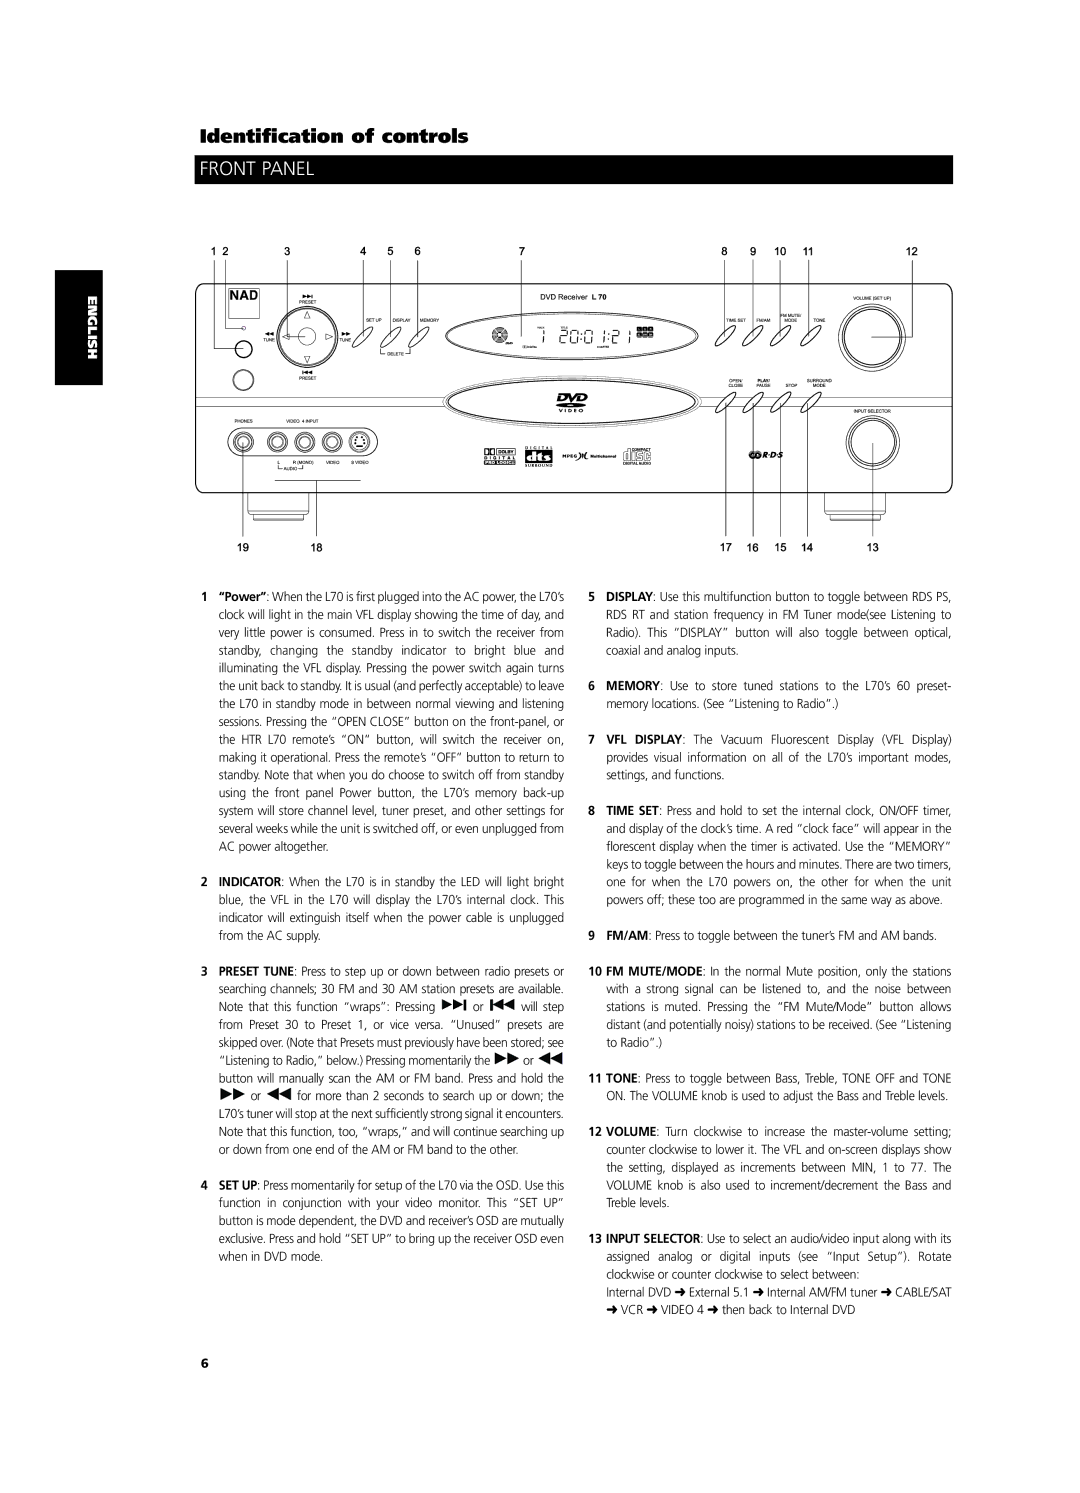
1“Power”: When the L70 is first plugged into the AC power, the L70’s clock will light in the main VFL display showing the time of day, and very little power is consumed. Press in to switch the receiver from standby, changing the standby indicator to bright blue and illuminating the VFL display. Pressing the power switch again turns the unit back to standby. It is usual (and perfectly acceptable) to leave the L70 in standby mode in between normal viewing and listening sessions. Pressing the “OPEN CLOSE” button on the
2INDICATOR: When the L70 is in standby the LED will light bright blue, the VFL in the L70 will display the L70’s internal clock. This indicator will extinguish itself when the power cable is unplugged from the AC supply.
3PRESET TUNE: Press to step up or down between radio presets or
searching channels; 30 FM and 30 AM station presets are available.
Note that this function “wraps”: Pressing ![]()
![]() or
or ![]()
![]() will step from Preset 30 to Preset 1, or vice versa. “Unused” presets are
will step from Preset 30 to Preset 1, or vice versa. “Unused” presets are
skipped over. (Note that Presets must previously have been stored; see
“Listening to Radio,” below.) Pressing momentarily the ![]() or
or ![]()
button will manually scan the AM or FM band. Press and hold the
![]() or
or ![]() for more than 2 seconds to search up or down; the L70’s tuner will stop at the next sufficiently strong signal it encounters. Note that this function, too, “wraps,” and will continue searching up or down from one end of the AM or FM band to the other.
for more than 2 seconds to search up or down; the L70’s tuner will stop at the next sufficiently strong signal it encounters. Note that this function, too, “wraps,” and will continue searching up or down from one end of the AM or FM band to the other.
4SET UP: Press momentarily for setup of the L70 via the OSD. Use this function in conjunction with your video monitor. This “SET UP” button is mode dependent, the DVD and receiver’s OSD are mutually exclusive. Press and hold “SET UP” to bring up the receiver OSD even when in DVD mode.
5DISPLAY: Use this multifunction button to toggle between RDS PS, RDS RT and station frequency in FM Tuner mode(see Listening to Radio). This “DISPLAY” button will also toggle between optical, coaxial and analog inputs.
6MEMORY: Use to store tuned stations to the L70’s 60 preset- memory locations. (See “Listening to Radio”.)
7VFL DISPLAY: The Vacuum Fluorescent Display (VFL Display) provides visual information on all of the L70’s important modes, settings, and functions.
8TIME SET: Press and hold to set the internal clock, ON/OFF timer, and display of the clock’s time. A red “clock face” will appear in the florescent display when the timer is activated. Use the “MEMORY” keys to toggle between the hours and minutes. There are two timers, one for when the L70 powers on, the other for when the unit powers off; these too are programmed in the same way as above.
9FM/AM: Press to toggle between the tuner’s FM and AM bands.
10FM MUTE/MODE: In the normal Mute position, only the stations with a strong signal can be listened to, and the noise between stations is muted. Pressing the “FM Mute/Mode” button allows distant (and potentially noisy) stations to be received. (See “Listening to Radio”.)
11TONE: Press to toggle between Bass, Treble, TONE OFF and TONE ON. The VOLUME knob is used to adjust the Bass and Treble levels.
12VOLUME: Turn clockwise to increase the
13INPUT SELECTOR: Use to select an audio/video input along with its assigned analog or digital inputs (see “Input Setup”). Rotate clockwise or counter clockwise to select between:
Internal DVD ➜ External 5.1 ➜ Internal AM/FM tuner ➜ CABLE/SAT ➜ VCR ➜ VIDEO 4 ➜ then back to Internal DVD
6