U-800 specifications
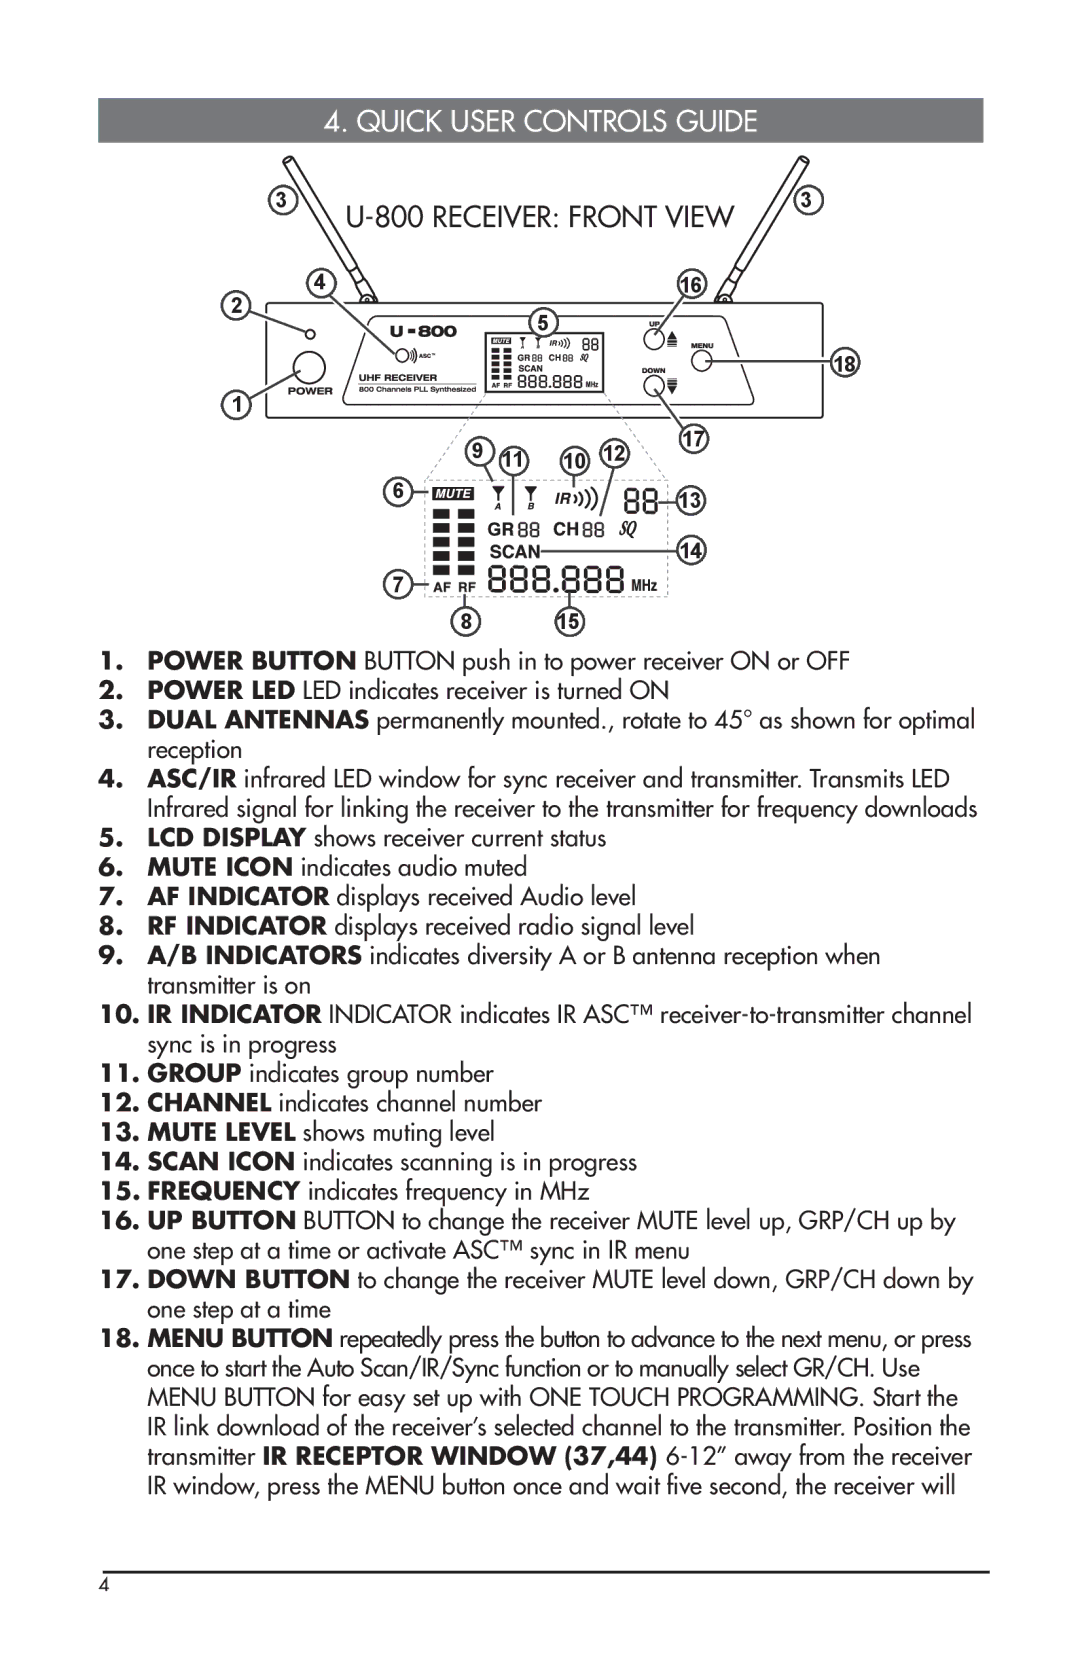
The Nady Systems U-800 is a professional-grade wireless vocal microphone system designed for performers and speakers who demand clear sound and reliability. With advanced features and robust performance, the U-800 stands out in the crowded market of wireless audio equipment.One of the key features of the Nady Systems U-800 is its UHF frequency range. Operating within the ultra-high frequency spectrum, this system provides a stable and interference-free signal. This is critical for live performances, as it minimizes the chances of audio dropouts or disruptions, ensuring that artists can deliver their best without technical difficulties.
The U-800 is equipped with a dual-channel receiver that allows for simultaneous operation of two microphones. This flexibility is ideal for duets, panel discussions, or any situation where multiple vocalists or speakers are needed. Each channel has its own volume control, providing users with the ability to balance sound levels seamlessly.
Signal strength is another vital characteristic of the U-800, featuring a dynamic range that offers clear high frequencies and deep lows, contributing to an overall rich sound quality. The system also employs advanced companding technology, which reduces unwanted noise and enhances the clarity of the audio being transmitted.
The microphone itself is lightweight and ergonomically designed for comfortable use, making it suitable for long performances or presentations. Additionally, it features a cardioid pickup pattern that helps isolate the desired sound source while minimizing background noise. This is particularly beneficial in live settings where crowd noise or other distractions may be present.
Battery life is a crucial aspect of any wireless system, and the U-800 does not disappoint. With efficient power management, the system offers extended battery life, allowing users to perform longer without the worry of battery depletion. It is also designed for quick and easy setup, with an intuitive interface that makes it accessible even for those who may be new to wireless systems.
In summary, the Nady Systems U-800 combines professional audio quality with user-friendly features, making it a reliable choice for musicians, entertainers, and speakers. Its UHF operation, dual-channel capability, excellent sound quality, and long battery life position the U-800 as a leading solution in the realm of wireless microphone systems. Whether for stage performances or public speaking events, the U-800 ensures that every word and note is transmitted with clarity and precision.

