WF6 |
| WF9 |
| WF18 |
BACKBOARD | BACKBOARD | BACKBOARD |
| |
|
| |||
|
|
| ||
35.250” | MORTAR | 35.250” |
|
|
MORTAR |
|
|
|
|
TILES | TILES |
|
|
|
|
|
| 70.50” | |
23.625” |
| 35.50” |
| |
| MORTAR |
| ||
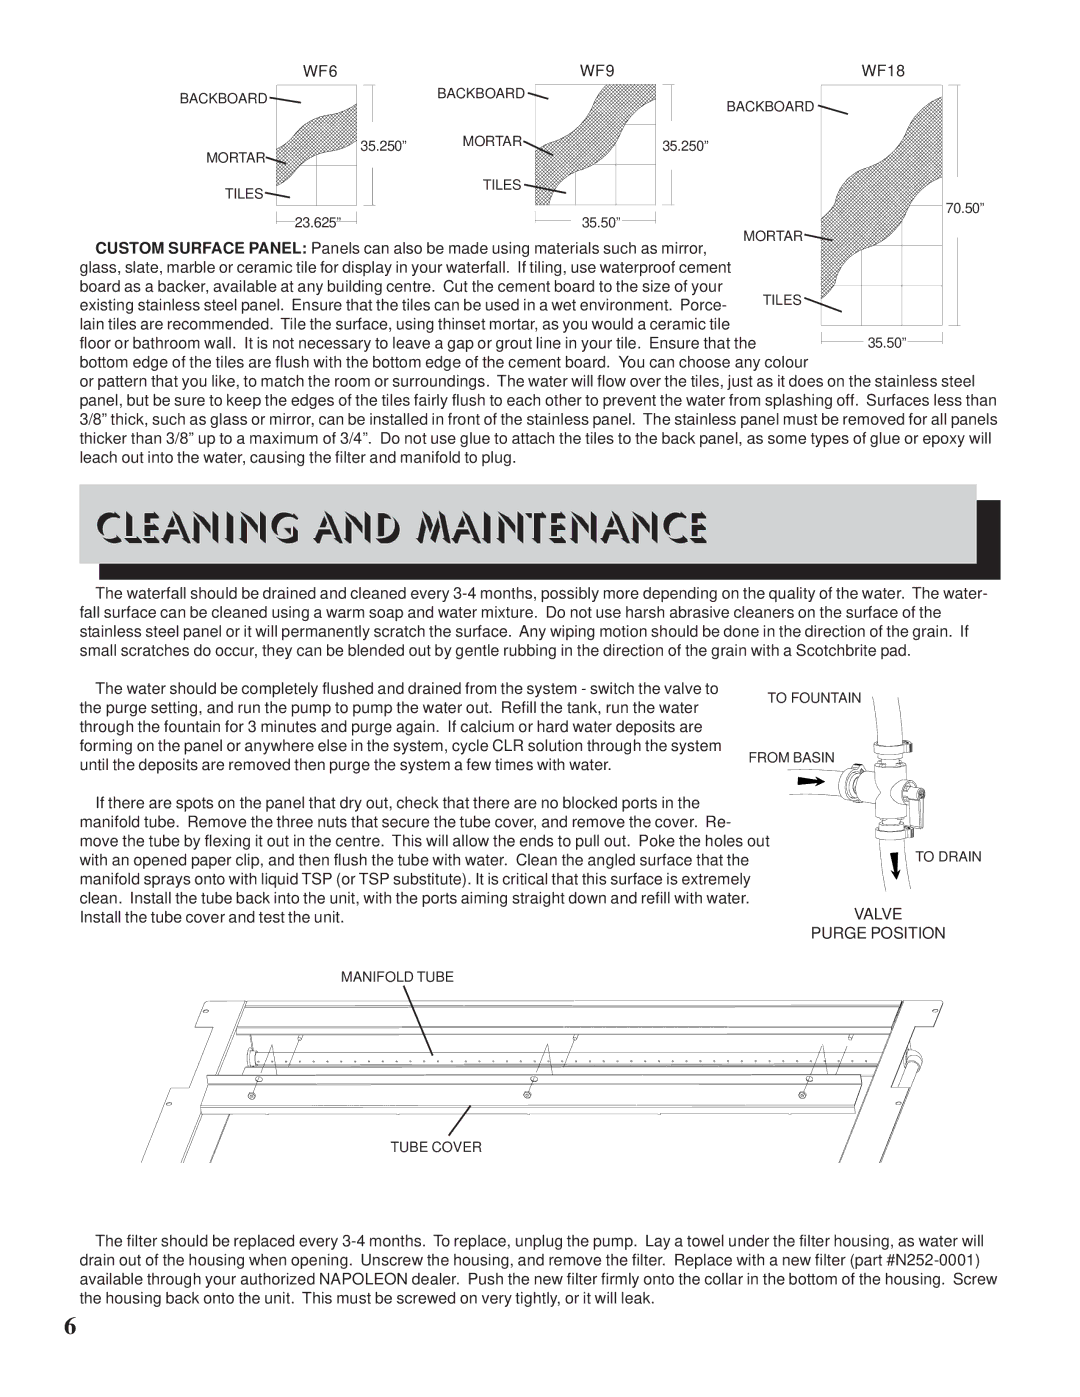
CUSTOM SURFACE PANEL: Panels can also be made using materials such as mirror, |
| |||
|
| |||
glass, slate, marble or ceramic tile for display in your waterfall. If tiling, use waterproof cement |
|
| ||
board as a backer, available at any building centre. Cut the cement board to the size of your | TILES |
| ||
existing stainless steel panel. Ensure that the tiles can be used in a wet environment. Porce- |
| |||
|
| |||
lain tiles are recommended. Tile the surface, using thinset mortar, as you would a ceramic tile |
|
| ||
floor or bathroom wall. It is not necessary to leave a gap or grout line in your tile. Ensure that the | 35.50” | |||
bottom edge of the tiles are flush with the bottom edge of the cement board. You can choose any colour |
| |||
or pattern that you like, to match the room or surroundings. The water will flow over the tiles, just as it does on the stainless steel panel, but be sure to keep the edges of the tiles fairly flush to each other to prevent the water from splashing off. Surfaces less than 3/8” thick, such as glass or mirror, can be installed in front of the stainless panel. The stainless panel must be removed for all panels thicker than 3/8” up to a maximum of 3/4”. Do not use glue to attach the tiles to the back panel, as some types of glue or epoxy will leach out into the water, causing the filter and manifold to plug.
CLEANING AND MAINTENANCE
The waterfall should be drained and cleaned every
The water should be completely flushed and drained from the system - switch the valve to the purge setting, and run the pump to pump the water out. Refill the tank, run the water through the fountain for 3 minutes and purge again. If calcium or hard water deposits are forming on the panel or anywhere else in the system, cycle CLR solution through the system until the deposits are removed then purge the system a few times with water.
TO FOUNTAIN
FROM BASIN
If there are spots on the panel that dry out, check that there are no blocked ports in the manifold tube. Remove the three nuts that secure the tube cover, and remove the cover. Re- move the tube by flexing it out in the centre. This will allow the ends to pull out. Poke the holes out with an opened paper clip, and then flush the tube with water. Clean the angled surface that the manifold sprays onto with liquid TSP (or TSP substitute). It is critical that this surface is extremely clean. Install the tube back into the unit, with the ports aiming straight down and refill with water. Install the tube cover and test the unit.
TO DRAIN
VALVE
PURGE POSITION
MANIFOLD TUBE
TUBE COVER
The filter should be replaced every
6
