MAINTENANCE INSTRUCTIONS
Turn off the gas at the source and disconnect unit before servicing. Maintenance should only be done when the grill is cool, to avoid the possibility of burns. A leak test must be performed annually, and whenever any component of the gas train is replaced.
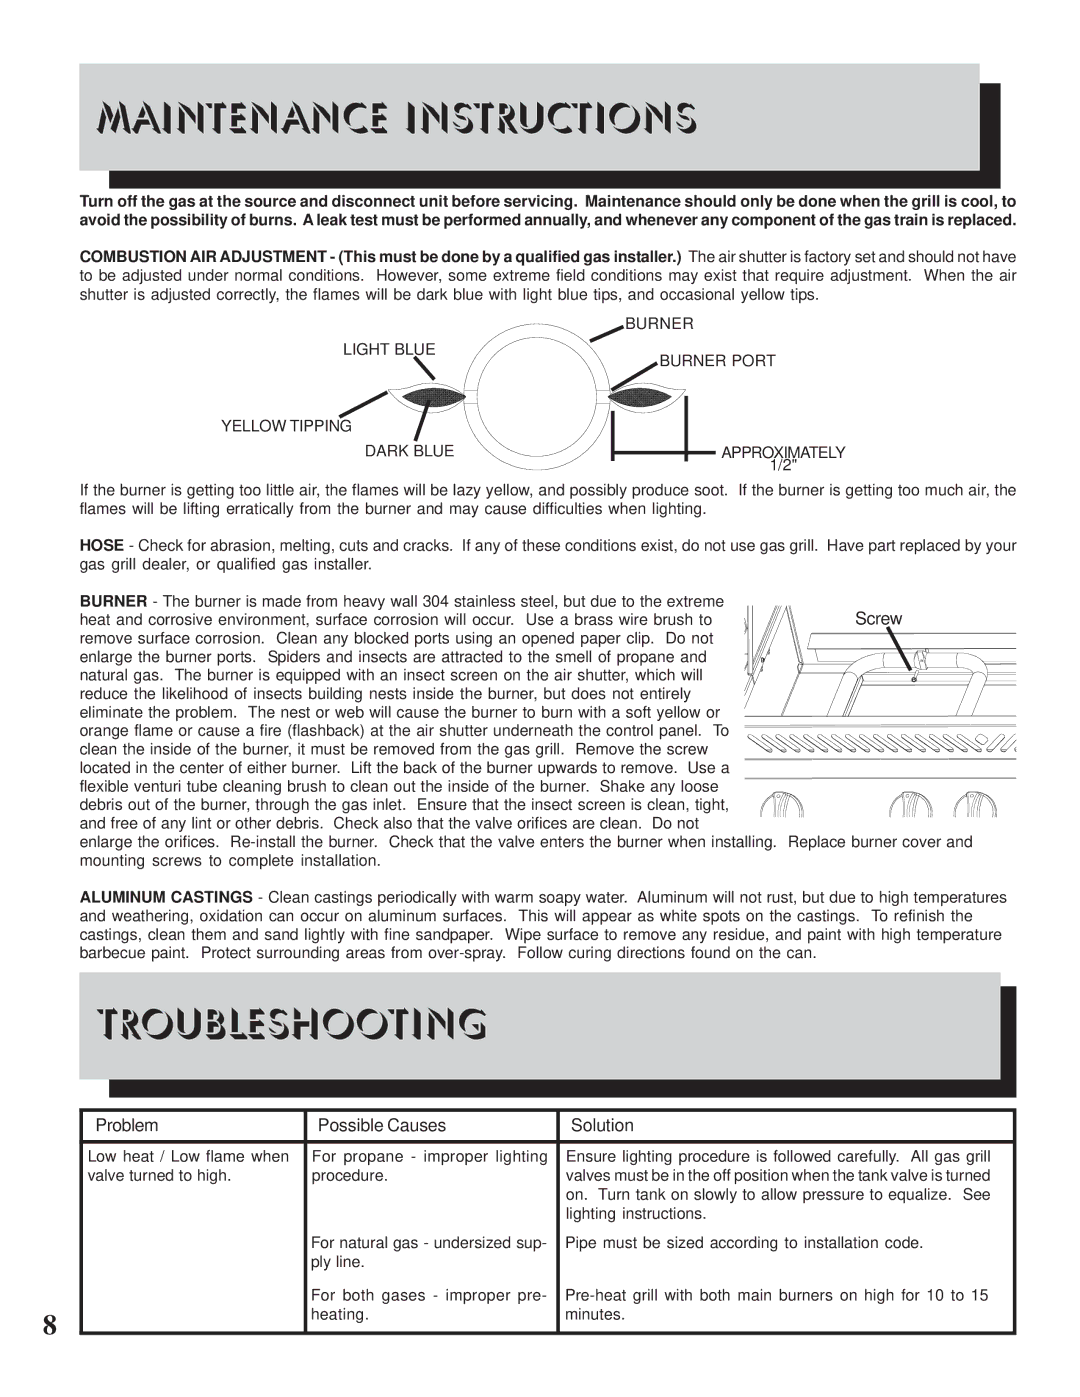
COMBUSTION AIR ADJUSTMENT - (This must be done by a qualified gas installer.) The air shutter is factory set and should not have to be adjusted under normal conditions. However, some extreme field conditions may exist that require adjustment. When the air shutter is adjusted correctly, the flames will be dark blue with light blue tips, and occasional yellow tips.
LIGHT BLUE
YELLOW TIPPING
DARK BLUE
BURNER
BURNER PORT
APPROXIMATELY
1/2"
If the burner is getting too little air, the flames will be lazy yellow, and possibly produce soot. If the burner is getting too much air, the flames will be lifting erratically from the burner and may cause difficulties when lighting.
HOSE - Check for abrasion, melting, cuts and cracks. If any of these conditions exist, do not use gas grill. Have part replaced by your gas grill dealer, or qualified gas installer.
BURNER - The burner is made from heavy wall 304 stainless steel, but due to the extreme | Screw |
heat and corrosive environment, surface corrosion will occur. Use a brass wire brush to | |
remove surface corrosion. Clean any blocked ports using an opened paper clip. Do not |
|
enlarge the burner ports. Spiders and insects are attracted to the smell of propane and |
|
natural gas. The burner is equipped with an insect screen on the air shutter, which will reduce the likelihood of insects building nests inside the burner, but does not entirely eliminate the problem. The nest or web will cause the burner to burn with a soft yellow or orange flame or cause a fire (flashback) at the air shutter underneath the control panel. To clean the inside of the burner, it must be removed from the gas grill. Remove the screw located in the center of either burner. Lift the back of the burner upwards to remove. Use a flexible venturi tube cleaning brush to clean out the inside of the burner. Shake any loose
debris out of the burner, through the gas inlet. Ensure that the insect screen is clean, tight, and free of any lint or other debris. Check also that the valve orifices are clean. Do not
enlarge the orifices.
ALUMINUM CASTINGS - Clean castings periodically with warm soapy water. Aluminum will not rust, but due to high temperatures and weathering, oxidation can occur on aluminum surfaces. This will appear as white spots on the castings. To refinish the castings, clean them and sand lightly with fine sandpaper. Wipe surface to remove any residue, and paint with high temperature barbecue paint. Protect surrounding areas from
TROUBLESHOOTING
8
Problem | Possible Causes | Solution |
|
|
|
Low heat / Low flame when | For propane - improper lighting | Ensure lighting procedure is followed carefully. All gas grill |
valve turned to high. | procedure. | valves must be in the off position when the tank valve is turned |
|
| on. Turn tank on slowly to allow pressure to equalize. See |
|
| lighting instructions. |
| For natural gas - undersized sup- | Pipe must be sized according to installation code. |
| ply line. |
|
| For both gases - improper pre- | |
| heating. | minutes. |
|
|
|
