English
| |
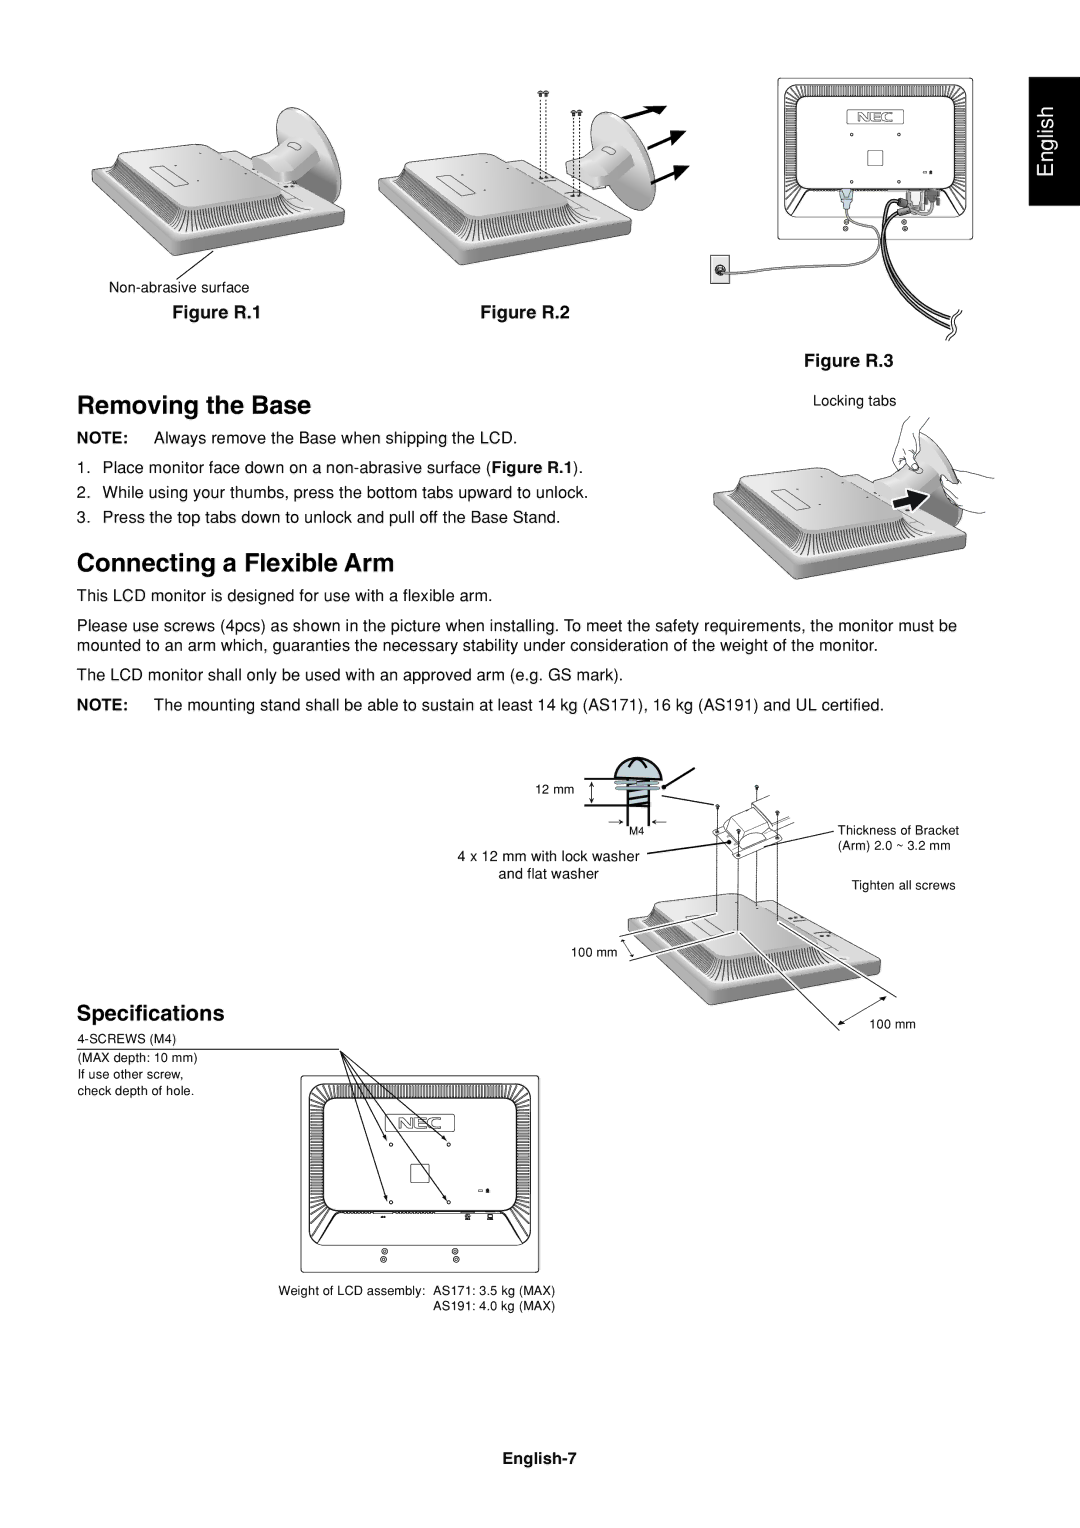
Figure R.1 | Figure R.2 |
Figure R.3
Removing the Base
Locking tabs
NOTE: Always remove the Base when shipping the LCD.
1. Place monitor face down on a
2. While using your thumbs, press the bottom tabs upward to unlock.
3. Press the top tabs down to unlock and pull off the Base Stand.
Connecting a Flexible Arm
This LCD monitor is designed for use with a flexible arm.
Please use screws (4pcs) as shown in the picture when installing. To meet the safety requirements, the monitor must be mounted to an arm which, guaranties the necessary stability under consideration of the weight of the monitor.
The LCD monitor shall only be used with an approved arm (e.g. GS mark).
NOTE: The mounting stand shall be able to sustain at least 14 kg (AS171), 16 kg (AS191) and UL certified.
12 mm
M4 | Thickness of Bracket |
| (Arm) 2.0 ~ 3.2 mm |
4 x 12 mm with lock washer
and flat washer
Tighten all screws
100 mm ![]()
Specifications
4-SCREWS (M4)
(MAX depth: 10 mm) If use other screw, check depth of hole.
100 mm
Weight of LCD assembly: AS171: 3.5 kg (MAX) AS191: 4.0 kg (MAX)
