Quick Start –continued
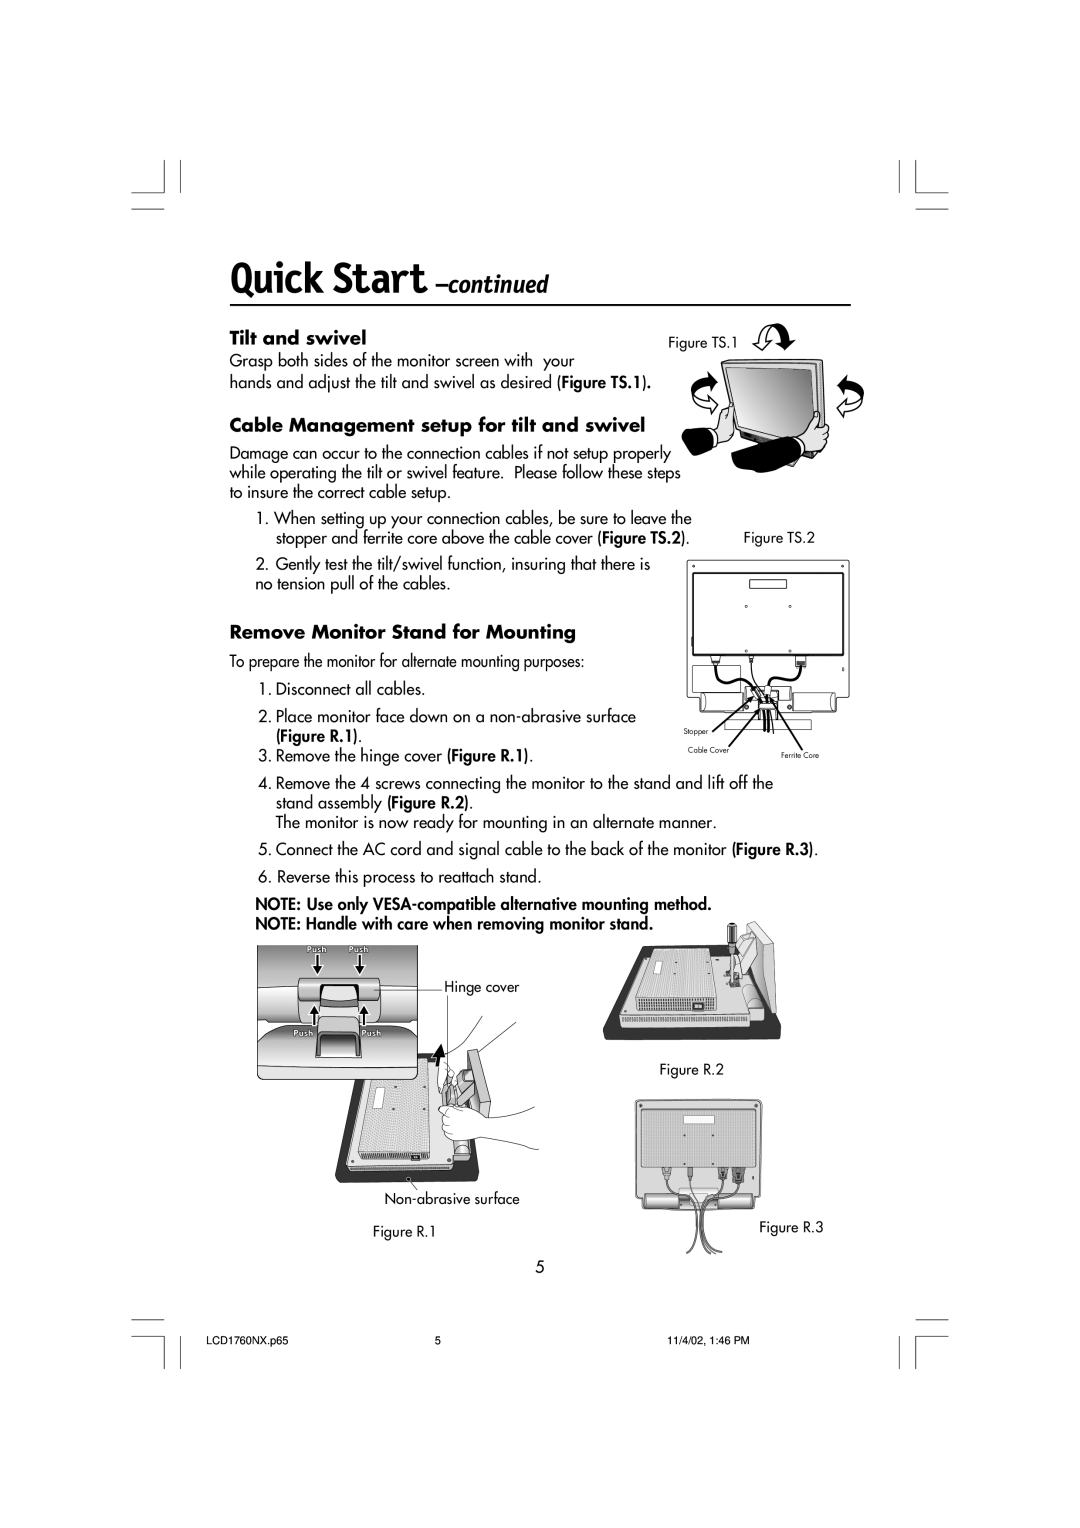
Tilt and swivel | Figure TS.1 |
Grasp both sides of the monitor screen with | your |
hands and adjust the tilt and swivel as desired (Figure TS.1).
Cable Management setup for tilt and swivel
Damage can occur to the connection cables if not setup properly while operating the tilt or swivel feature. Please follow these steps to insure the correct cable setup.
1. When setting up your connection cables, be sure to leave the |
|
stopper and ferrite core above the cable cover (Figure TS.2). | Figure TS.2 |
2. Gently test the tilt/swivel function, insuring that there is |
|
no tension pull of the cables. |
|
Remove Monitor Stand for Mounting
To prepare the monitor for alternate mounting purposes:
1.Disconnect all cables.
2.Place monitor face down on a
3.Remove the hinge cover (Figure R.1).
Stopper
Cable Cover
Ferrite Core
4.Remove the 4 screws connecting the monitor to the stand and lift off the stand assembly (Figure R.2).
The monitor is now ready for mounting in an alternate manner.
5.Connect the AC cord and signal cable to the back of the monitor (Figure R.3).
6.Reverse this process to reattach stand.
NOTE: Use only
NOTE: Handle with care when removing monitor stand.
Hinge cover
Figure R.2
Non-abrasive surface Figure R.1
Figure R.3
5
LCD1760NX.p65 | 5 | 11/4/02, 1:46 PM |
