Setting up TV Programme

Setting up TV Programme

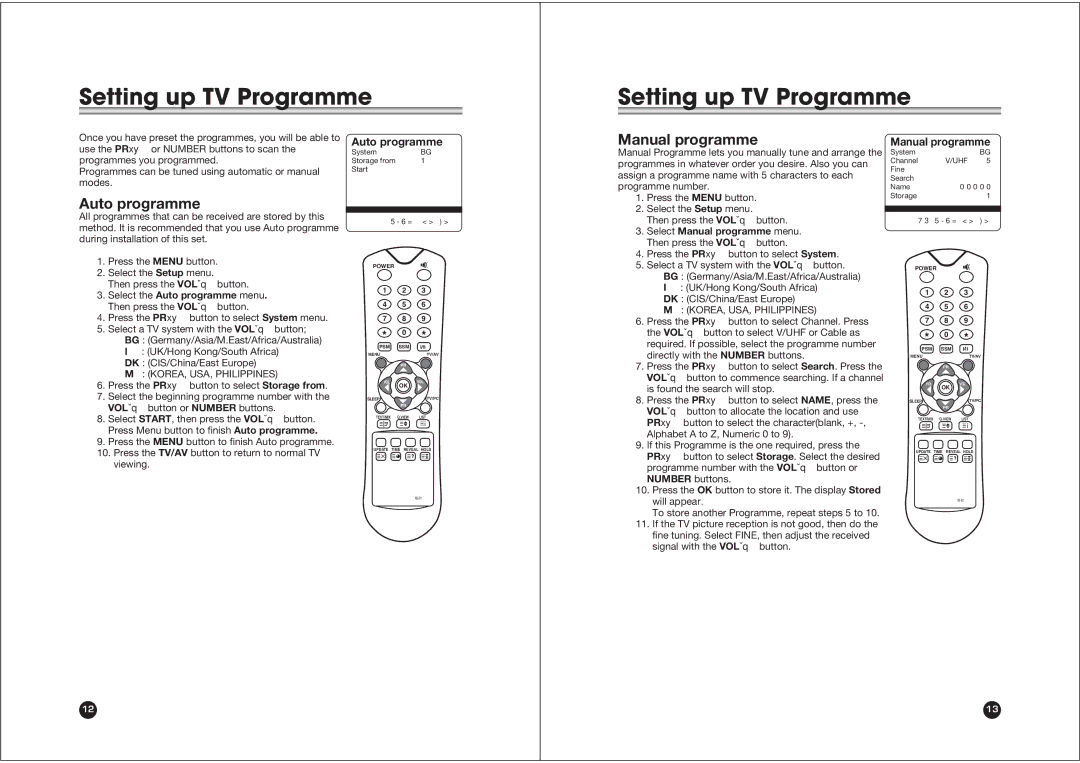
Once you have preset the programmes, you will be able to

Auto programme

use the PRxy or NUMBER buttons to scan the

System

BG

programmes you programmed.

Storage from

1

Programmes can be tuned using automatic or manual

Start


modes.


Manual programme

Manual Programme lets you manually tune and arrange the programmes in whatever order you desire. Also you can assign a programme name with 5 characters to each programme number.

Manual programme

System


BG

Channel

V/UHF

5

Fine


Search


Name

0 0 0 0 0

Auto programme

All programmes that can be received are stored by this method. It is recommended that you use Auto programme during installation of this set.

1.Press the MENU button.

2.Select the Setup menu.

Then press the VOLÏq button.

3.Select the Auto programme menu. Then press the VOLÏq button.

4.Press the PRxy button to select System menu.

5.Select a TV system with the VOLÏq button; BG : (Germany/Asia/M.East/Africa/Australia) I : (UK/Hong Kong/South Africa)

DK : (CIS/China/East Europe)

M : (KOREA, USA, PHILIPPINES)

6.Press the PRxy button to select Storage from.

7.Select the beginning programme number with the VOLÏq button or NUMBER buttons.

8.Select START, then press the VOLÏq button. Press Menu button to finish Auto programme.

9.Press the MENU button to finish Auto programme.

10.Press the TV/AV button to return to normal TV viewing.

5-6=<>)>

POWER

1 2 3

4 5 6

7 8 9

* 0 *

PSM SSM I/II

MENUTV/AV


PR

VOL

VOL


OK

SLEEPTV/PC

PR

TEXT/MIX Q.VIEW LIST

UPDATE TIME REVEAL HOLD

ENGLISH

1.

Press the MENU button.

2.

Select the Setup menu.


Then press the VOLÏq button.

3.

Select Manual programme menu.


Then press the VOLÏq button.

4.

Press the PRxy button to select System.

5.

Select a TV system with the VOLÏq button.


BG : (Germany/Asia/M.East/Africa/Australia)


I : (UK/Hong Kong/South Africa)


DK : (CIS/China/East Europe)


M : (KOREA, USA, PHILIPPINES)

6.

Press the PRxy button to select Channel. Press


the VOLÏq button to select V/UHF or Cable as


required. If possible, select the programme number


directly with the NUMBER buttons.

7.

Press the PRxy button to select Search. Press the


VOLÏq button to commence searching. If a channel


is found the search will stop.

8.

Press the PRxy button to select NAME, press the


VOLÏq button to allocate the location and use


PRxy button to select the character(blank, +, -,


Alphabet A to Z, Numeric 0 to 9).

9.

If this Programme is the one required, press the


PRxy button to select Storage. Select the desired


programme number with the VOLÏq button or


NUMBER buttons.

10. Press the OK button to store it. The display Stored

Storage

1


735-6=<>)>

POWER

1 2 3

4 5 6

7 8 9

* 0 *

PSM SSM I/II

MENUTV/AV


PR

VOL

VOL


OK

SLEEPTV/PC

PR

TEXT/MIX Q.VIEW LIST

UPDATE TIME REVEAL HOLD

NS-201

will appear.

To store another Programme, repeat steps 5 to 10.

11. If the TV picture reception is not good, then do the

fine tuning. Select FINE, then adjust the received

signal with the VOLÏq button.

NS-201

12

13

Page 6
Image 6
NEC NLT-20 owner manual Setting up TV Programme, Auto programme, Select Manual programme menu

NLT-20 specifications

The NEC NLT-20 is a remarkable piece of audiovisual technology that stands out for its advanced features and capabilities. It is a high-performance large display solution designed primarily for professional settings such as corporate boardrooms, control rooms, and educational institutions. The NLT-20 embodies NEC’s commitment to delivering superior image quality, reliability, and user-friendly functionality.

One of the main features of the NEC NLT-20 is its impressive display resolution. The screen supports a native 4K UHD resolution, providing a level of clarity and detail that enhances presentations and visual content. The high brightness levels ensure that visuals remain vibrant and legible, even in well-lit environments, making it ideal for various applications.

The NLT-20 integrates state-of-the-art LED backlighting technology, which not only improves contrast ratios but also enhances energy efficiency. This technology allows for deeper blacks and brighter whites, resulting in an overall more dynamic image. Additionally, NEC has incorporated advanced color calibration capabilities in the NLT-20, ensuring accurate color reproduction and uniformity across the entire screen. This feature is particularly beneficial for graphic designers and media professionals who rely on precise color accuracy.

Another notable characteristic of the NEC NLT-20 is its robust connectivity options. It is equipped with multiple HDMI, DisplayPort, and USB ports, enabling seamless integration with various devices such as laptops, video conferencing systems, and gaming consoles. The inclusion of front-facing service ports allows for easy access and maintenance, minimizing downtime in professional environments.

Moreover, the NLT-20 is designed with durability in mind. Built with a sturdy chassis and featuring a long operational lifespan, this display assures users of its reliability and longevity. Its thermal management system further protects the internal components, ensuring consistent performance even during extended usage periods.

User-friendliness is another essential aspect of the NEC NLT-20. The display comes with an intuitive interface that simplifies navigation and settings adjustments. It supports various content management systems, allowing users to easily schedule and display content based on their specific needs.

In conclusion, the NEC NLT-20 is a versatile and powerful display solution that combines advanced technology with practical features. Its exceptional resolution, energy-efficient design, reliable connectivity, and user-centric functionality make it an ideal choice for any professional setting. Whether for presentations, collaborations, or media display, the NEC NLT-20 excels in delivering a captivating visual experience.