STTABLE
Installation Instructions
We greatly appreciate your purchase of this NEC M Series Monitor Table top stand.
Read these instructions and M Series monitor User's manual carefully to ensure proper usage.
This product is designed for use exclusively with the following M Series Monitors.
*M Series M40
*M Series M46
- Materials included in two packages -
Package 1 *Stand *Installation instructions Package 2 *Bracket *Screws (M4X10mm) (8) Screw package is taped to inside bezel. *Screws (M4X16mm) (2)
Safety Precautions (A note on symbols used herein)
Be sure to read the following descriptions carefully before installing.
Warning | Items marked with this symbol indicate items containing instructions which, if ignored or improperly followed, might |
| result in death or bodily injury. |
Caution | Items marked with this symbol indicate items containing instructions which, if ignored or improperly followed, might |
result in bodily injury or damage to property. |
![]() Warning
Warning
![]()
![]() When installing your M Series monitor, be sure to have it installed correctly in accordance with the instructions given herein. Improper installation may cause the M Series monitor to tip over, and this in turn might result in bodily injury.
When installing your M Series monitor, be sure to have it installed correctly in accordance with the instructions given herein. Improper installation may cause the M Series monitor to tip over, and this in turn might result in bodily injury.
![]()
![]() Be sure to follow the assembly instructions in the order they are given and to firmly screw in all screws in their designated locations. Failure to follow instructions might cause the monitor to tip over, fall down, become damaged, or result in other unforeseen accidents after the M Series monitor has been installed.
Be sure to follow the assembly instructions in the order they are given and to firmly screw in all screws in their designated locations. Failure to follow instructions might cause the monitor to tip over, fall down, become damaged, or result in other unforeseen accidents after the M Series monitor has been installed.
![]()
![]() Never alter any of the provided components, as doing so might result in the M Series monitor tipping over, which might in turn result in bodily injury.
Never alter any of the provided components, as doing so might result in the M Series monitor tipping over, which might in turn result in bodily injury.
![]()
![]() Never use any damaged parts or components, as doing so might result in the MULTEOS monitor tipping over, which might in turn result in bodily injury. If you do find any damaged parts or components, contact the retail store where the product was purchased for assistance.
Never use any damaged parts or components, as doing so might result in the MULTEOS monitor tipping over, which might in turn result in bodily injury. If you do find any damaged parts or components, contact the retail store where the product was purchased for assistance.
![]()
![]() When moving the stand and M Series monitor while they are still attached together, never move the stand and monitor by holding the stand alone, as doing so might result in the M Series monitor tipping over, which might in turn result in bodily injury.
When moving the stand and M Series monitor while they are still attached together, never move the stand and monitor by holding the stand alone, as doing so might result in the M Series monitor tipping over, which might in turn result in bodily injury.
![]() Caution
Caution
![]()
![]() When attaching a M Series monitor to the stand, be sure to hold the M Series monitor in place when doing so, as failing to hold the monitor in place might result in it tipping over, which might in turn result in bodily injury.
When attaching a M Series monitor to the stand, be sure to hold the M Series monitor in place when doing so, as failing to hold the monitor in place might result in it tipping over, which might in turn result in bodily injury.
| When attaching the M Series monitor, turn off the power to the monitor and any connected devices and remove the power cord from the | ||
| power socket before doing so. |
| |
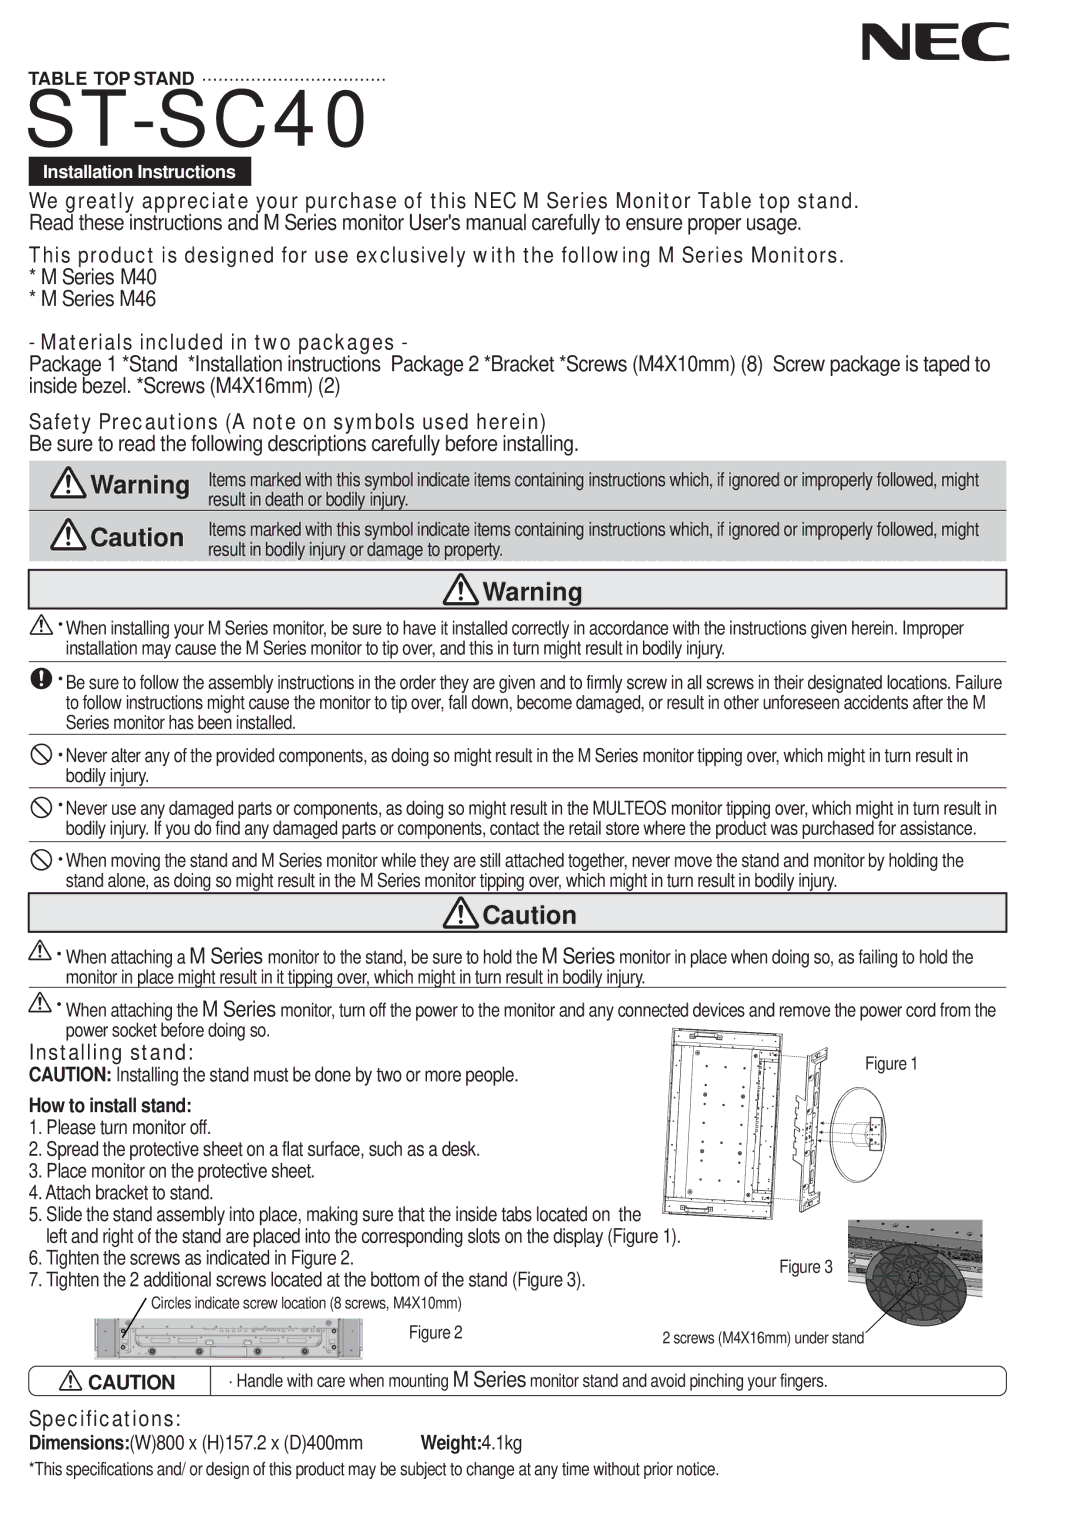
Installing stand: | Figure 1 | ||
CAUTION: Installing the stand must be done by two or more people. | |||
| |||
How to install stand: |
| ||
1. | Please turn monitor off. |
| |
2. | Spread the protective sheet on a flat surface, such as a desk. |
| |
3. | Place monitor on the protective sheet. |
| |
4. Attach bracket to stand. |
| ||
5. | Slide the stand assembly into place, making sure that the inside tabs located on the |
| |
| left and right of the stand are placed into the corresponding slots on the display (Figure 1). |
| |
6. Tighten the screws as indicated in Figure 2. | Figure 3 | |
7. Tighten the 2 additional screws located at the bottom of the stand (Figure 3). | ||
| ||
Circles indicate screw location (8 screws, M4X10mm) |
| |
Figure 2 | 2 screws (M4X16mm) under stand |
![]() CAUTION
CAUTION
. Handle with care when mounting M Series monitor stand and avoid pinching your fingers.
Specifications:
Dimensions:(W)800 x (H)157.2 x (D)400mm | Weight:4.1kg |
*This specifications and/ or design of this product may be subject to change at any time without prior notice.