
WNCE3001-100NAS specifications
The NETGEAR WNCE3001-100NAS is a versatile wireless bridge designed to connect various devices to a Wi-Fi network. This product is particularly valuable for users who have devices that lack built-in wireless capabilities, such as game consoles, smart TVs, and media players. With its compact size and streamlined design, the WNCE3001 effortlessly blends into any home entertainment setup.One of the standout features of the WNCE3001 is its dual-band capability. Operating on both the 2.4GHz and 5GHz frequencies allows it to provide greater flexibility and improved performance. The 2.4GHz band, while more crowded, is excellent for longer-range connections, while the 5GHz band offers increased speeds and less interference, making it ideal for high-bandwidth activities like streaming and online gaming.
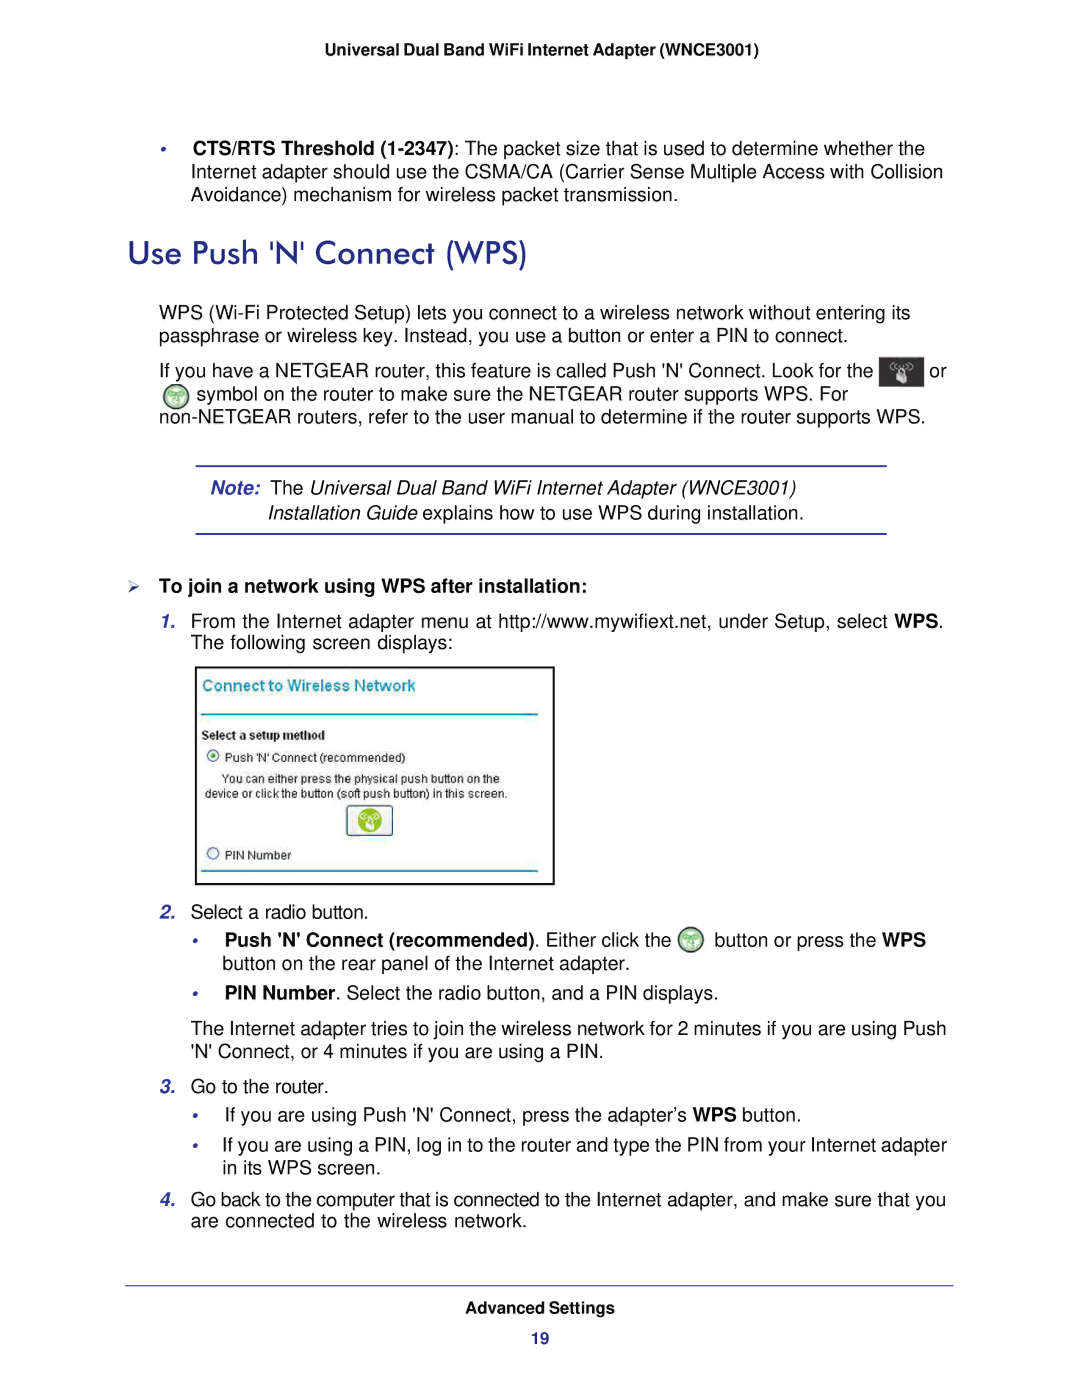
Equipped with 802.11n technology, the WNCE3001 supports data transfer speeds of up to 300 Mbps. This ensures smooth streaming and quick downloads, even in demanding environments. The device also supports WPS (Wi-Fi Protected Setup), making it simple to connect to a secure wireless network with the press of a button, enhancing user convenience and security.
The WNCE3001 is designed to support multiple devices, making it suitable for families or tech-savvy users with various gadgets. Once connected to a Wi-Fi network, users can easily connect multiple devices through its Ethernet ports. This feature is valuable for those who wish to avoid Wi-Fi interference or maintain a stable connection for wired devices.
Installation is user-friendly, with an intuitive setup process. The WNCE3001 provides a user-friendly web interface that allows users to manage settings and monitor the connection status effortlessly. Additionally, with its advanced security protocols, including WPA and WPA2, users can ensure their network remains protected from unauthorized access.
In summary, the NETGEAR WNCE3001-100NAS wireless bridge stands out with its dual-band functionality, support for 802.11n technology, and easy setup process. Whether enhancing home entertainment systems or enabling smart home devices, the WNCE3001 provides an effective solution for connecting a variety of devices to a wireless network. Its excellent performance and compatibility make it an appealing choice for anyone looking to improve their home network configuration.