6.Once the unit is in the “updating” mode, go to your START/ALL PROGRAMS menu and look for the newly installed program group. It should be called “Photo Viewer”
7.Go to this new program group and double click the Photoviewer icon to open the program
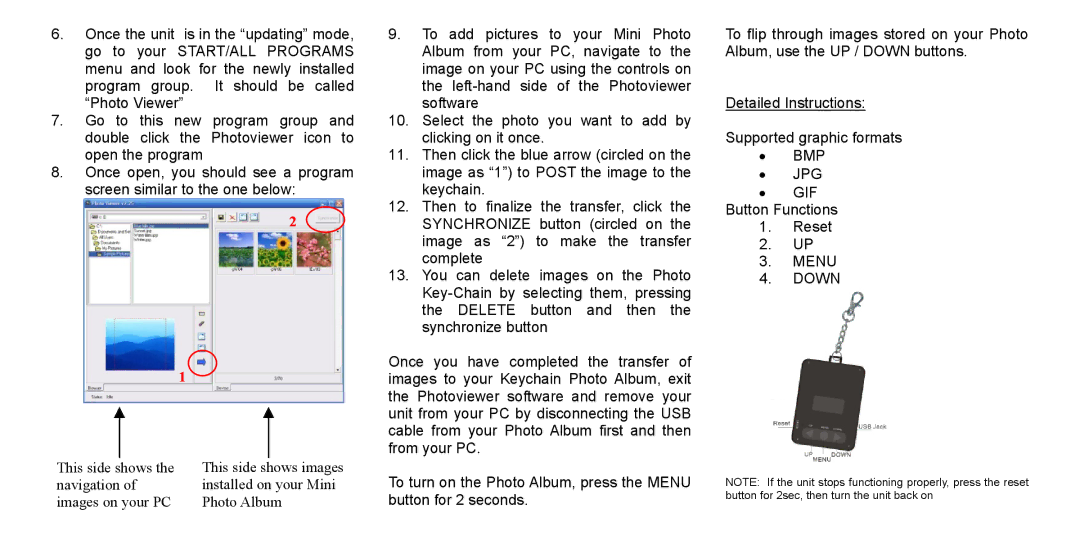
8.Once open, you should see a program screen similar to the one below:
2
1![]()
9.To add pictures to your Mini Photo Album from your PC, navigate to the image on your PC using the controls on the
10.Select the photo you want to add by clicking on it once.
11.Then click the blue arrow (circled on the image as “1”) to POST the image to the keychain.
12.Then to finalize the transfer, click the SYNCHRONIZE button (circled on the image as “2”) to make the transfer complete
13.You can delete images on the Photo
Once you have completed the transfer of images to your Keychain Photo Album, exit the Photoviewer software and remove your unit from your PC by disconnecting the USB cable from your Photo Album first and then from your PC.
To flip through images stored on your Photo Album, use the UP / DOWN buttons.
Detailed Instructions:
Supported graphic formats
•BMP
•JPG
•GIF
Button Functions
1.Reset
2.UP
3.MENU
4.DOWN
This side shows the navigation of images on your PC
This side shows images installed on your Mini Photo Album
To turn on the Photo Album, press the MENU button for 2 seconds.
NOTE: If the unit stops functioning properly, press the reset button for 2sec, then turn the unit back on
