Installing the batteries
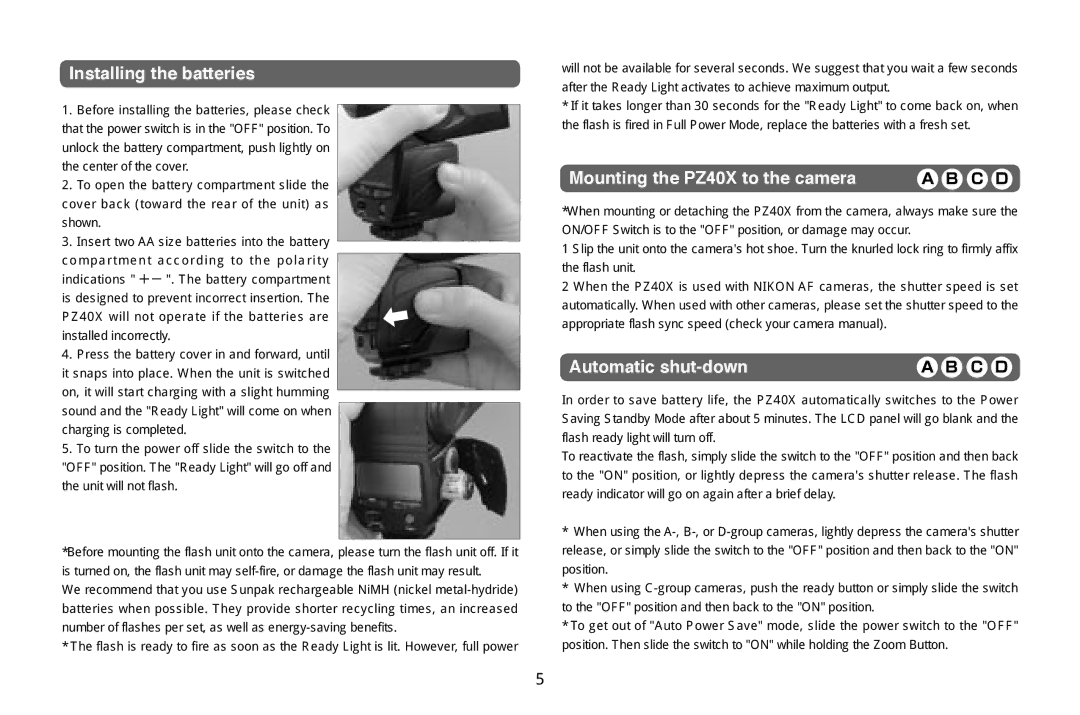
1.Before installing the batteries, please check that the power switch is in the "OFF" position. To unlock the battery compartment, push lightly on the center of the cover.
2.To open the battery compartment slide the cover back (toward the rear of the unit) as shown.
3.Insert two AA size batteries into the battery compartment according to the polarity indications " +- ". The battery compartment is designed to prevent incorrect insertion. The PZ40X will not operate if the batteries are installed incorrectly.
4.Press the battery cover in and forward, until it snaps into place. When the unit is switched on, it will start charging with a slight humming sound and the "Ready Light" will come on when charging is completed.
5.To turn the power off slide the switch to the "OFF" position. The "Ready Light" will go off and the unit will not flash.
*Before mounting the flash unit onto the camera, please turn the flash unit off. If it is turned on, the flash unit may
We recommend that you use Sunpak rechargeable NiMH (nickel
* The flash is ready to fire as soon as the Ready Light is lit. However, full power
will not be available for several seconds. We suggest that you wait a few seconds after the Ready Light activates to achieve maximum output.
*If it takes longer than 30 seconds for the "Ready Light" to come back on, when the flash is fired in Full Power Mode, replace the batteries with a fresh set.
Mounting the PZ40X to the camera | A B C D |
*When mounting or detaching the PZ40X from the camera, always make sure the ON/OFF Switch is to the "OFF" position, or damage may occur.
1 Slip the unit onto the camera's hot shoe. Turn the knurled lock ring to firmly affix the flash unit.
2 When the PZ40X is used with NIKON AF cameras, the shutter speed is set automatically. When used with other cameras, please set the shutter speed to the appropriate flash sync speed (check your camera manual).
Automatic | A B C D |
In order to save battery life, the PZ40X automatically switches to the Power Saving Standby Mode after about 5 minutes. The LCD panel will go blank and the flash ready light will turn off.
To reactivate the flash, simply slide the switch to the "OFF" position and then back to the "ON" position, or lightly depress the camera's shutter release. The flash ready indicator will go on again after a brief delay.
*When using the
*When using
*To get out of "Auto Power Save" mode, slide the power switch to the "OFF" position. Then slide the switch to "ON" while holding the Zoom Button.
5