5. Fill the wall cavity with insulation at this | Installing a Niles | |||
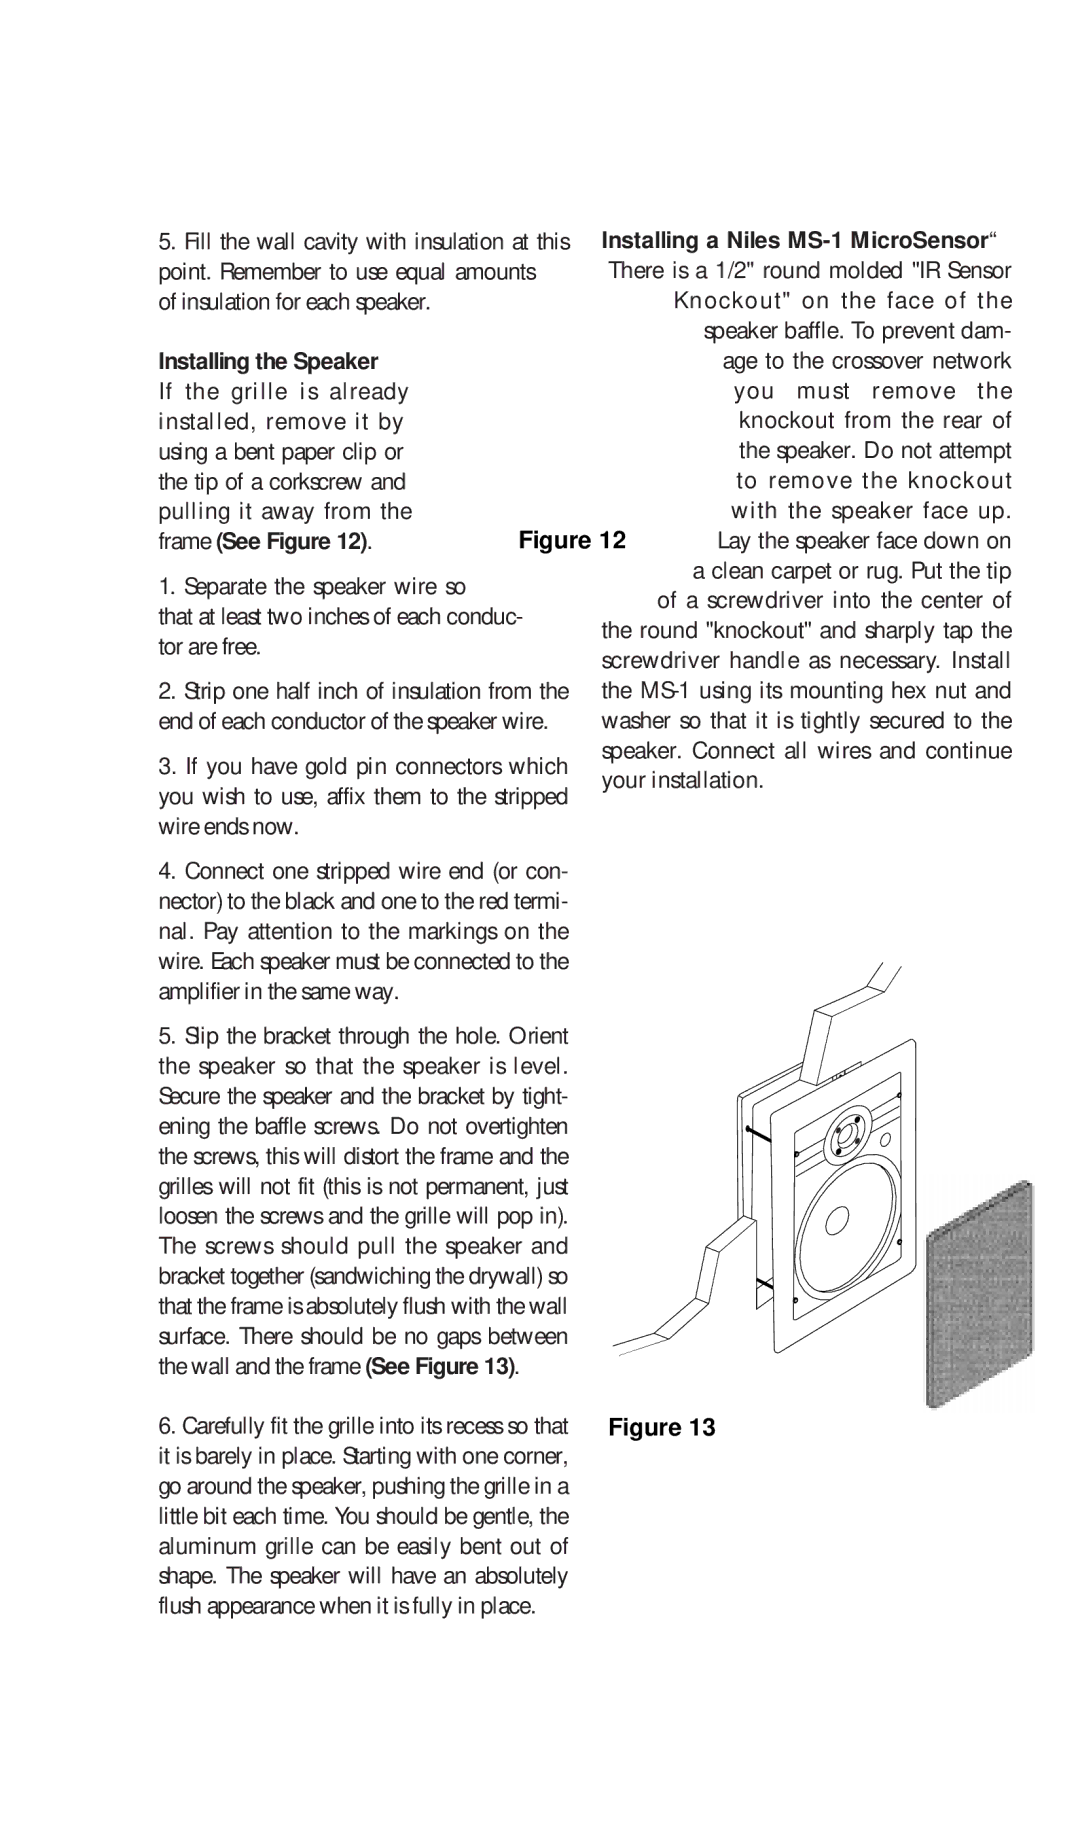
point. Remember to use equal amounts | There is a 1/2" round molded "IR Sensor | |||
of insulation for each speaker. |
|
| Knockout" on the face of the | |
|
|
| speaker baffle. To prevent dam- | |
Installing the Speaker |
|
| age to the crossover network | |
If the grille is already |
|
| you must remove the | |
installed, remove it by |
|
| knockout from the rear of | |
using a bent paper clip or |
|
| the speaker. Do not attempt | |
the tip of a corkscrew and |
|
| to remove the knockout | |
pulling it away from the | Figure 12 | with the speaker face up. | ||
frame (See Figure 12). | Lay the speaker face down on | |||
1. Separate the speaker wire so |
|
| a clean carpet or rug. Put the tip | |
|
| of a screwdriver into the center of | ||
that at least two inches of each conduc- |
| |||
the round "knockout" and sharply tap the | ||||
tor are free. |
| |||
| screwdriver handle as necessary. Install | |||
|
| |||
2. Strip one half inch of insulation from the | the | |||
end of each conductor of the speaker wire. | washer so that it is tightly secured to the | |||
|
| speaker. Connect all wires and continue | ||
3. If you have gold pin connectors which you wish to use, affix them to the stripped wire ends now.
4.Connect one stripped wire end (or con- nector) to the black and one to the red termi- nal. Pay attention to the markings on the wire. Each speaker must be connected to the
amplifier in the same way.
5.Slip the bracket through the hole. Orient the speaker so that the speaker is level.
Secure the speaker and the bracket by tight- ening the baffle screws. Do not overtighten the screws, this will distort the frame and the grilles will not fit (this is not permanent, just loosen the screws and the grille will pop in). The screws should pull the speaker and bracket together (sandwiching the drywall) so that the frame is absolutely flush with the wall surface. There should be no gaps between the wall and the frame (See Figure 13).
your installation.
6. Carefully fit the grille into its recess so that | Figure 13 |
it is barely in place. Starting with one corner, |
|
go around the speaker, pushing the grille in a |
|
little bit each time. You should be gentle, the |
|
aluminum grille can be easily bent out of |
|
shape. The speaker will have an absolutely |
|
flush appearance when it is fully in place. |
|