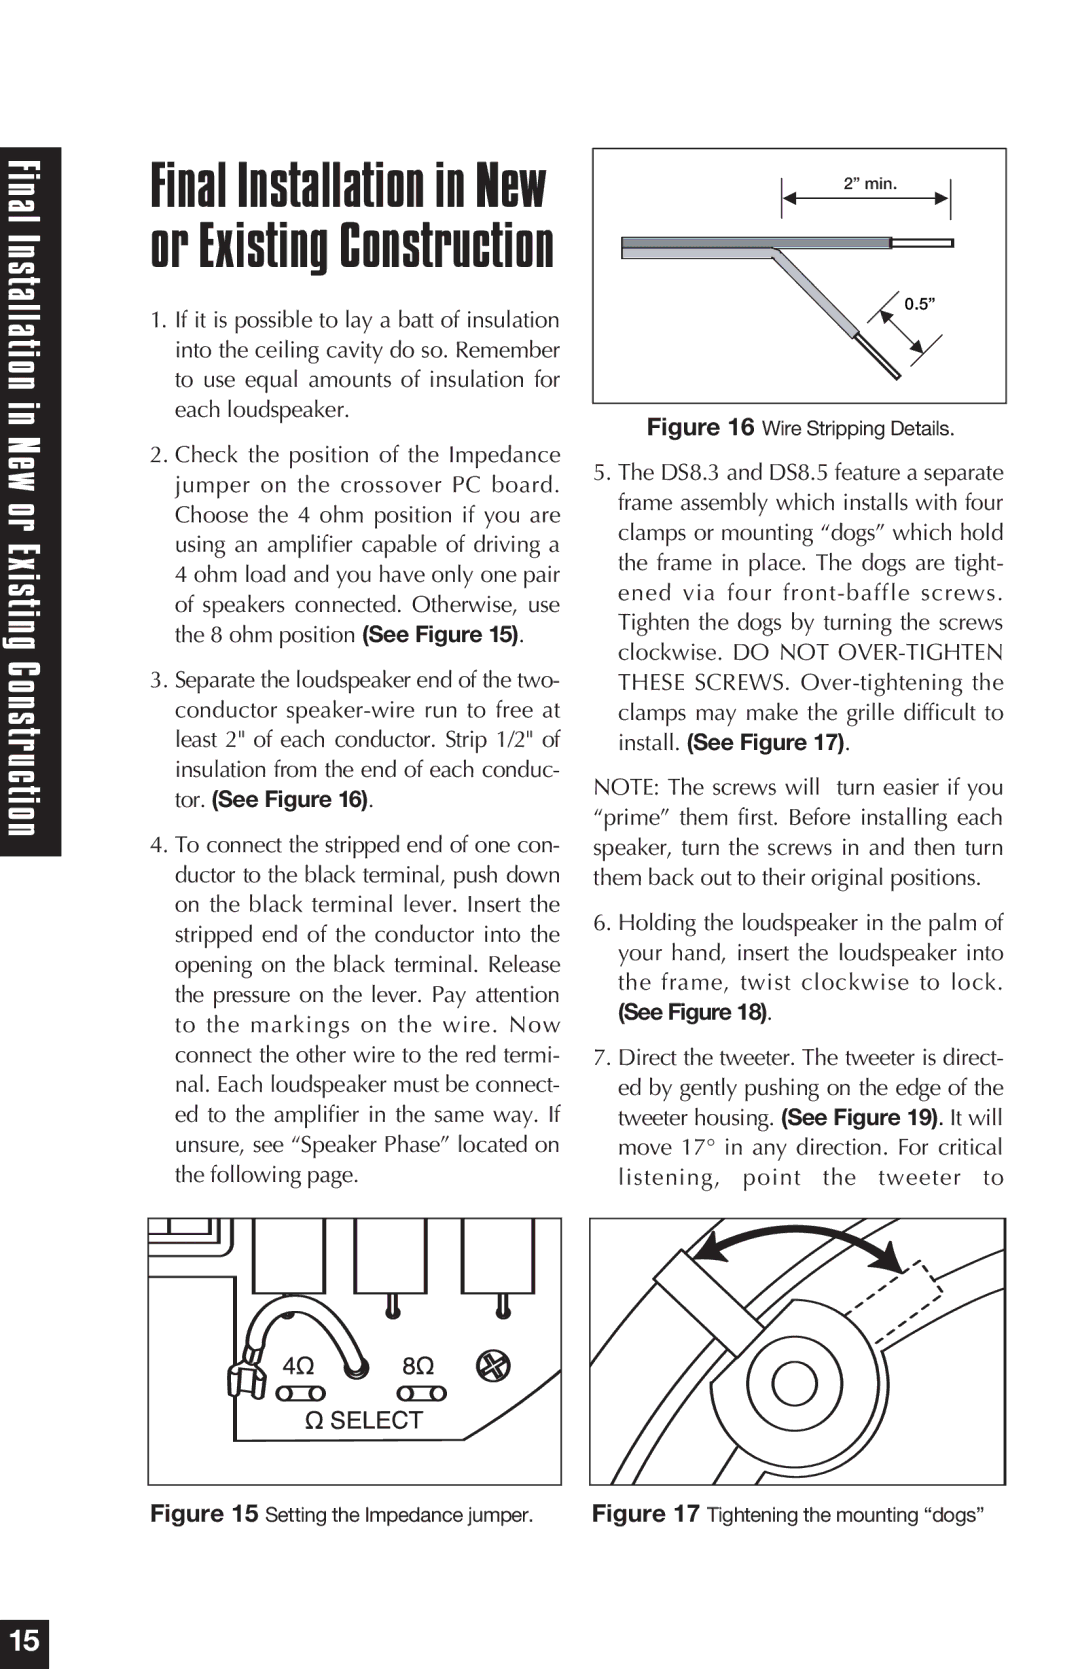
DS8.3, DS8..5 specifications
Niles Audio has been a prominent name in high-quality audio solutions, and their series of speakers, particularly the DS8.5 and DS8.3, continue to set benchmarks in the industry. These in-ceiling speakers are designed for those seeking exceptional sound quality while blending seamlessly into their living environments.The Niles Audio DS8.5 is particularly known for its impressive 8-inch polypropylene cone woofer, which delivers deep, rich bass that enhances the listening experience. Its dual voice coil design allows for flexibility in wiring configurations, making it easier to achieve optimal sound distribution throughout a space. The DS8.5 also features a 1-inch silk dome tweeter, which adds clarity and detail to higher frequencies, ensuring that every nuance of music and dialogue is crisp and clear.
On the other hand, the DS8.3 offers similar high-quality audio but with slightly smaller 6.5-inch woofers. This model caters to those who may have more compact spaces but still desire remarkable sound performance. The DS8.3 maintains the same 1-inch silk dome tweeter, providing an impressive audio experience with a smooth frequency response and reduced distortion.
Both models incorporate advanced technologies such as a patented dual-tweeter design in the DS8.5, which allows listeners to experience a broader soundstage. The speakers come equipped with Niles' EZ-Install mounting system, making installation straightforward, whether you're a DIY enthusiast or hiring a professional. The speakers’ low-profile design and paintable grilles enable them to blend into any decor seamlessly.
Furthermore, both the DS8.5 and DS8.3 are crafted from durable materials designed to withstand various environmental conditions, making them suitable for indoor and outdoor use. Their robust construction enhances their longevity and ability to deliver consistent performance over time.
In summary, Niles Audio's DS8.5 and DS8.3 speakers are perfect choices for audiophiles looking for high-quality audio solutions that do not compromise on aesthetic appeal. With their advanced technologies, versatility, and impressive sound performance, these speakers are designed to elevate any listening experience. Whether for a home theater setup, whole-house audio system, or simply enjoying music in a favorite room, Niles Audio's offerings promise satisfaction in sound quality and design.