NOTE : While you can use any input connector with any output connector, only one set of these con- nectors is to be used at one time, detail wiring and connection, please refer to 4.2 audio connection.
18. Ground lift switch
This switch is used to disconnect the signal ground from the mains and chassis earth. If it is determined that the equalizer is the cause of hum or buzz in your system due to a ground loop, move this switch to the "lift" position.
19. Fuse holder / Voltage selector
This is a dual voltage unit. Before you attempt to connect and operate the unit, please make sure that your local voltage matches the voltage on the
Caution: The fuse protecting the AC supplies circuits of this unit. The fuse can only be changed by a qualified technician, in the event of a fault or changing the supply voltage. If the fuse continues to blow after replacing, discontinue use of this unit before repaired.
|
|
|
|
|
| ||||||||
|
|
|
|
|
|
|
|
|
|
|
|
|
|
|
|
|
|
|
|
|
|
|
|
|
|
|
|
|
|
|
|
|
|
|
|
|
|
|
|
|
|
|
|
|
|
|
|
|
|
|
|
|
|
|
|
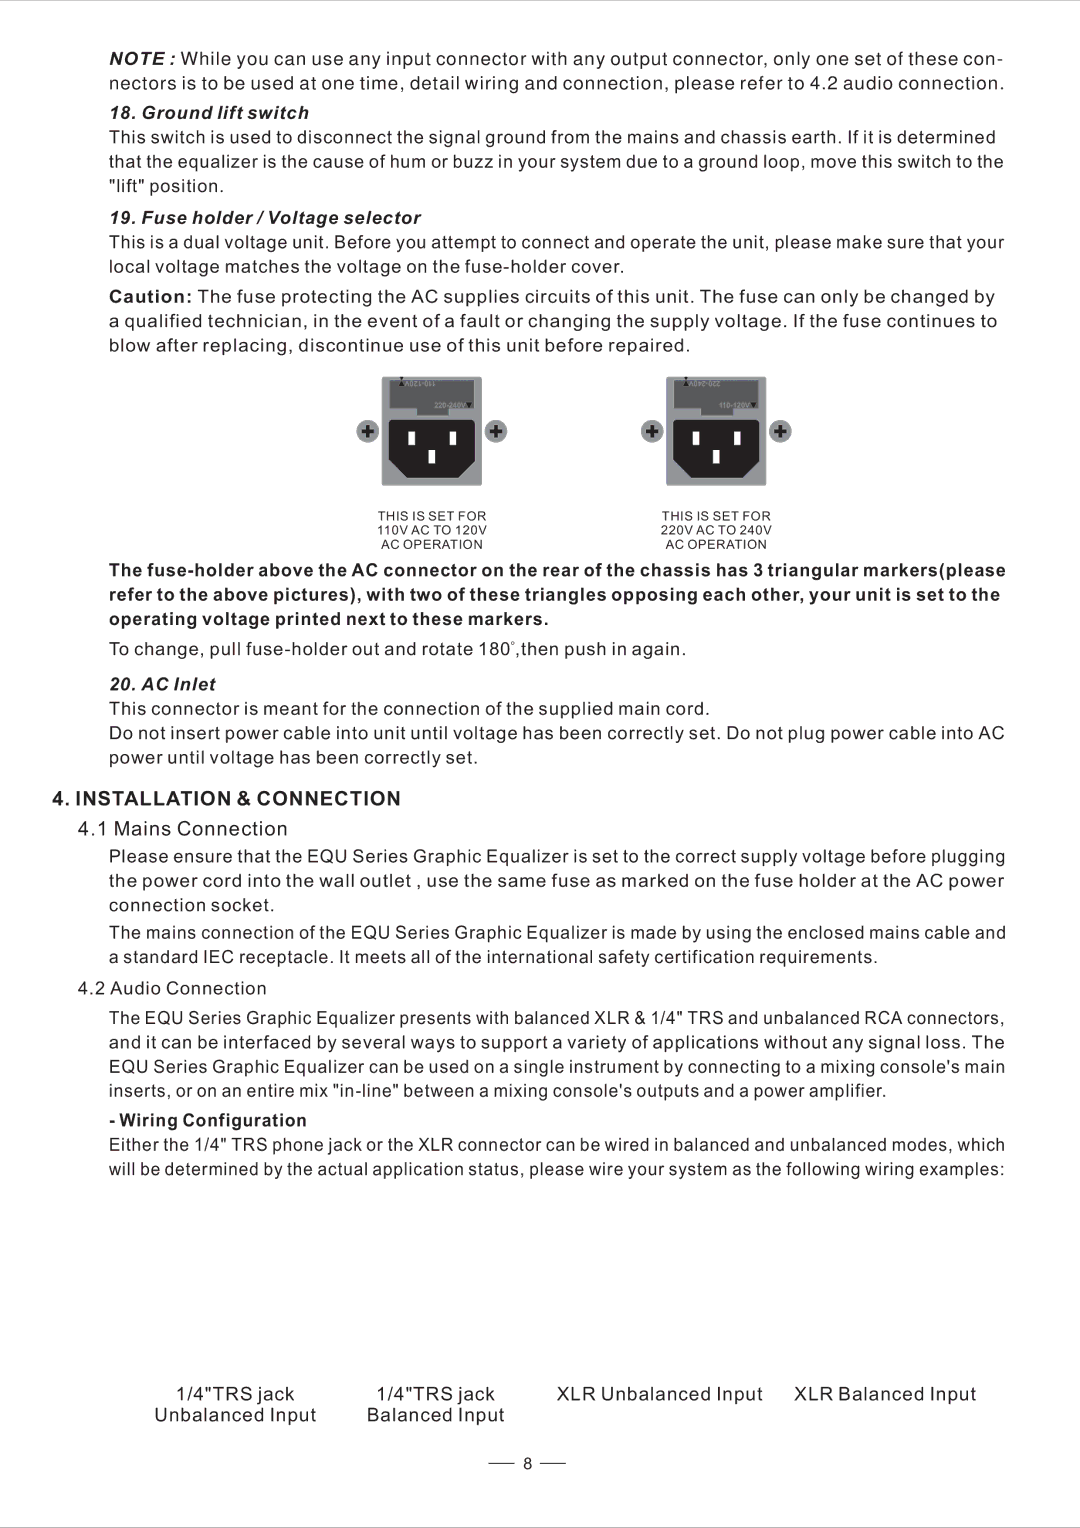
THIS IS SET FOR 110V AC TO 120V AC OPERATION
THIS IS SET FOR 220V AC TO 240V AC OPERATION
The
To change, pull ![]() ,then push in again.
,then push in again.
20. AC Inlet
This connector is meant for the connection of the supplied main cord.
Do not insert power cable into unit until voltage has been correctly set. Do not plug power cable into AC power until voltage has been correctly set.
4. INSTALLATION & CONNECTION
4.1 Mains Connection
Please ensure that the EQU Series Graphic Equalizer is set to the correct supply voltage before plugging the power cord into the wall outlet , use the same fuse as marked on the fuse holder at the AC power connection socket.
The mains connection of the EQU Series Graphic Equalizer is made by using the enclosed mains cable and a standard IEC receptacle. It meets all of the international safety certification requirements.
4.2Audio Connection
The EQU Series Graphic Equalizer presents with balanced XLR & 1/4" TRS and unbalanced RCA connectors, and it can be interfaced by several ways to support a variety of applications without any signal loss. The EQU Series Graphic Equalizer can be used on a single instrument by connecting to a mixing console's main inserts, or on an entire mix
- Wiring Configuration
Either the 1/4" TRS phone jack or the XLR connector can be wired in balanced and unbalanced modes, which will be determined by the actual application status, please wire your system as the following wiring examples:
1/4"TRS jack | 1/4"TRS jack | XLR Unbalanced Input XLR Balanced Input |
Unbalanced Input | Balanced Input |
|
8