|
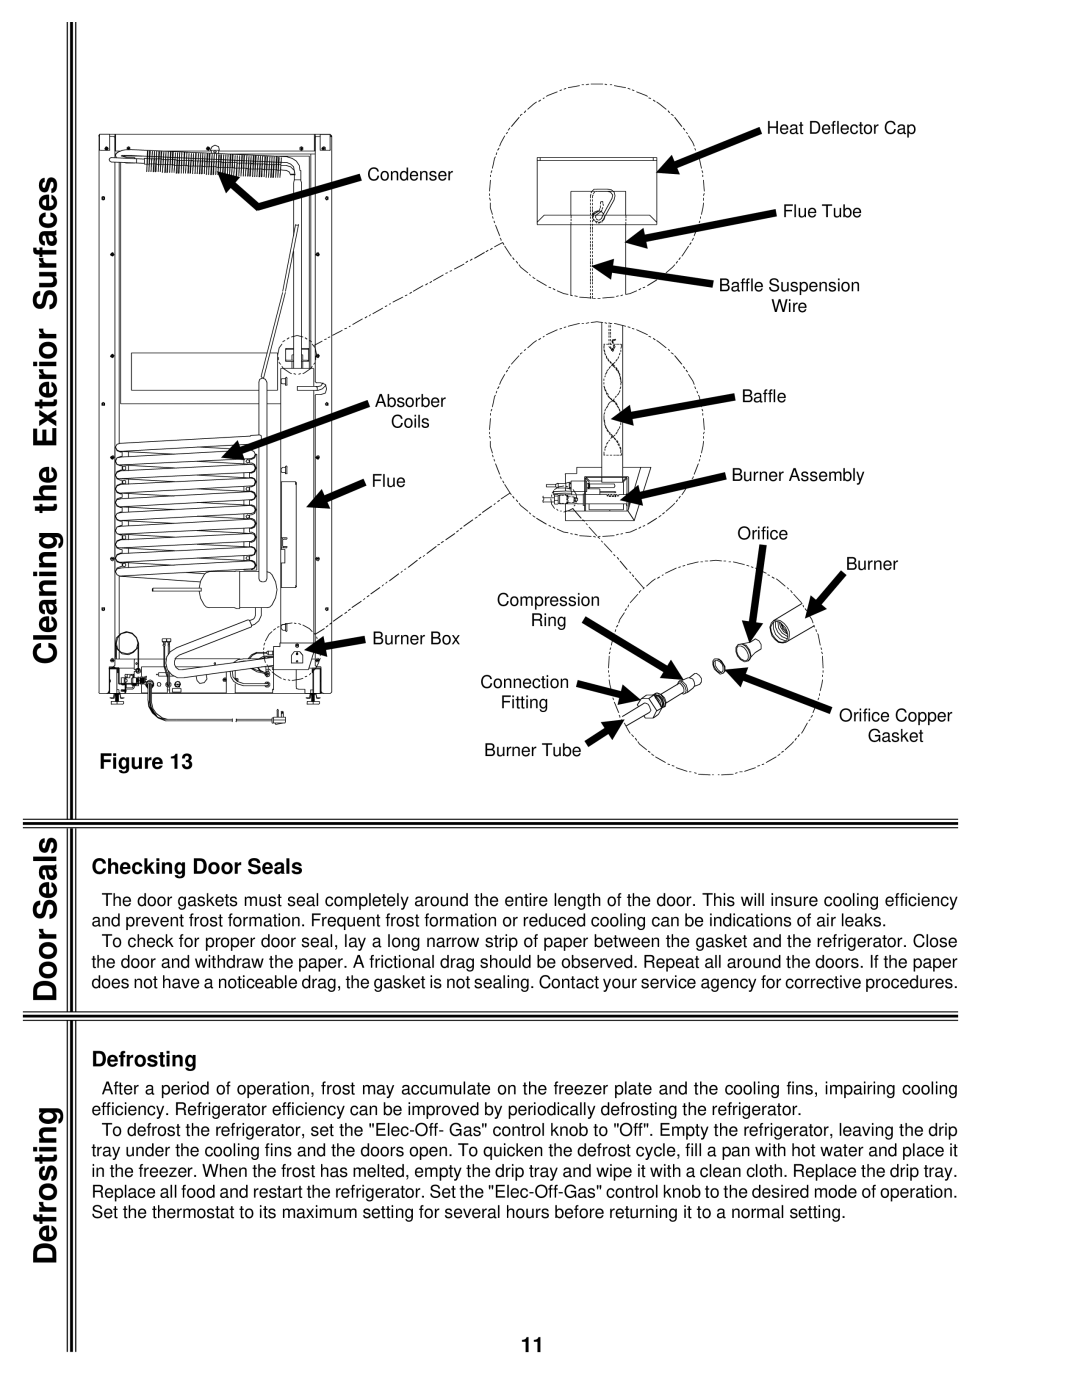
| Heat Deflector Cap | |
Surfaces | Condenser |
| |
| Flue Tube | ||
| Baffle Suspension | ||
| Wire | ||
|
| ||
Exterior | Absorber | Baffle | |
Coils |
| ||
|
| ||
the | Flue | Burner Assembly | |
| |||
|
| ||
Cleaning |
| Orifice | |
| Burner | ||
| Compression | ||
Burner Box | Ring | ||
| |||
| Connection | ||
|
| ||
|
| Fitting | |
|
| Orifice Copper | |
|
| Gasket | |
| Figure 13 | Burner Tube | |
|
| ||
Seals | Checking Door Seals |
| |
The door gaskets must seal completely around the entire length of the door. This will insure cooling efficiency | |||
and prevent frost formation. Frequent frost formation or reduced cooling can be indications of air leaks. | |||
Door | |||
To check for proper door seal, lay a long narrow strip of paper between the gasket and the refrigerator. Close | |||
the door and withdraw the paper. A frictional drag should be observed. Repeat all around the doors. If the paper | |||
does not have a noticeable drag, the gasket is not sealing. Contact your service agency for corrective procedures. | |||
|
| ||
| Defrosting |
| |
| After a period of operation, frost may accumulate on the freezer plate and the cooling fins, impairing cooling | |
Defrosting | efficiency. Refrigerator efficiency can be improved by periodically defrosting the refrigerator. | |
To defrost the refrigerator, set the | ||
| ||
| tray under the cooling fins and the doors open. To quicken the defrost cycle, fill a pan with hot water and place it | |
| in the freezer. When the frost has melted, empty the drip tray and wipe it with a clean cloth. Replace the drip tray. | |
| Replace all food and restart the refrigerator. Set the | |
| Set the thermostat to its maximum setting for several hours before returning it to a normal setting. |
11
