AXIS 2
FRONT PANEL
16.CD Illumination Light – lights up the CD drawer and CD when open.
17.CD Drawer – Place your CDs you wish to play in here. This unit is designed to play commercially available CD and properly burned and finalized CDR and CDRW formats. Due to variances on the specification of certain CD burners and CDs some discs home made CDs may not play properly.
REAR PANEL
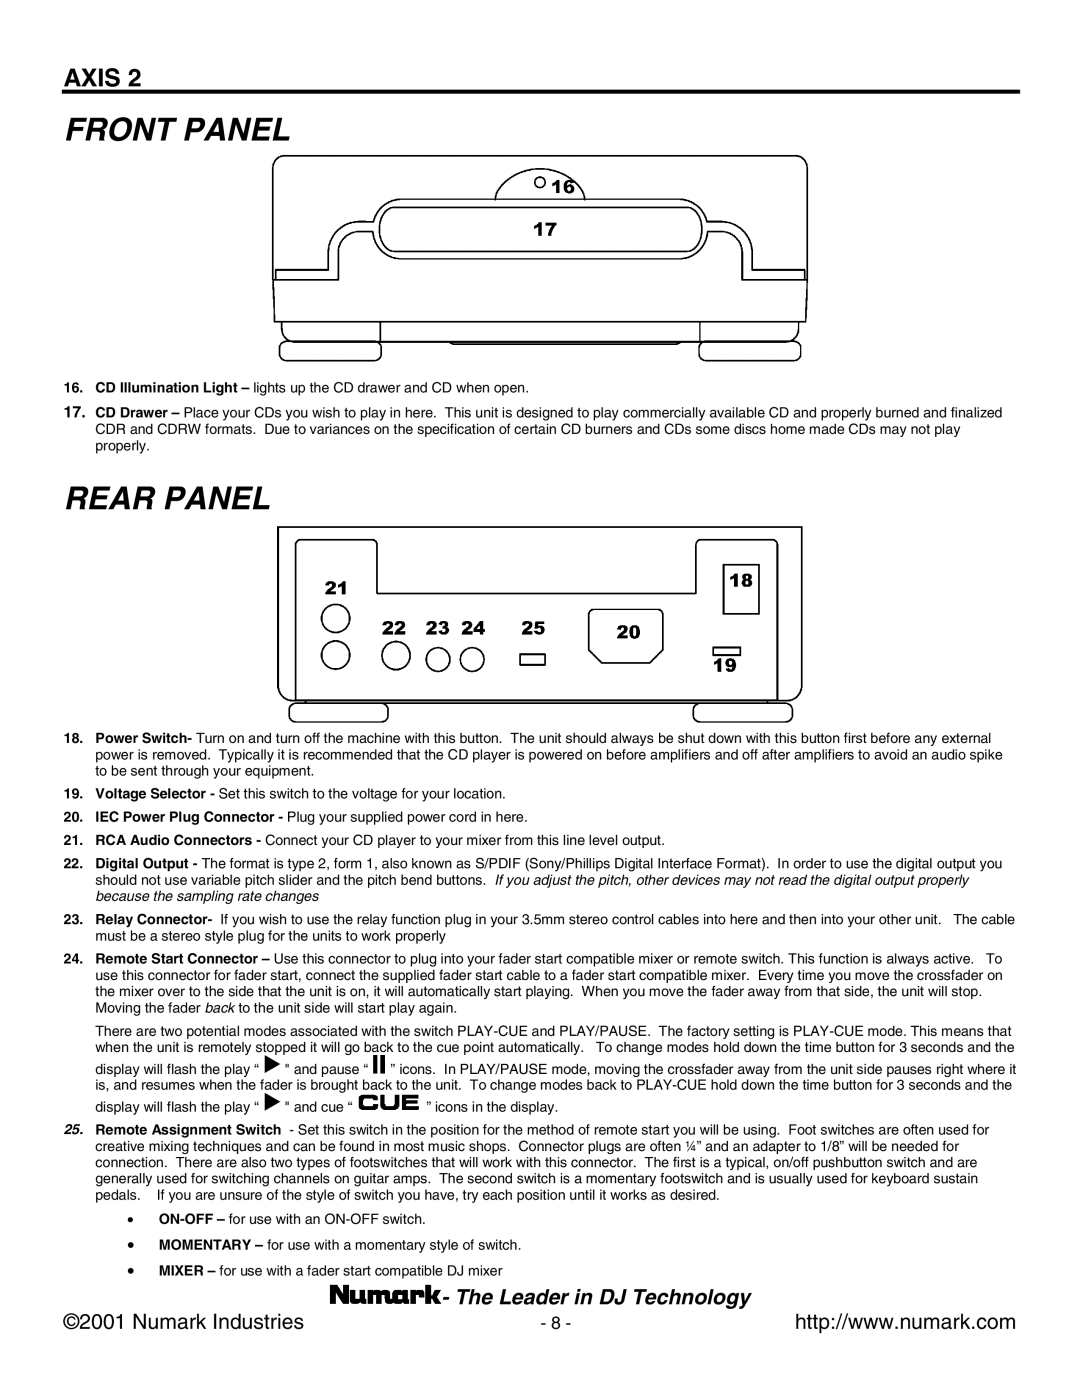
18.Power Switch- Turn on and turn off the machine with this button. The unit should always be shut down with this button first before any external power is removed. Typically it is recommended that the CD player is powered on before amplifiers and off after amplifiers to avoid an audio spike to be sent through your equipment.
19.Voltage Selector - Set this switch to the voltage for your location.
20.IEC Power Plug Connector - Plug your supplied power cord in here.
21.RCA Audio Connectors - Connect your CD player to your mixer from this line level output.
22.Digital Output - The format is type 2, form 1, also known as S/PDIF (Sony/Phillips Digital Interface Format). In order to use the digital output you should not use variable pitch slider and the pitch bend buttons. If you adjust the pitch, other devices may not read the digital output properly because the sampling rate changes
23.Relay Connector- If you wish to use the relay function plug in your 3.5mm stereo control cables into here and then into your other unit. The cable must be a stereo style plug for the units to work properly
24.Remote Start Connector – Use this connector to plug into your fader start compatible mixer or remote switch. This function is always active. To use this connector for fader start, connect the supplied fader start cable to a fader start compatible mixer. Every time you move the crossfader on the mixer over to the side that the unit is on, it will automatically start playing. When you move the fader away from that side, the unit will stop.
Moving the fader back to the unit side will start play again.
There are two potential modes associated with the switch
when the unit is remotely stopped it will go back to the cue point automatically. To change modes hold down the time button for 3 seconds and the display will flash the play “ ![]() " and pause “
" and pause “ ![]() ” icons. In PLAY/PAUSE mode, moving the crossfader away from the unit side pauses right where it
” icons. In PLAY/PAUSE mode, moving the crossfader away from the unit side pauses right where it
is, and resumes when the fader is brought back to the unit. To change modes back to
display will flash the play “ ![]() " and cue “
" and cue “ ![]() ” icons in the display.
” icons in the display.
25.Remote Assignment Switch - Set this switch in the position for the method of remote start you will be using. Foot switches are often used for creative mixing techniques and can be found in most music shops. Connector plugs are often ¼” and an adapter to 1/8” will be needed for connection. There are also two types of footswitches that will work with this connector. The first is a typical, on/off pushbutton switch and are generally used for switching channels on guitar amps. The second switch is a momentary footswitch and is usually used for keyboard sustain pedals. If you are unsure of the style of switch you have, try each position until it works as desired.
•
•MOMENTARY – for use with a momentary style of switch.
•MIXER – for use with a fader start compatible DJ mixer
©2001 Numark Industries | - The Leader in DJ Technology | http://www.numark.com |
- 8 - |