
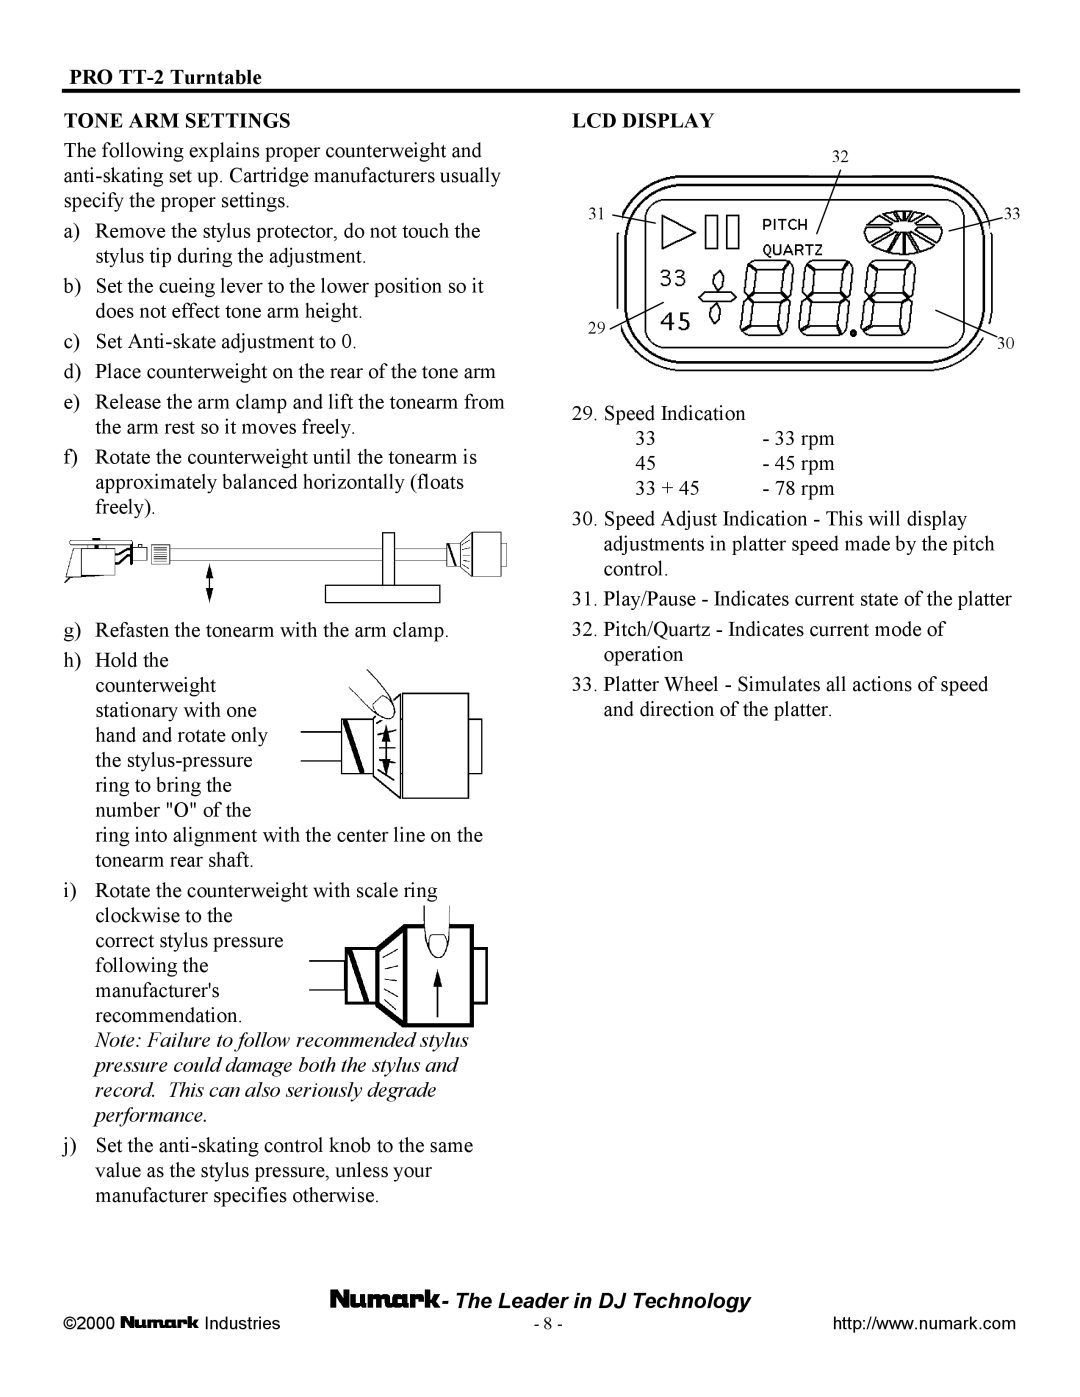
PRO TT-2 specifications
Numark Industries is renowned for its innovative contributions to the world of professional audio equipment, and one of its standout products is the PRO TT-2 turntable. Designed for both aspiring DJs and seasoned professionals, the PRO TT-2 promises high-quality performance and versatility, making it an essential tool for anyone serious about vinyl playback and mixing.One of the key features of the PRO TT-2 is its precision-engineered direct-drive motor. This technology provides exceptional torque, allowing for immediate start-up times and consistent playback speed. Unlike belt-driven turntables, the direct-drive system reduces issues related to speed fluctuations, ensuring that every performance maintains the highest fidelity and accuracy.
The PRO TT-2 comes with a high-quality S-shaped tonearm that is designed for optimal tracking. The tonearm is adjustable and equipped with anti-skate controls, allowing users to fine-tune their setup for various cartridge types. This precision ensures that the needle stays properly aligned in the groove, minimizing wear on records and maximizing sound quality. The turntable is compatible with a range of cartridges, giving users the flexibility to choose the best one for their needs.
A standout feature of the PRO TT-2 is its built-in USB output, which allows DJs and audiophiles to easily digitize their vinyl collections. This functionality is particularly beneficial for those looking to preserve their records or share their mixes digitally. With this feature, the PRO TT-2 bridges the gap between analog warmth and digital convenience.
Additionally, the PRO TT-2 boasts a sturdy construction with heavy-duty materials, which not only enhances durability but also minimizes unwanted resonance and vibrations. The turntable is equipped with a vibration-dampening base that ensures the sound produced is clean and free from interference.
For users who are looking to integrate the PRO TT-2 into a broader DJ setup, the turntable features a standard RCA output, making it easy to connect to mixers and audio interfaces. This seamless connectivity is crucial for live performances where reliability and sound clarity are paramount.
In conclusion, Numark Industries' PRO TT-2 turntable is a versatile and robust option for any DJ or vinyl enthusiast. With its direct-drive motor, adjustable tonearm, USB output, and solid construction, it stands out as a reliable choice that meets the demands of both performance and everyday use. Whether mastering a set at a club or digitizing a beloved record collection, the PRO TT-2 demonstrates Numark's commitment to delivering quality and innovation in the world of audio.