CONTROLS continued
Tone Arm Parts
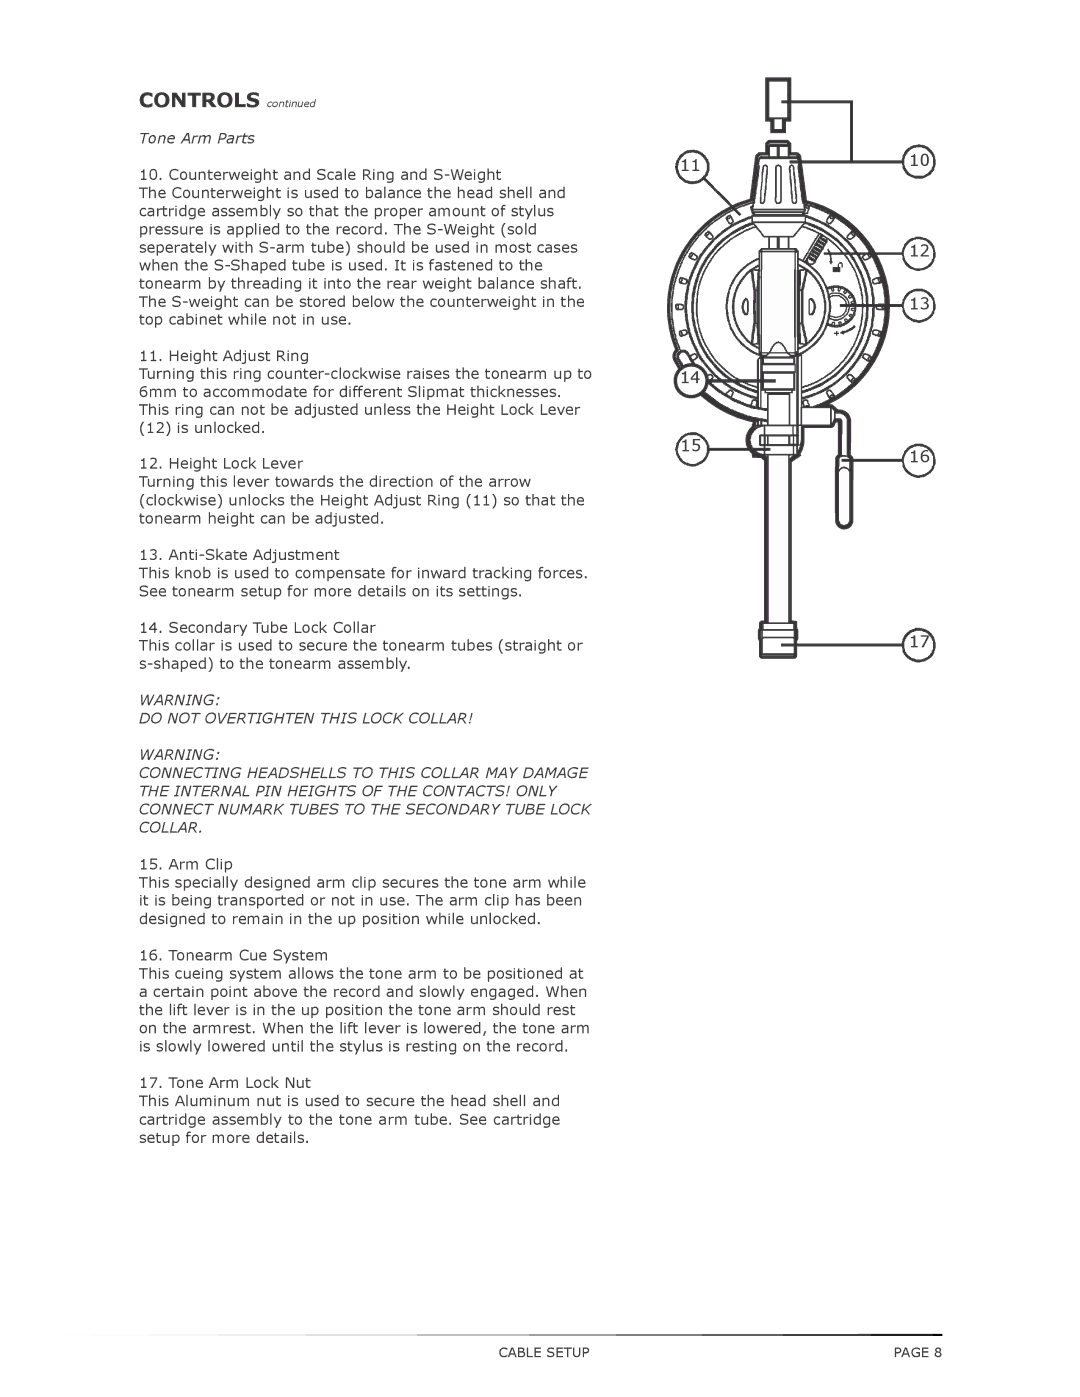
10. Counterweight and Scale Ring and
The Counterweight is used to balance the head shell and cartridge assembly so that the proper amount of stylus pressure is applied to the record. The
11. Height Adjust Ring
Turning this ring
12. Height Lock Lever
Turning this lever towards the direction of the arrow (clockwise) unlocks the Height Adjust Ring (11) so that the tonearm height can be adjusted.
13.
This knob is used to compensate for inward tracking forces. See tonearm setup for more details on its settings.
14. Secondary Tube Lock Collar
This collar is used to secure the tonearm tubes (straight or
WARNING:
DO NOT OVERTIGHTEN THIS LOCK COLLAR!
WARNING:
CONNECTING HEADSHELLS TO THIS COLLAR MAY DAMAGE THE INTERNAL PIN HEIGHTS OF THE CONTACTS! ONLY CONNECT NUMARK TUBES TO THE SECONDARY TUBE LOCK COLLAR.
15. Arm Clip
This specially designed arm clip secures the tone arm while it is being transported or not in use. The arm clip has been designed to remain in the up position while unlocked.
16. Tonearm Cue System
This cueing system allows the tone arm to be positioned at a certain point above the record and slowly engaged. When the lift lever is in the up position the tone arm should rest on the armrest. When the lift lever is lowered, the tone arm is slowly lowered until the stylus is resting on the record.
17. Tone Arm Lock Nut
This Aluminum nut is used to secure the head shell and cartridge assembly to the tone arm tube. See cartridge setup for more details.
11 | 10 |
12
13
14
1516
17
CABLE SETUP | PAGE 8 |
