MOUNTING THE HOUSING
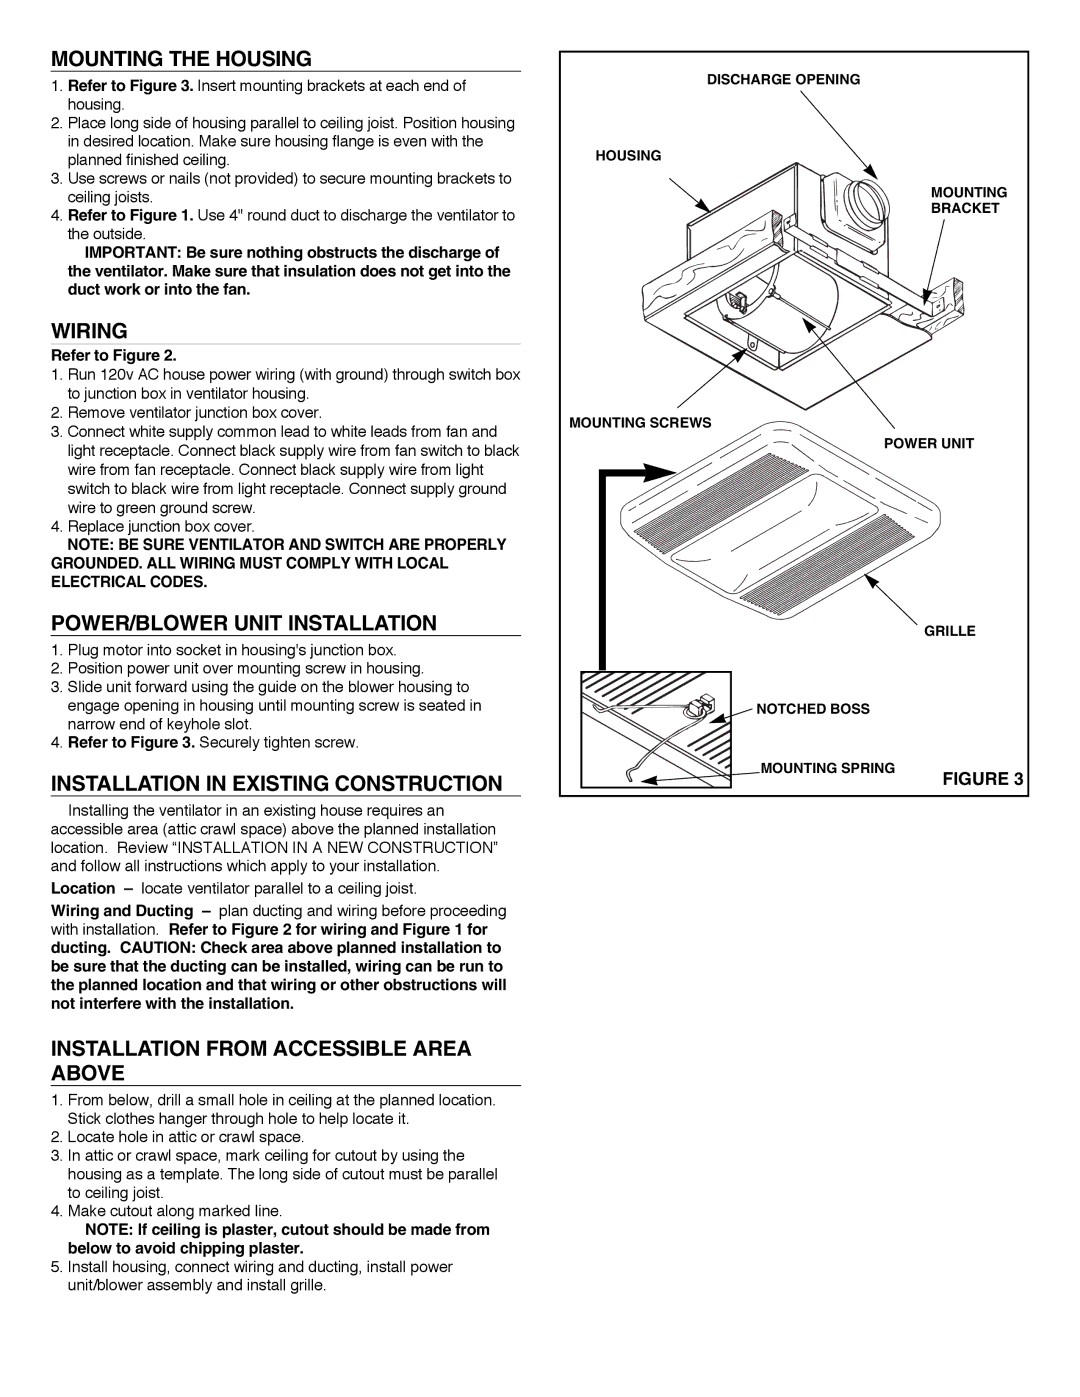
1.Refer to Figure 3. Insert mounting brackets at each end of housing.
2.Place long side of housing parallel to ceiling joist. Position housing in desired location. Make sure housing flange is even with the planned finished ceiling.
3.Use screws or nails (not provided) to secure mounting brackets to ceiling joists.
4.Refer to Figure 1. Use 4" round duct to discharge the ventilator to the outside.
IMPORTANT: Be sure nothing obstructs the discharge of the ventilator. Make sure that insulation does not get into the duct work or into the fan.
WIRING
Refer to Figure 2.
1.Run 120v AC house power wiring (with ground) through switch box to junction box in ventilator housing.
2.Remove ventilator junction box cover.
3.Connect white supply common lead to white leads from fan and light receptacle. Connect black supply wire from fan switch to black wire from fan receptacle. Connect black supply wire from light switch to black wire from light receptacle. Connect supply ground wire to green ground screw.
4.Replace junction box cover.
NOTE: BE SURE VENTILATOR AND SWITCH ARE PROPERLY
GROUNDED. ALL WIRING MUST COMPLY WITH LOCAL ELECTRICAL CODES.
POWER/BLOWER UNIT INSTALLATION
1.Plug motor into socket in housing's junction box.
2.Position power unit over mounting screw in housing.
3.Slide unit forward using the guide on the blower housing to engage opening in housing until mounting screw is seated in narrow end of keyhole slot.
4.Refer to Figure 3. Securely tighten screw.
INSTALLATION IN EXISTING CONSTRUCTION
Installing the ventilator in an existing house requires an accessible area (attic crawl space) above the planned installation location. Review “INSTALLATION IN A NEW CONSTRUCTION” and follow all instructions which apply to your installation.
Location – locate ventilator parallel to a ceiling joist.
Wiring and Ducting – plan ducting and wiring before proceeding with installation. Refer to Figure 2 for wiring and Figure 1 for ducting. CAUTION: Check area above planned installation to be sure that the ducting can be installed, wiring can be run to the planned location and that wiring or other obstructions will not interfere with the installation.
INSTALLATION FROM ACCESSIBLE AREA ABOVE
1.From below, drill a small hole in ceiling at the planned location. Stick clothes hanger through hole to help locate it.
2.Locate hole in attic or crawl space.
3.In attic or crawl space, mark ceiling for cutout by using the housing as a template. The long side of cutout must be parallel to ceiling joist.
4.Make cutout along marked line.
NOTE: If ceiling is plaster, cutout should be made from below to avoid chipping plaster.
5.Install housing, connect wiring and ducting, install power unit/blower assembly and install grille.
DISCHARGE OPENING |
HOUSING |
MOUNTING |
BRACKET |
MOUNTING SCREWS |
POWER UNIT |
GRILLE |
NOTCHED BOSS |
MOUNTING SPRING |
FIGURE 3 |