MODEL QTXN110HL
TYPICAL INSTALLATION
CEILING | POWER | MOUNTING |
JOIST, TRUSS, | CABLES | |
OR |
| CHANNELS |
|
| |
| HOUSING |
|
CEILING | GRILLE |
|
MATERIAL |
| |
|
|
Housing mounted directly to joists, trusses, or
Up to
PLAN THE INSTALLATION
ROOF CAP * |
| |
| ||
DUCT * |
| |
WALL | ||
CAP * | ||
ELBOW * | ||
* Purchase separately |
|
Unit shown connected to 6-inch round ductwork.
The unit will operate most quietly and efficiently when located where the shortest possible duct run and minimum number of elbows will be needed.
Plan to supply the unit with proper line voltage and appropriate power cable.
Page 2
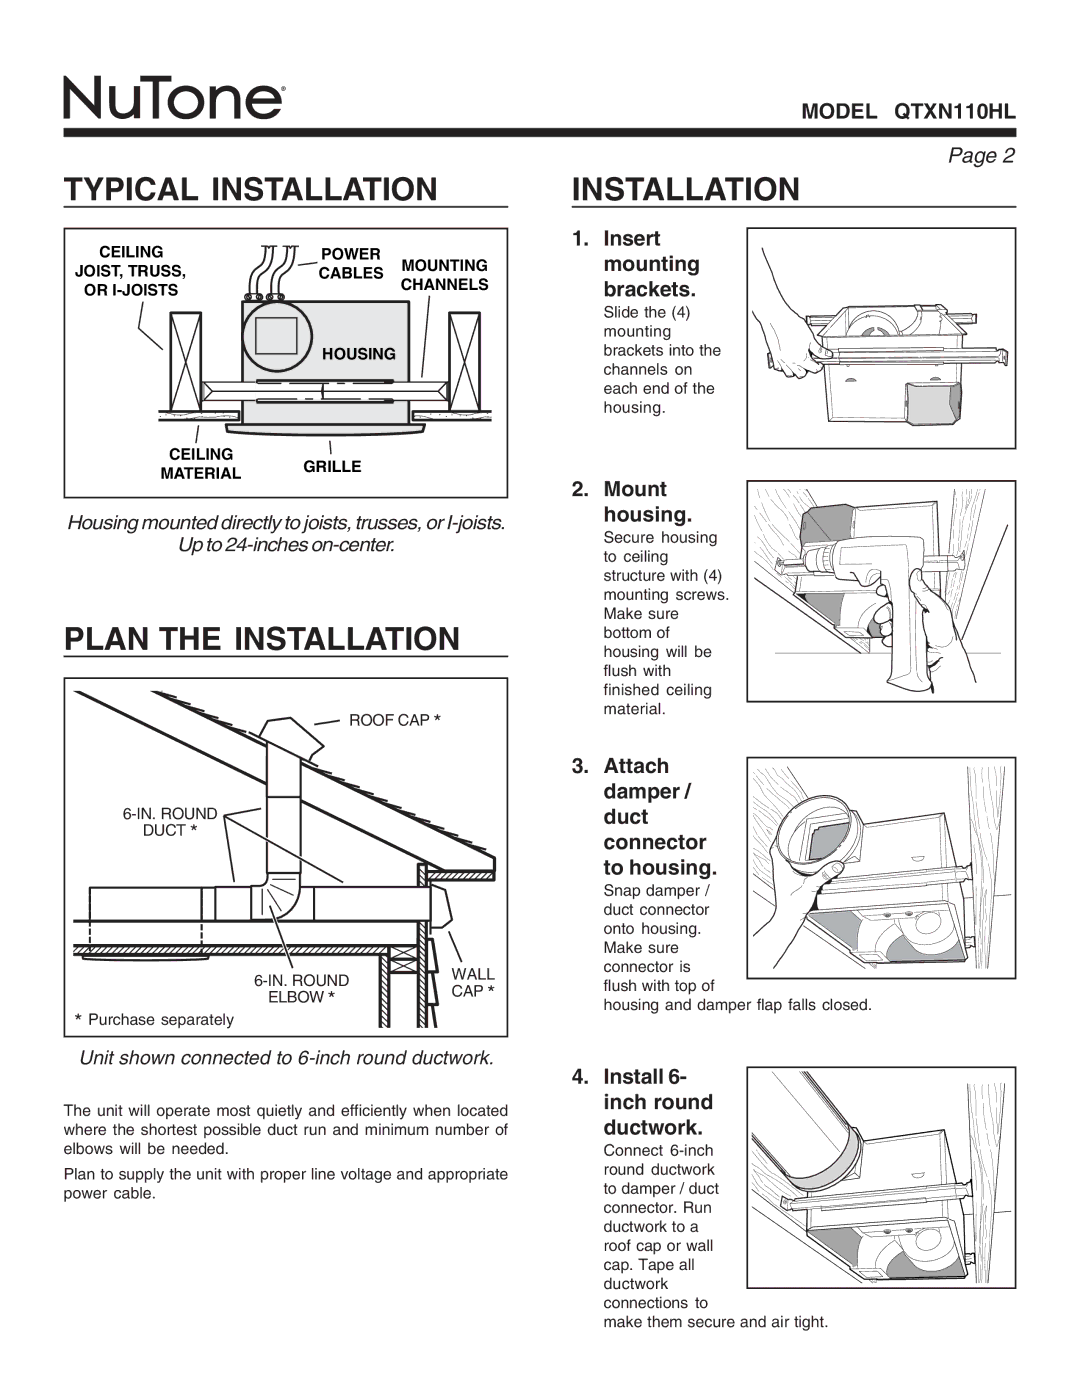
INSTALLATION
1.Insert mounting
brackets.
Slide the (4) mounting brackets into the channels on each end of the housing.
2. Mount housing.
Secure housing to ceiling structure with (4) mounting screws. Make sure bottom of housing will be flush with finished ceiling material.
3. Attach damper / duct connector to housing.
Snap damper / duct connector onto housing.
Make sure connector is flush with top of
housing and damper flap falls closed.
4. Install 6- inch round ductwork.
Connect
to damper / duct connector. Run ductwork to a roof cap or wall
cap. Tape all ductwork connections to
make them secure and air tight.