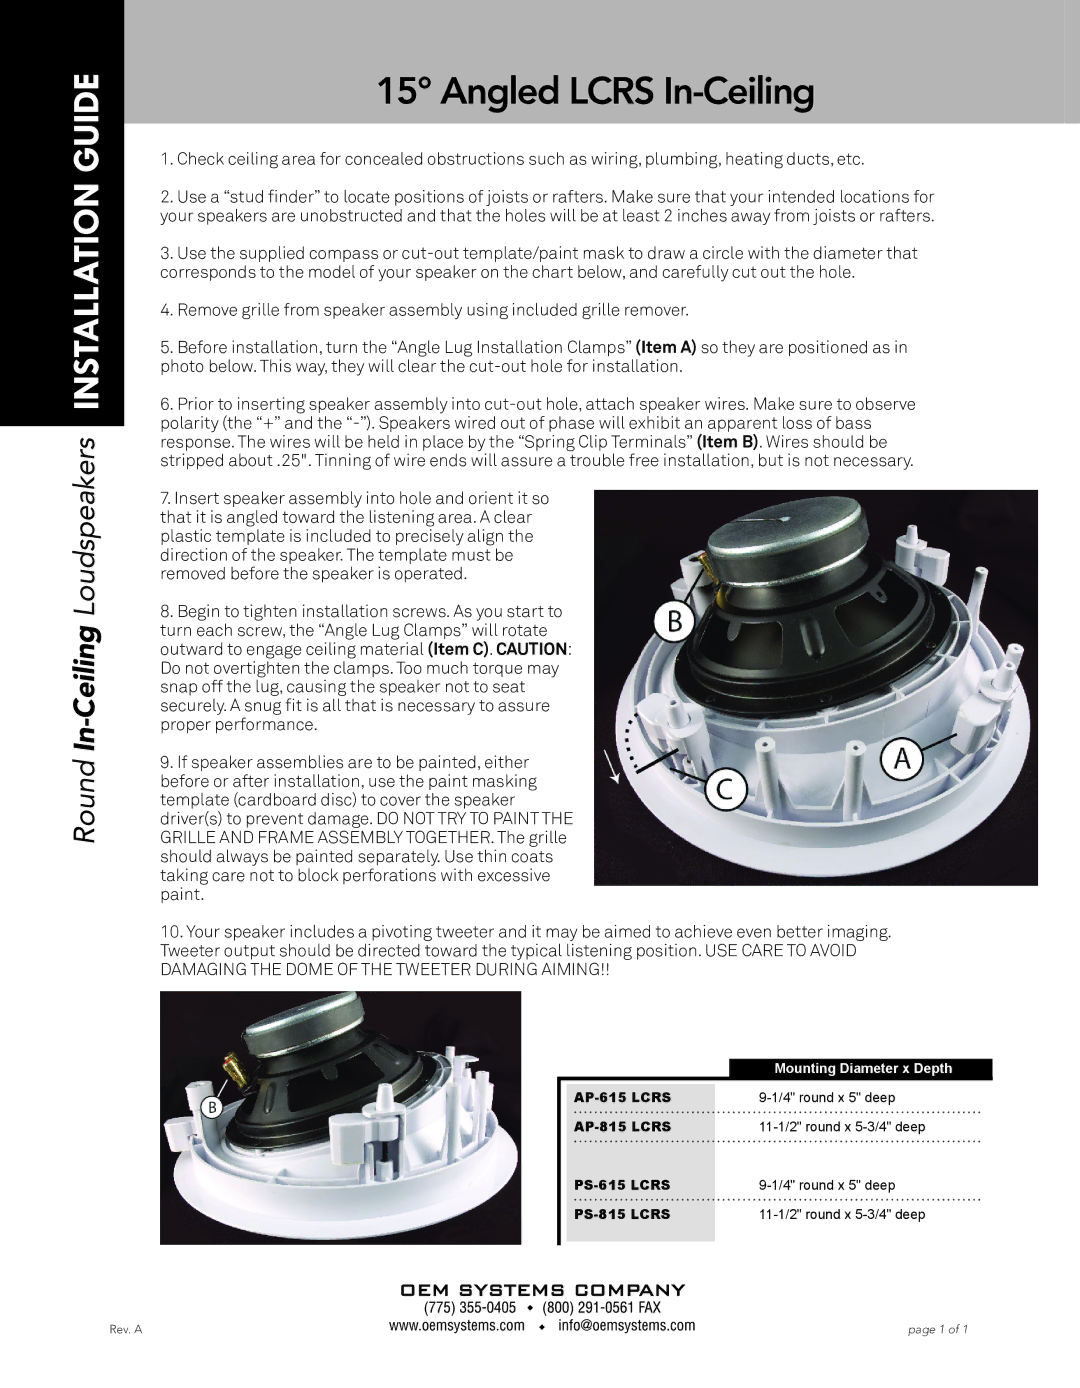
AP-615 LCRS, AP-815 LCRS, PS-615 LCRS, PS-815 LCRS specifications
OEM Systems specializes in innovative technological solutions, and their LCRS series, including the AP-815, AP-615, PS-815, and PS-615 models, showcases their commitment to quality and performance in the field of industrial applications. These systems are particularly designed for logistical and operational efficiency in various environments.The AP-815 LCRS, a standout model, is engineered for versatility, featuring advanced load cell and resistance sensor technology. This device excels in precise measurements, ensuring that users can rely on its accuracy for various applications. Its robust construction guarantees durability, capable of withstanding challenging operational conditions.
Similarly, the AP-615 LCRS is tailored for seamless integration into existing infrastructures. This model focuses on efficiency, providing real-time data analytics that enhances decision-making processes. The graphical interface is user-friendly, allowing quick access to operational metrics. With a compact design, the AP-615 suits environments with limited space without compromising on performance.
The PS-815 LCRS emphasizes modularity, enabling users to expand the system according to their evolving needs. It supports multiple connectivity options, including Ethernet, which facilitates easy integration into large networks and enhances data management capabilities. The PS-815 is particularly favored in environments requiring scalability, like warehouses and distribution centers.
On the other hand, the PS-615 LCRS is designed for environments where simplicity and reliability are key. Its robust design is optimized for low-maintenance operation, catering to facilities that require straightforward functionality. The PS-615’s energy-efficient technology ensures that it consumes minimal power, making it an environmentally friendly option for organizations striving to reduce their carbon footprint.
All models in the LCRS series are equipped with advanced firmware that allows for periodic updates, ensuring longevity and adaptability in an ever-evolving technological landscape. Enhanced security features safeguard sensitive data, crucial in today’s information-driven industries.
In summary, the OEM Systems LCRS series, comprising the AP-815, AP-615, PS-815, and PS-615, represents a blend of innovation, reliability, and functionality. Each model is tailored to meet diverse operational demands, ensuring that users can select a system aligned with their specific needs while benefiting from cutting-edge technology. These systems are a testament to OEM Systems' dedication to delivering performance-driven solutions that empower businesses to enhance their operational effectiveness.