3.With the ridged side facing up and the blue lever on your right, insert the toner cartridge into the image drum unit, left end first.
*![]()
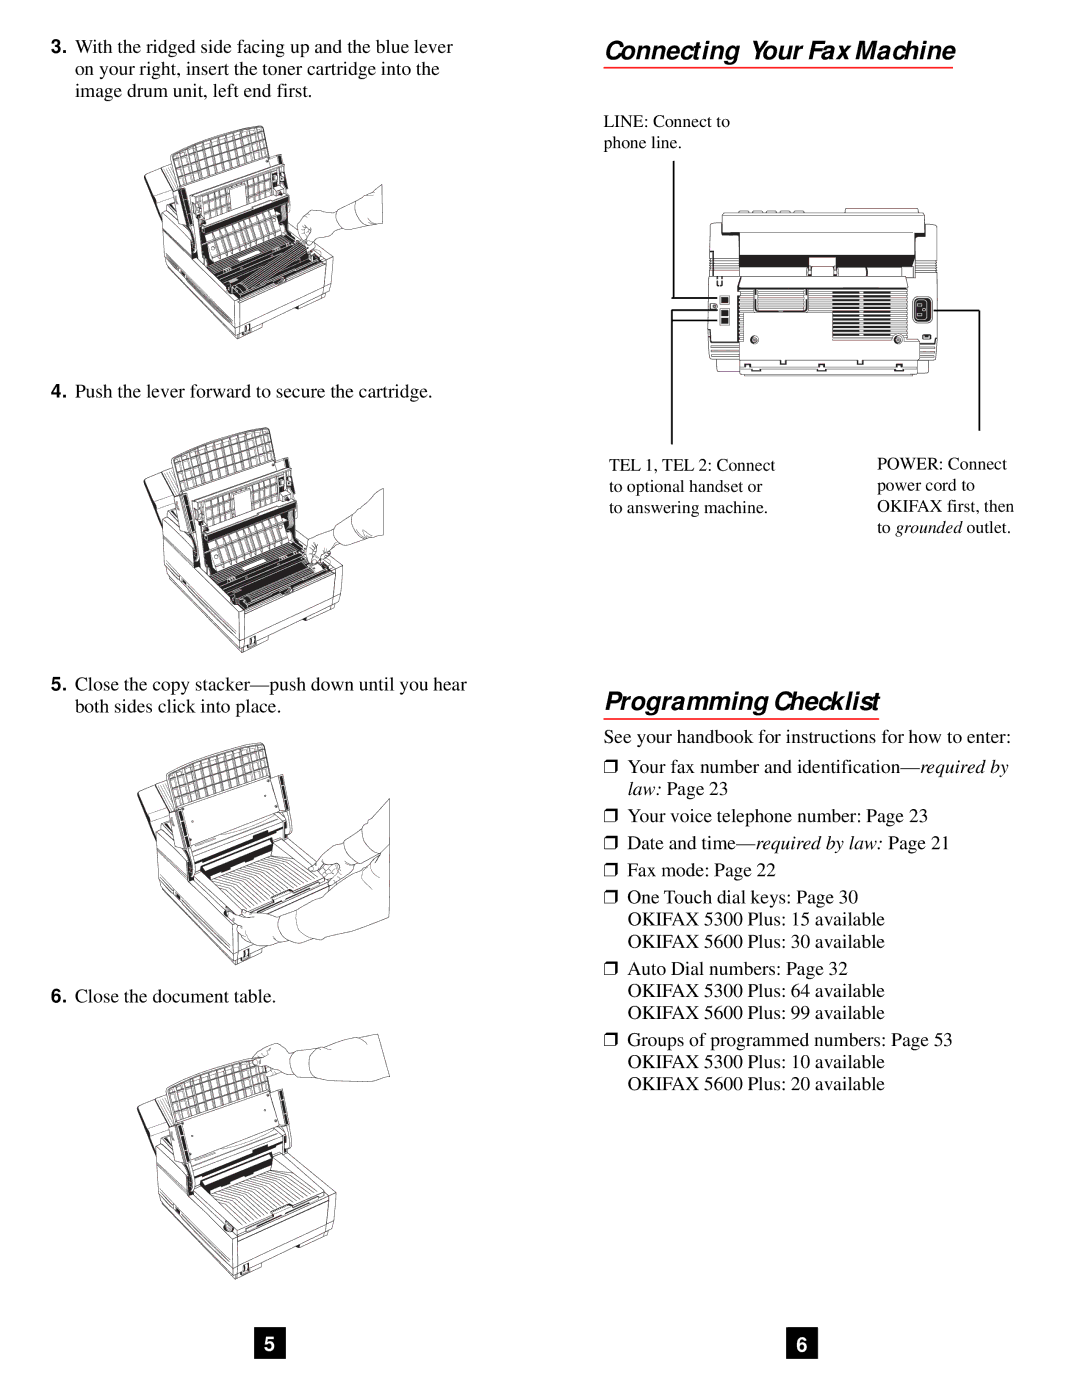
Connecting Your Fax Machine
LINE: Connect to phone line.
4.Push the lever forward to secure the cartridge.
*![]()
5.Close the copy
6.Close the document table.
TEL 1, TEL 2: Connect | POWER: Connect |
to optional handset or | power cord to |
to answering machine. | OKIFAX first, then |
| to grounded outlet. |
Programming Checklist
See your handbook for instructions for how to enter:
❒Your fax number and identification— required by law: Page 23
❒Your voice telephone number: Page 23
❒Date and time— required by law: Page 21
❒Fax mode: Page 22
❒One Touch dial keys: Page 30
OKIFAX 5300 Plus: 15 available
OKIFAX 5600 Plus: 30 available
❒Auto Dial numbers: Page 32
OKIFAX 5300 Plus: 64 available
OKIFAX 5600 Plus: 99 available
❒Groups of programmed numbers: Page 53
OKIFAX 5300 Plus: 10 available
OKIFAX 5600 Plus: 20 available
5
6