5.Plug the cable into the connector on the left side of the printer.
Front F6_06.jpg
6.Install the center guides and rear sheet supports. Install the center guides by snapping them onto the round shaft (1), then securing the top hooks to the square shaft (2). Install the rear supports by sliding them onto the square shaft (2).
Front F6_08.jpg
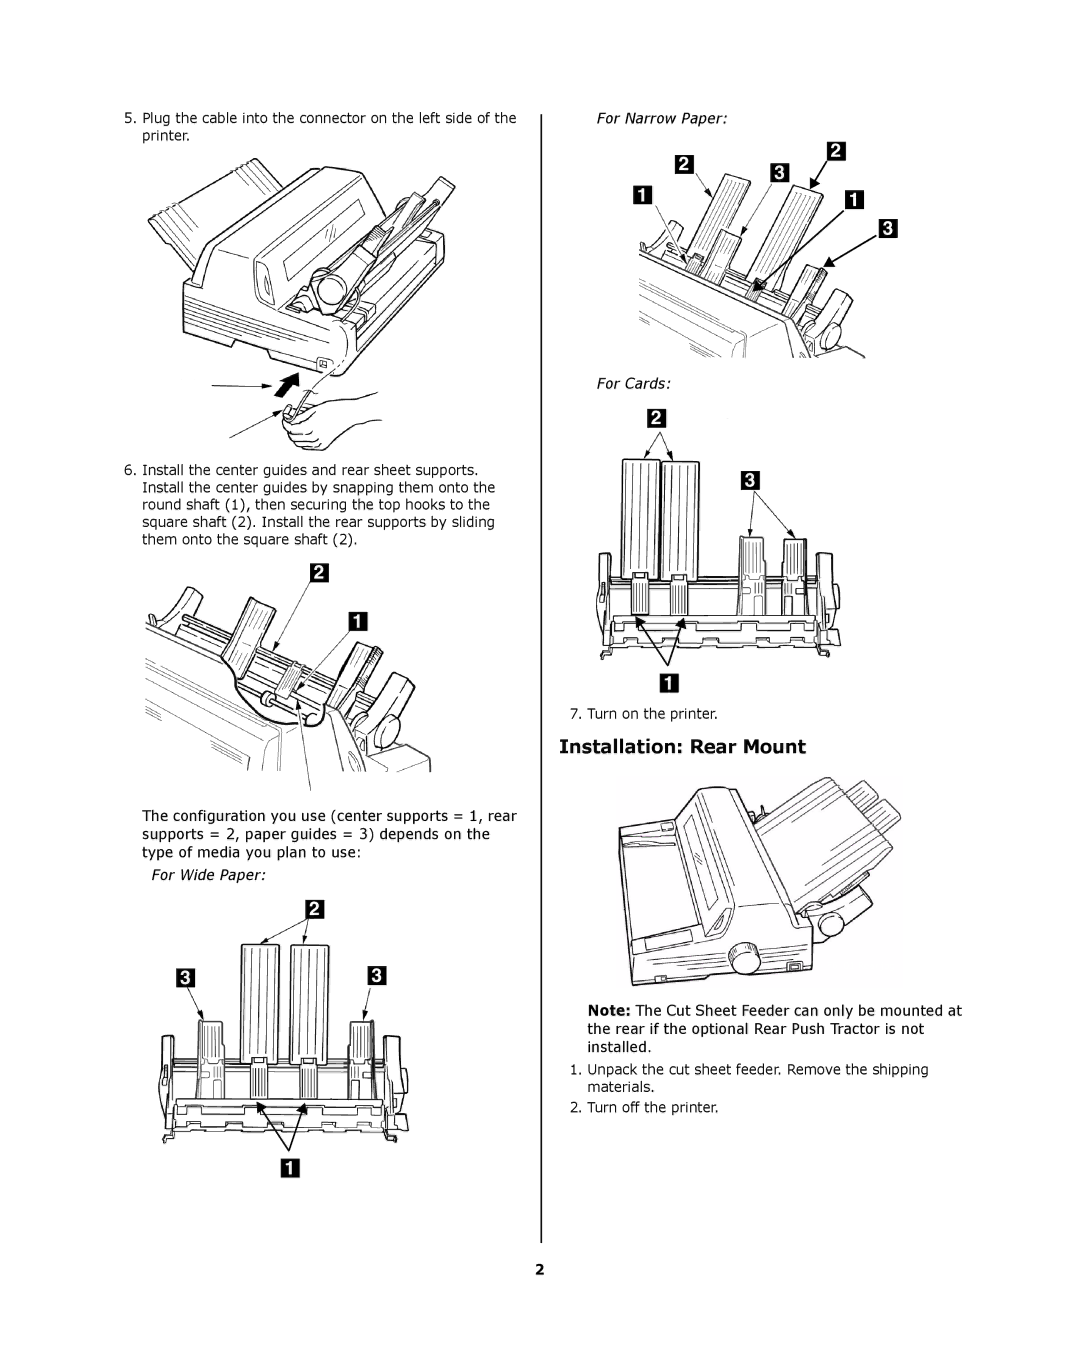
The configuration you use (center supports = 1, rear supports = 2, paper guides = 3) depends on the type of media you plan to use:
For Wide Paper:
For Narrow Paper:
For Cards:
F6_22.jpg
7. Turn on the printer.
Installation: Rear Mount
F6_01 Rear.jpg
Note: The Cut Sheet Feeder can only be mounted at the rear if the optional Rear Push Tractor is not installed.
1.Unpack the cut sheet feeder. Remove the shipping materials.
2.Turn off the printer.
2