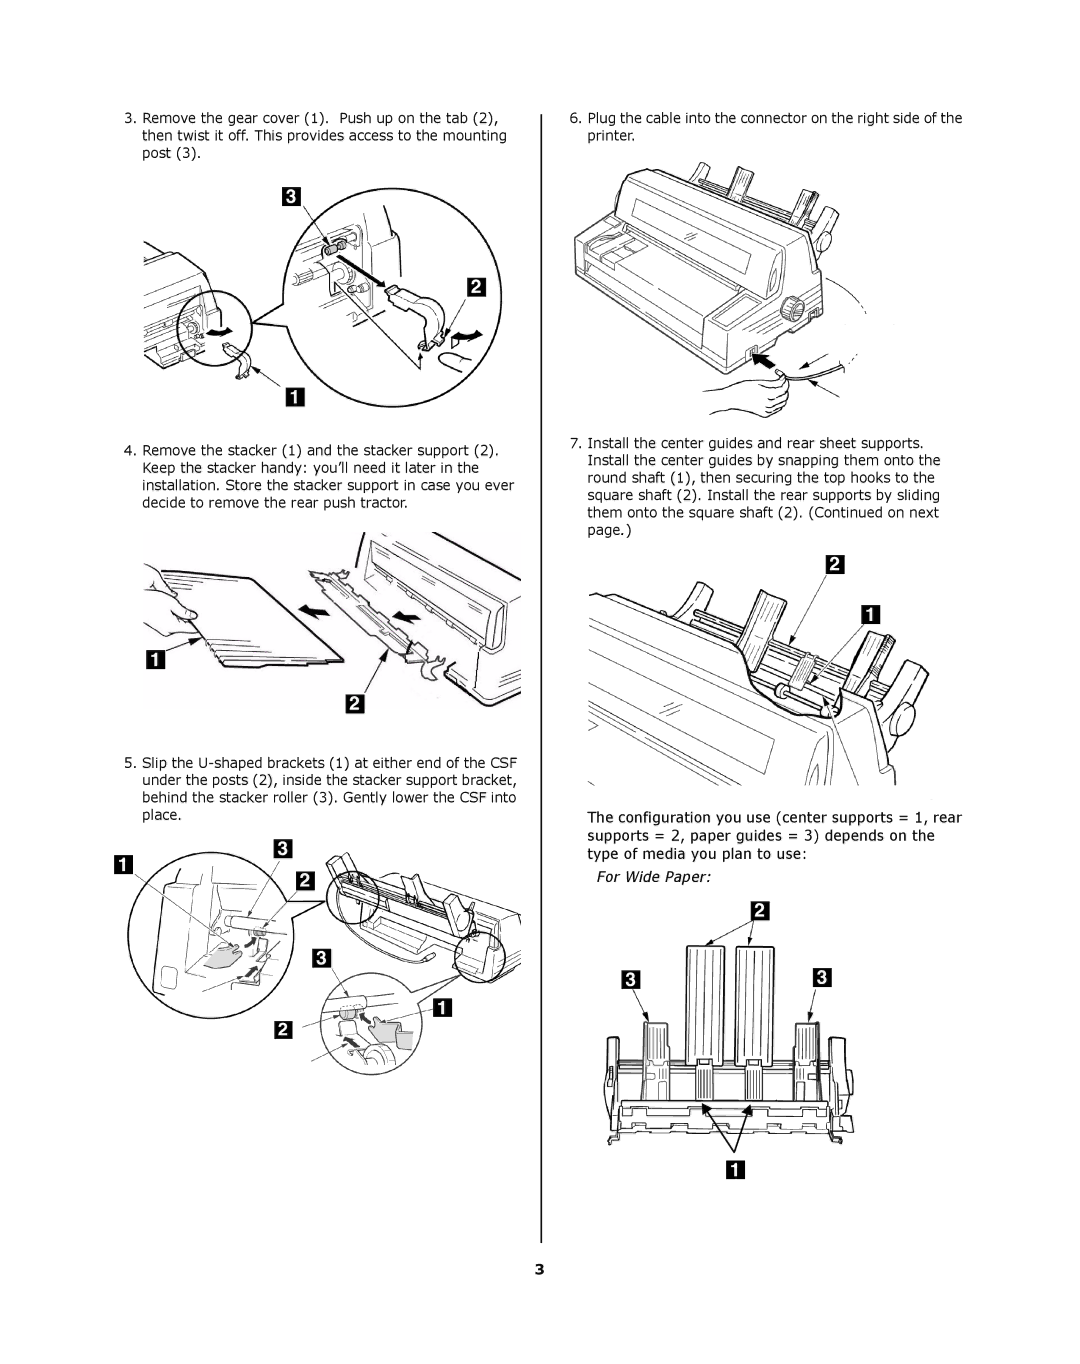
3.Remove the gear cover (1). Push up on the tab (2), then twist it off. This provides access to the mounting post (3).
4.Remove the stacker (1) and the stacker support (2). Keep the stacker handy: you’ll need it later in the installation. Store the stacker support in case you ever decide to remove the rear push tractor.
Rear F6_13a.JPG
5.Slip the
Rear F6_14.jpg
6.Plug the cable into the connector on the right side of the printer.
Rear F6_15.jpg
7.Install the center guides and rear sheet supports. Install the center guides by snapping them onto the round shaft (1), then securing the top hooks to the square shaft (2). Install the rear supports by sliding them onto the square shaft (2). (Continued on next page.)
Rear F6_07.jpg
The configuration you use (center supports = 1, rear supports = 2, paper guides = 3) depends on the type of media you plan to use:
For Wide Paper:
3