
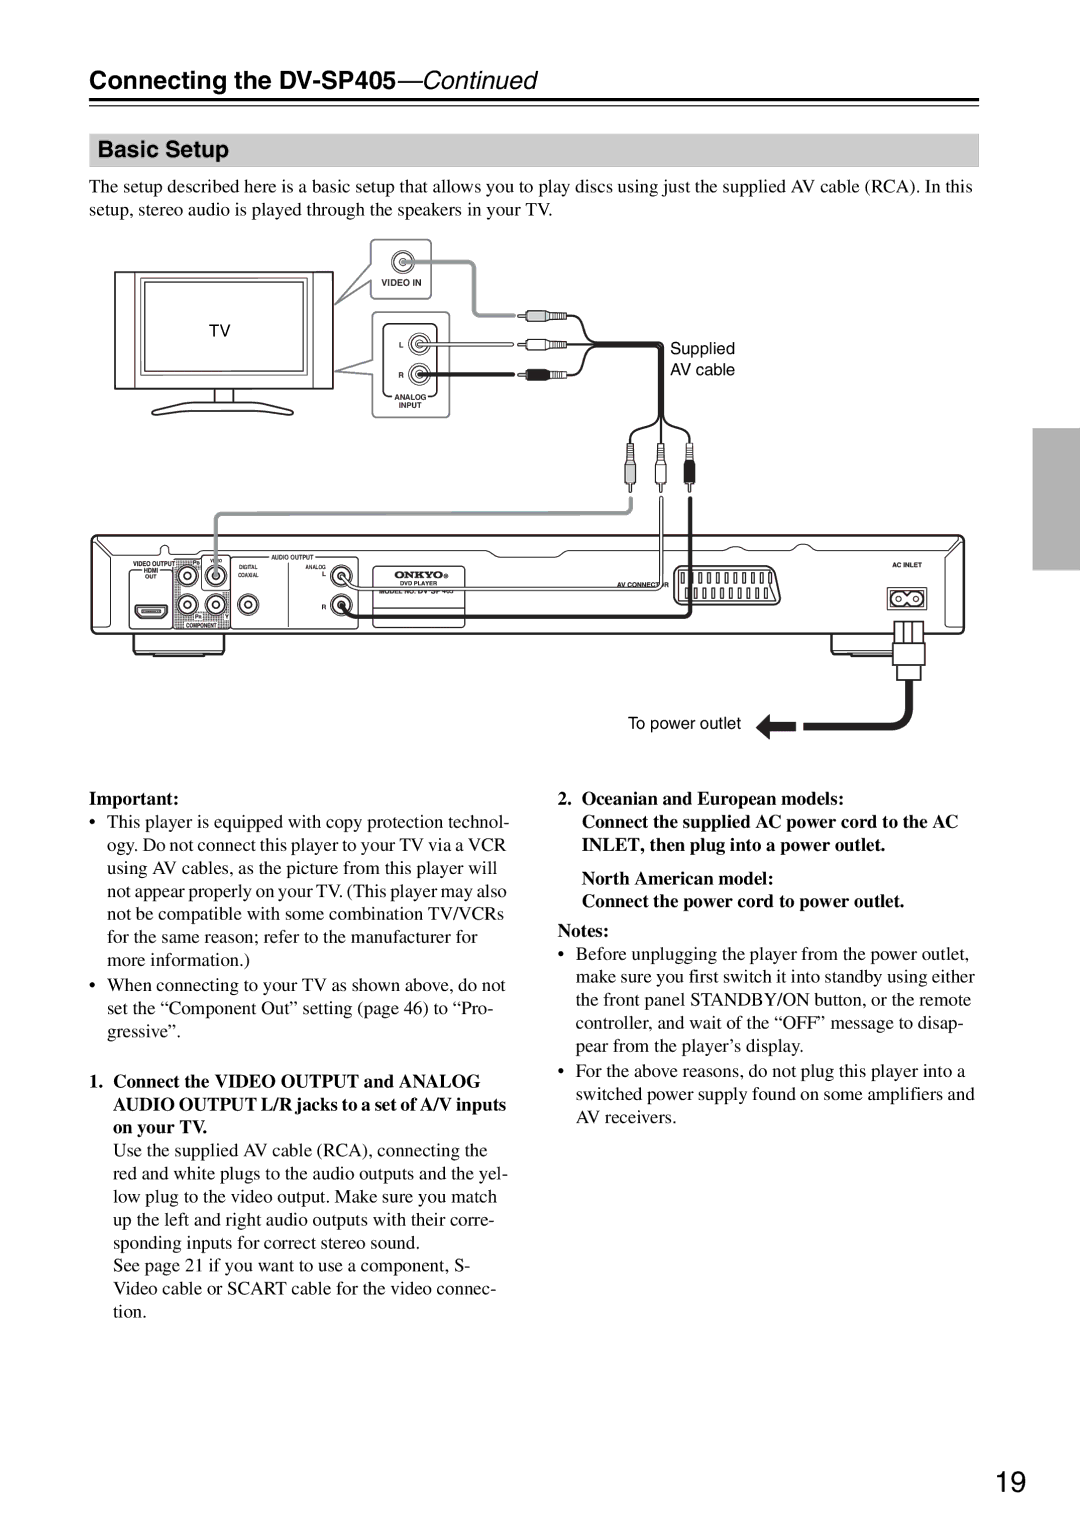
DV-SP405 specifications
The Onkyo DV-SP405 is a versatile and feature-rich DVD player that has garnered attention for its excellent performance and connectivity options. Designed to cater to both audiophiles and casual viewers, the DV-SP405 stands out with its ability to play various disc formats, including standard DVD, CD, and even SACD (Super Audio CD), offering a broad range of compatibility for users.One of the most notable features of the Onkyo DV-SP405 is its advanced video processing technology. It employs a high-quality 1080p upscaling capability that enhances standard DVD content to near high-definition quality. This feature improves image clarity, detail, and overall viewing experience, making it suitable for modern HDTVs. Additionally, the player supports progressive scan, which means it can deliver smoother motion and reduced flicker during playback, further enhancing the viewing experience.
Audio performance is also a significant aspect of the DV-SP405. It features high-resolution audio playback, ensuring that music enthusiasts can enjoy crystal-clear sound with exceptional fidelity. The player supports multiple audio formats, including Dolby Digital, DTS, and PCM. With dedicated audio outputs, including coaxial and optical digital outputs, users can easily connect to external audio systems or AV receivers, optimizing their home theater setup.
The Onkyo DV-SP405 is designed with user convenience in mind. Its intuitive remote control allows easy navigation through menus and settings. The on-screen display provides accessible information about the disc being played, allowing for quick adjustments to audio and video settings. Furthermore, the player has a compact and stylish design, making it a perfect fit for any home entertainment center.
In terms of build quality, the DV-SP405 is constructed with a robust housing that minimizes vibration, contributing to better sound quality. The overall aesthetic is sleek and modern, integrating well with other home theater components.
For those who appreciate both video and audio excellence, the Onkyo DV-SP405 offers a well-rounded solution that meets the demands of various formats and connectivity needs. Its combination of advanced technology, versatility, and user-friendly design make it an excellent choice for anyone looking to enhance their home entertainment experience. Whether watching movies or listening to favorite albums, the DV-SP405 delivers performance that is hard to rival in its class.