E N G L I S H
Assembly
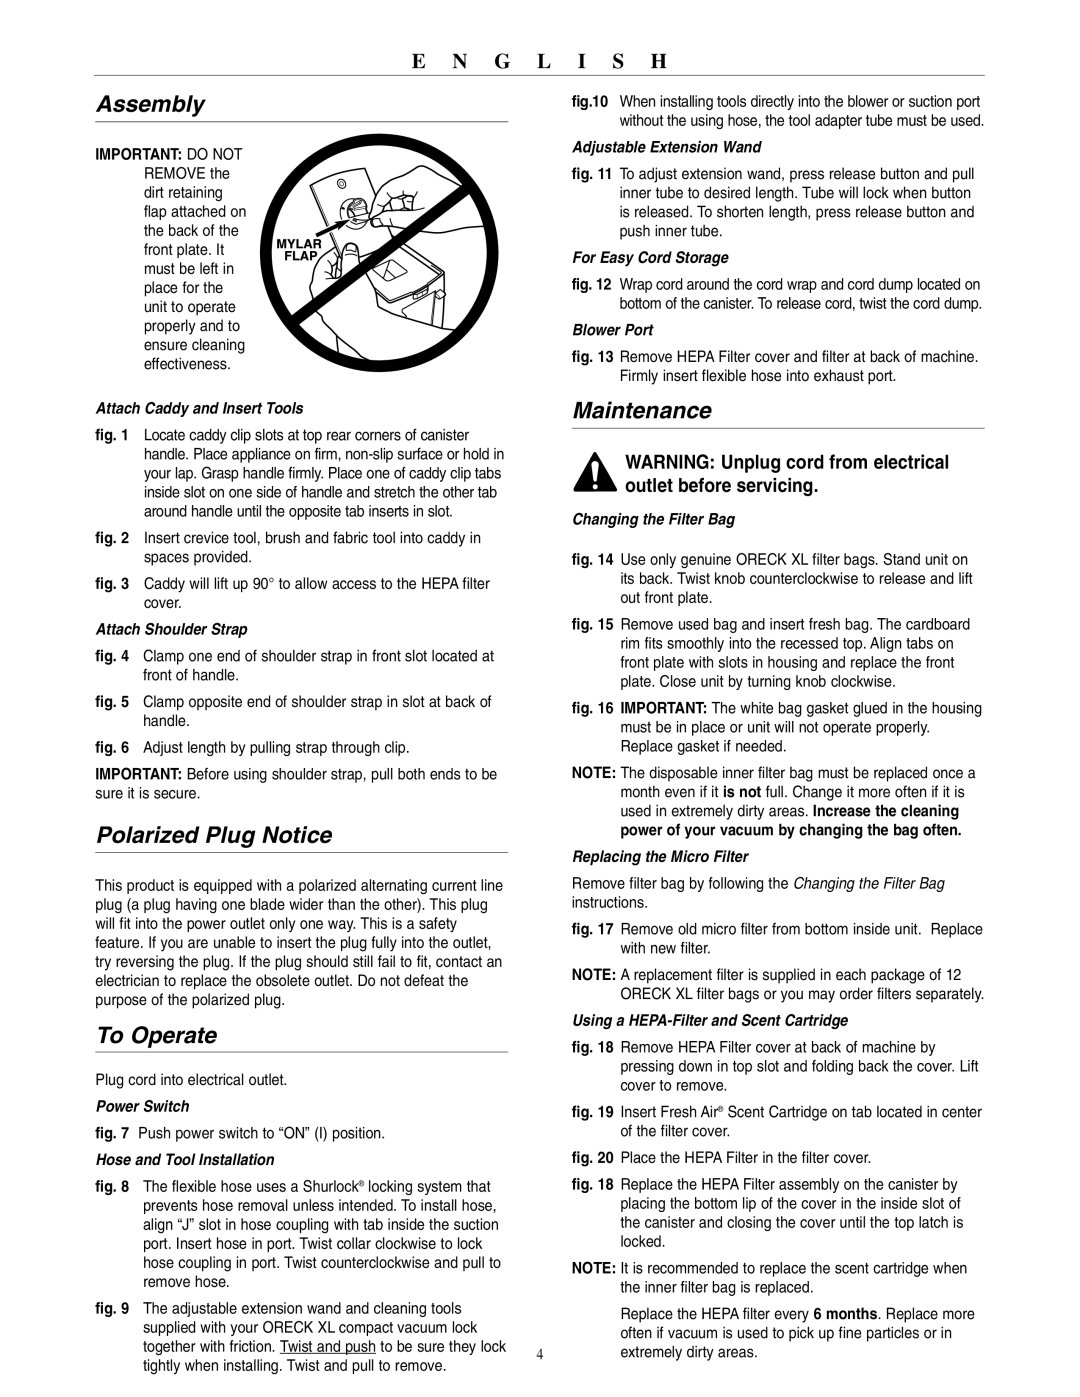
IMPORTANT: DO NOT REMOVE the dirt retaining flap attached on the back of the front plate. It must be left in place for the unit to operate properly and to ensure cleaning effectiveness.
Attach Caddy and Insert Tools fig. 1
fig.10 When installing tools directly into the blower or suction port without the using hose, the tool adapter tube must be used.
Adjustable Extension Wand
fig. 11 To adjust extension wand, press release button and pull inner tube to desired length. Tube will lock when button is released. To shorten length, press release button and push inner tube.
For Easy Cord Storage
fig. 12 Wrap cord around the cord wrap and cord dump located on bottom of the canister. To release cord, twist the cord dump.
Blower Port
fig. 13 Remove HEPA Filter cover and filter at back of machine. Firmly insert flexible hose into exhaust port.
Maintenance
WARNING: Unplug cord from electrical outlet before servicing.
fig. 2
fig. 3
Attach Shoulder Strap
fig. 4 Clamp one end of shoulder strap in front slot located at front of handle.
fig. 5 Clamp opposite end of shoulder strap in slot at back of handle.
fig. 6 Adjust length by pulling strap through clip.
IMPORTANT: Before using shoulder strap, pull both ends to be sure it is secure.
Polarized Plug Notice
Changing the Filter Bag
fig. 14 Use only genuine ORECK XL filter bags. Stand unit on its back. Twist knob counterclockwise to release and lift out front plate.
fig. 15 Remove used bag and insert fresh bag. The cardboard rim fits smoothly into the recessed top. Align tabs on front plate with slots in housing and replace the front plate. Close unit by turning knob clockwise.
fig. 16 IMPORTANT: The white bag gasket glued in the housing must be in place or unit will not operate properly. Replace gasket if needed.
NOTE: The disposable inner filter bag must be replaced once a month even if it is not full. Change it more often if it is used in extremely dirty areas. Increase the cleaning power of your vacuum by changing the bag often.
Replacing the Micro Filter
This product is equipped with a polarized alternating current line |
| Remove filter bag by following the Changing the Filter Bag | |
plug (a plug having one blade wider than the other). This plug |
| instructions. | |
will fit into the power outlet only one way. This is a safety |
| fig. 17 | Remove old micro filter from bottom inside unit. Replace |
feature. If you are unable to insert the plug fully into the outlet, |
| ||
|
| with new filter. | |
try reversing the plug. If the plug should still fail to fit, contact an |
|
| |
| NOTE: A replacement filter is supplied in each package of 12 | ||
electrician to replace the obsolete outlet. Do not defeat the |
| ||
|
| ORECK XL filter bags or you may order filters separately. | |
purpose of the polarized plug. |
|
| |
|
|
| |
To Operate |
| Using a | |
| fig. 18 | Remove HEPA Filter cover at back of machine by | |
|
| ||
|
| ||
Plug cord into electrical outlet. |
|
| pressing down in top slot and folding back the cover. Lift |
|
| cover to remove. | |
|
|
| |
Power Switch |
| fig. 19 | Insert Fresh Air® Scent Cartridge on tab located in center |
fig. 7 Push power switch to “ON” (I) position. |
|
| of the filter cover. |
Hose and Tool Installation |
| fig. 20 | Place the HEPA Filter in the filter cover. |
fig. 8 The flexible hose uses a Shurlock® locking system that |
| fig. 18 | Replace the HEPA Filter assembly on the canister by |
prevents hose removal unless intended. To install hose, |
|
| placing the bottom lip of the cover in the inside slot of |
align “J” slot in hose coupling with tab inside the suction |
|
| the canister and closing the cover until the top latch is |
port. Insert hose in port. Twist collar clockwise to lock |
|
| locked. |
hose coupling in port. Twist counterclockwise and pull to |
| NOTE: It is recommended to replace the scent cartridge when | |
remove hose. |
| ||
|
| the inner filter bag is replaced. | |
|
|
| |
fig. 9 The adjustable extension wand and cleaning tools |
|
| Replace the HEPA filter every 6 months. Replace more |
supplied with your ORECK XL compact vacuum lock |
|
| |
|
| often if vacuum is used to pick up fine particles or in | |
together with friction. Twist and push to be sure they lock |
|
| |
4 |
| extremely dirty areas. | |
|
| ||
tightly when installing. Twist and pull to remove.