UPRO14T specifications
The Oreck UPRO14T is a powerful and versatile upright vacuum cleaner designed for both household and commercial use. Renowned for its lightweight design and impressive cleaning capabilities, it caters to the needs of users seeking an efficient and easy-to-handle vacuuming solution.One of the standout features of the Oreck UPRO14T is its incredibly lightweight construction, tipping the scales at only 8 lbs. This makes it extremely easy to maneuver, lift, and carry, even for prolonged periods of cleaning. The vacuum's slim profile allows it to reach tight spaces and corners effectively, making it an excellent choice for cleaning around furniture and in hard-to-reach areas.
The UPRO14T boasts a powerful 1.25 HP motor, delivering strong suction to tackle dirt, dust, and pet hair with ease. The vacuum's suction power is complemented by its unique roller brush system, which agitates carpet fibers to effectively lift debris while being gentle enough not to damage delicate surfaces.
Incorporating Oreck's proprietary SpinTrap technology, the UPRO14T efficiently captures fine dust and allergens, contributing to a cleaner indoor environment. This technology is particularly beneficial for allergy sufferers, as it reduces the amount of airborne particles during the cleaning process.
Another key characteristic of the UPRO14T is its advanced filtration system, which includes a disposable inner bag that effectively traps dirt and debris. The vacuum's highly efficient filtration helps maintain a cleaner home atmosphere, while the hassle-free bag replacement system makes maintenance easy and efficient.
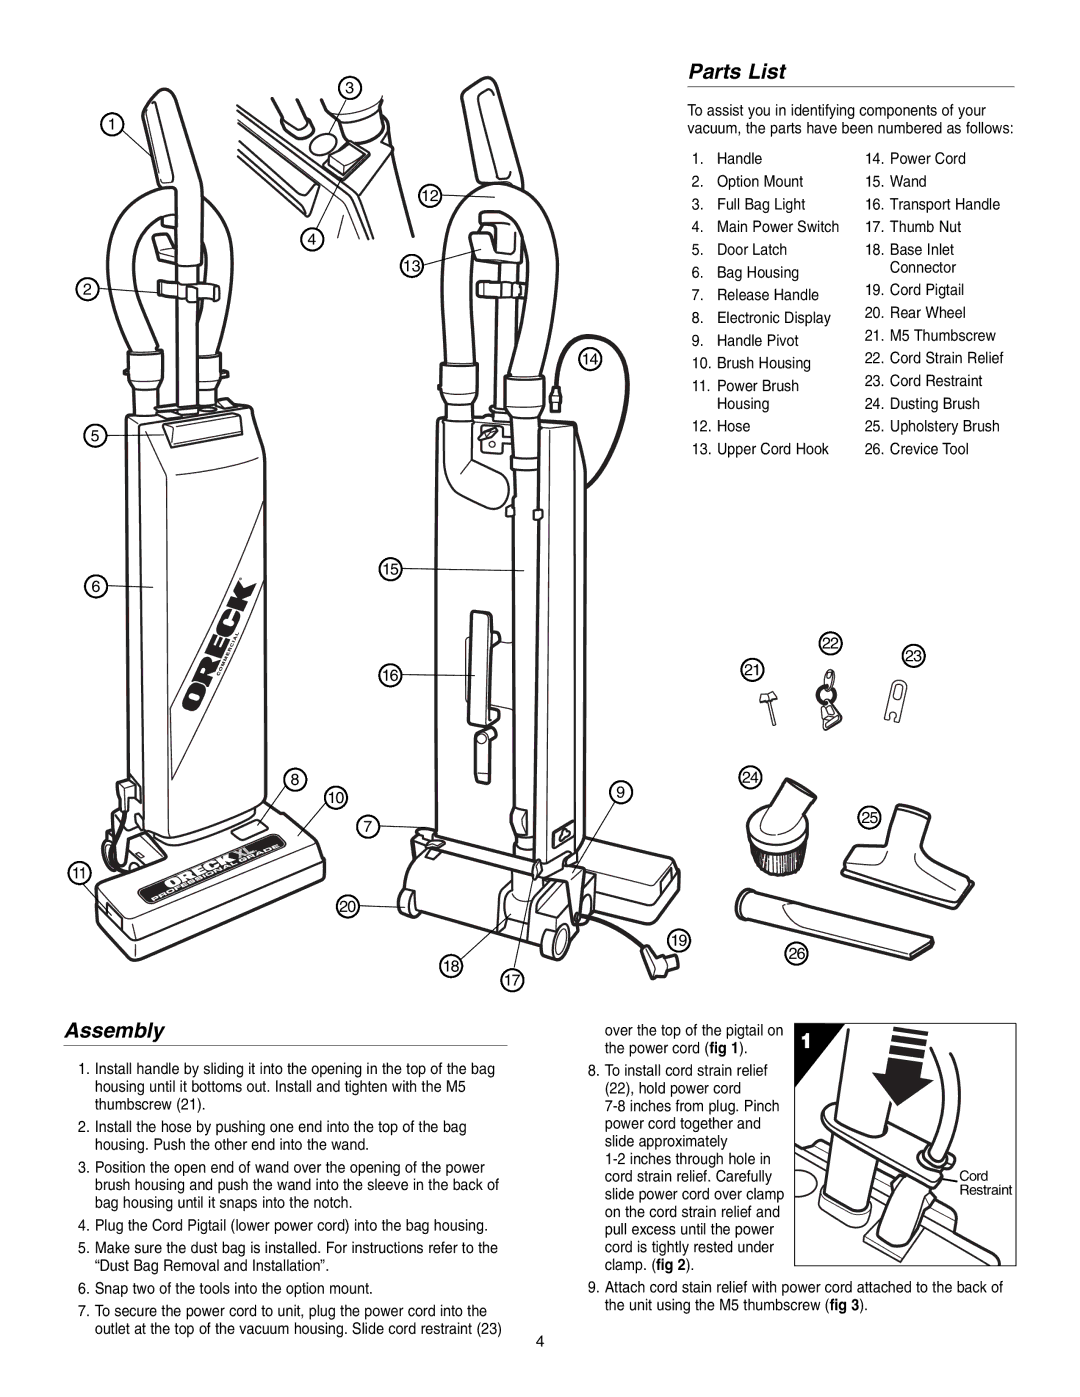
The UPRO14T also features convenient onboard tools, including a dusting brush, crevice tool, and upholstery nozzle, which enhance its versatility and allow users to tackle a variety of cleaning tasks easily. The vacuum is designed with a simple, user-friendly interface, making it accessible for users of all ages.
In summary, the Oreck UPRO14T stands out as a powerful and convenient vacuum cleaner that combines lightweight design with robust cleaning performance. Its innovative technologies, such as SpinTrap and advanced filtration, ensure a thorough clean while promoting a healthier environment. With added versatility and ease of use, the UPRO14T is an excellent investment for anyone looking to keep their home or workspace immaculate.

