
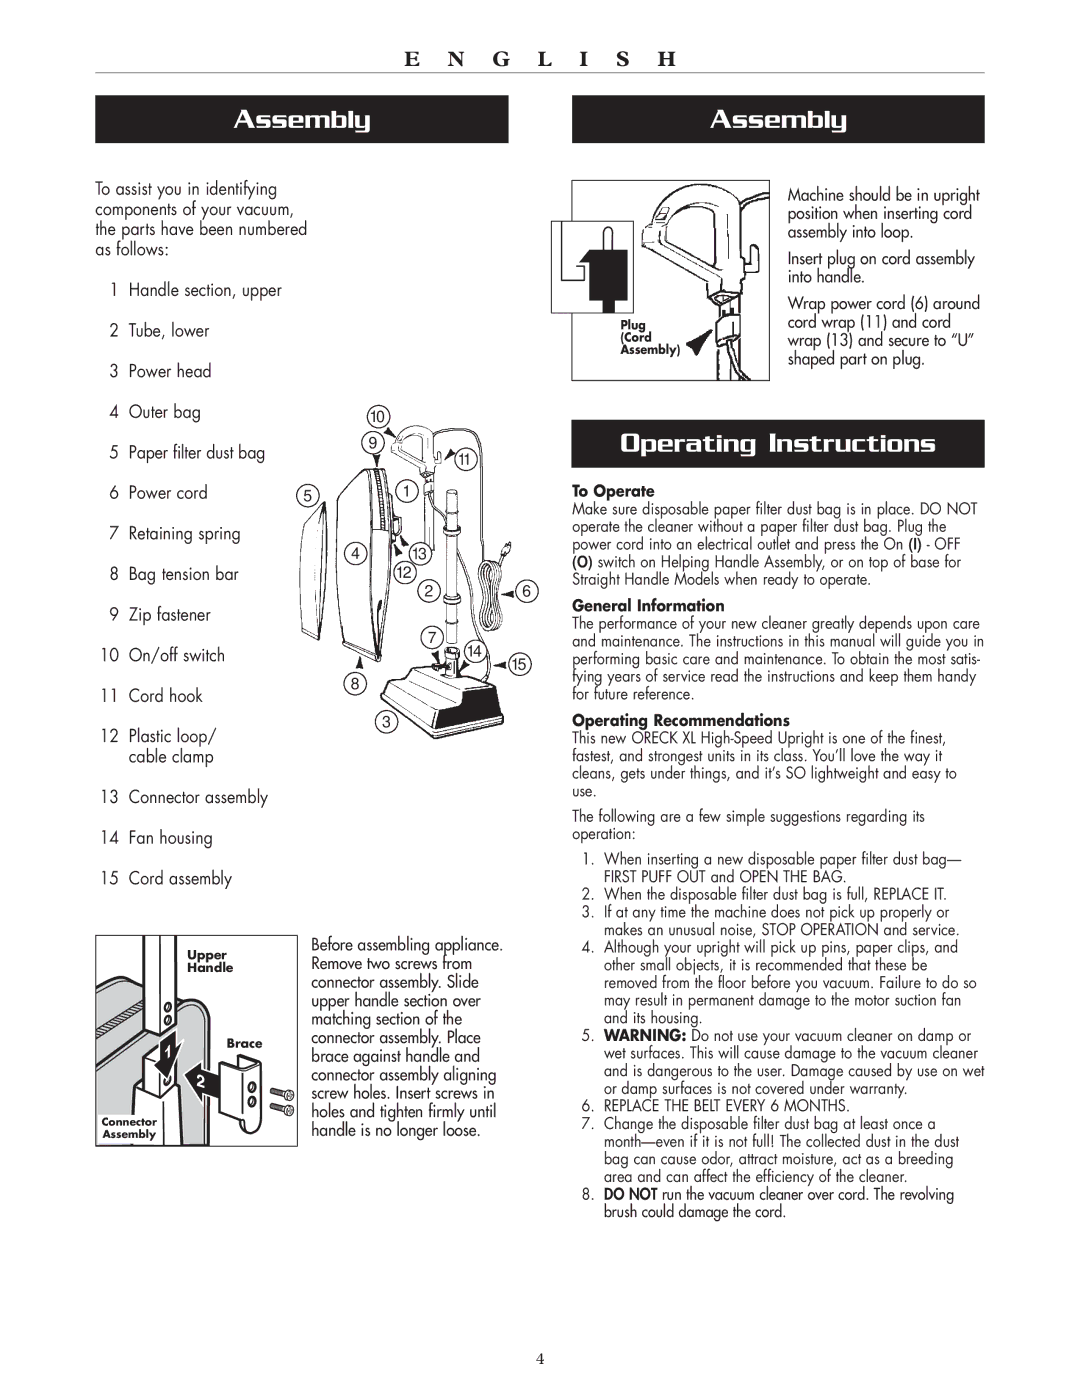
XL2000HH specifications
The Oreck XL2000HH is a renowned lightweight vacuum cleaner that has captured the attention of both homeowners and professionals alike, thanks to its effective design and innovative technologies. With its sleek and compact frame, the Oreck XL2000HH weighs around 8 pounds, making it easy to maneuver around the house and ideal for users of all ages.One of the standout features of the Oreck XL2000HH is its powerful motor, which generates impressive suction. This vacuum is equipped with a 12-inch cleaning path, allowing it to cover larger areas quickly, minimizing the time spent vacuuming. The dual helix roller brush technology enhances its cleaning capabilities by loosening dirt and debris from various floor types, including carpet, hardwood, and tile, making it versatile for different surfaces.
The Oreck XL2000HH excels in reaching those tough spots and corners. Its low-profile design allows it to fit under furniture, ensuring that dust and allergens don't accumulate in neglected areas. For those who are particularly sensitive to allergens, the vacuum features a hypoallergenic inner bag that captures particles as small as 0.3 microns. This filtration system is crucial for improving indoor air quality, especially for allergy sufferers.
Flexibility is another key characteristic of the Oreck XL2000HH. The vacuum has a convenient 40-foot power cord that offers ample reach without the need to frequently change outlets. Additionally, itsAutomatic Floor Adjustment enables the vacuum to seamlessly transition from carpet to bare floors without any manual adjustments needed.
The Oreck XL2000HH is designed with user-friendly features that enhance the overall cleaning experience. The handle is ergonomically designed to reduce strain during extended use, and its simple controls make it straightforward to operate. Another noteworthy point is the vacuum's durability; Oreck is known for producing long-lasting products, and the XL2000HH is no exception.
Moreover, its maintenance is hassle-free thanks to the easy-to-change bags and simple brush-roll access. Users can rely on the quality of Oreck, as this vacuum is backed by a solid warranty, providing peace of mind with every purchase.
In summary, the Oreck XL2000HH stands out not only for its exceptional performance but also for its innovative features and user-friendly design. Its lightweight build, powerful suction, advanced filtration, and versatility make it a highly recommended option for anyone looking to maintain a clean and healthy living environment.