Note: If the camera is connected to your PC, you have to unplug the USB cable to turn off the camera.
Inserting/Removing the SD memory Card
Make sure the
Warning: The card and the data may be damaged if the SD card is inserted or removed while the camera is on.
Insert:
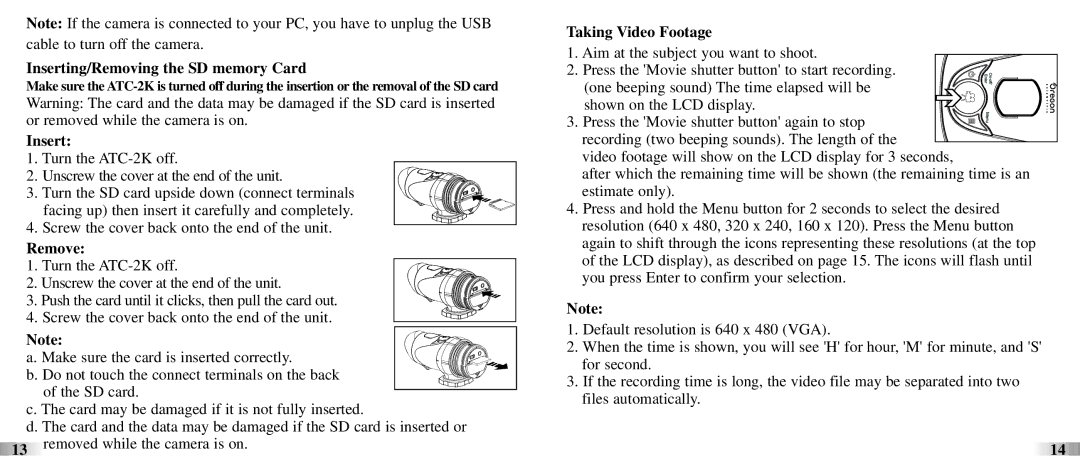
1. Turn the
2. Unscrew the cover at the end of the unit.
3. Turn the SD card upside down (connect terminals facing up) then insert it carefully and completely.
4. Screw the cover back onto the end of the unit.
Remove:
1. Turn the
2. Unscrew the cover at the end of the unit. 3. Push the card until it clicks, then pull the card out. 4. Screw the cover back onto the end of the unit.
Note: a. Make sure the card is inserted correctly. b. Do not touch the connect terminals on the back of the SD card.
c. The card may be damaged if it is not fully inserted.
d. The card and the data may be damaged if the SD card is inserted or ![]()
![]()
![]()
![]()
![]()
![]()
![]()
![]()
![]()
![]()
![]()
![]()
![]()
![]() 13
13![]()
![]()
![]()
![]()
![]()
![]()
![]()
![]()
![]()
![]()
![]()
![]()
![]()
![]()
![]()
![]()
![]()
![]()
![]()
![]()
![]()
![]()
![]()
![]()
![]()
![]()
![]() removed while the camera is on.
removed while the camera is on.
Taking Video Footage
1. Aim at the subject you want to shoot. 2. Press the 'Movie shutter button' to start recording.
(one beeping sound) The time elapsed will be shown on the LCD display.
3. Press the 'Movie shutter button' again to stop![]()
![]() recording (two beeping sounds). The length of the
recording (two beeping sounds). The length of the ![]() video footage will show on the LCD display for 3 seconds,
video footage will show on the LCD display for 3 seconds,
after which the remaining time will be shown (the remaining time is an estimate only).
4.Press and hold the Menu button for 2 seconds to select the desired resolution (640 x 480, 320 x 240, 160 x 120). Press the Menu button again to shift through the icons representing these resolutions (at the top of the LCD display), as described on page 15. The icons will flash until you press Enter to confirm your selection.
Note:
1.Default resolution is 640 x 480 (VGA).
2.When the time is shown, you will see 'H' for hour, 'M' for minute, and 'S' for second.
3.If the recording time is long, the video file may be separated into two files automatically.
![]()
![]()
![]()
![]()
![]()
![]()
![]()
![]()
![]()
![]()
![]()
![]()
![]()
![]()
![]()
![]()
![]()
![]()
![]() 14
14![]()
![]()
![]()
![]()
![]()
![]()
![]()
![]()
![]()
![]()
![]()
![]()
![]()
![]()
![]()
![]()
![]()
![]()
![]()
![]()
![]()
![]()
![]()
