EN
PRODUCT OVERVIEW
FRONT VIEW
1
2
3
4
5
6
BACK VIEW
1
2
3
4
5
6
7
8
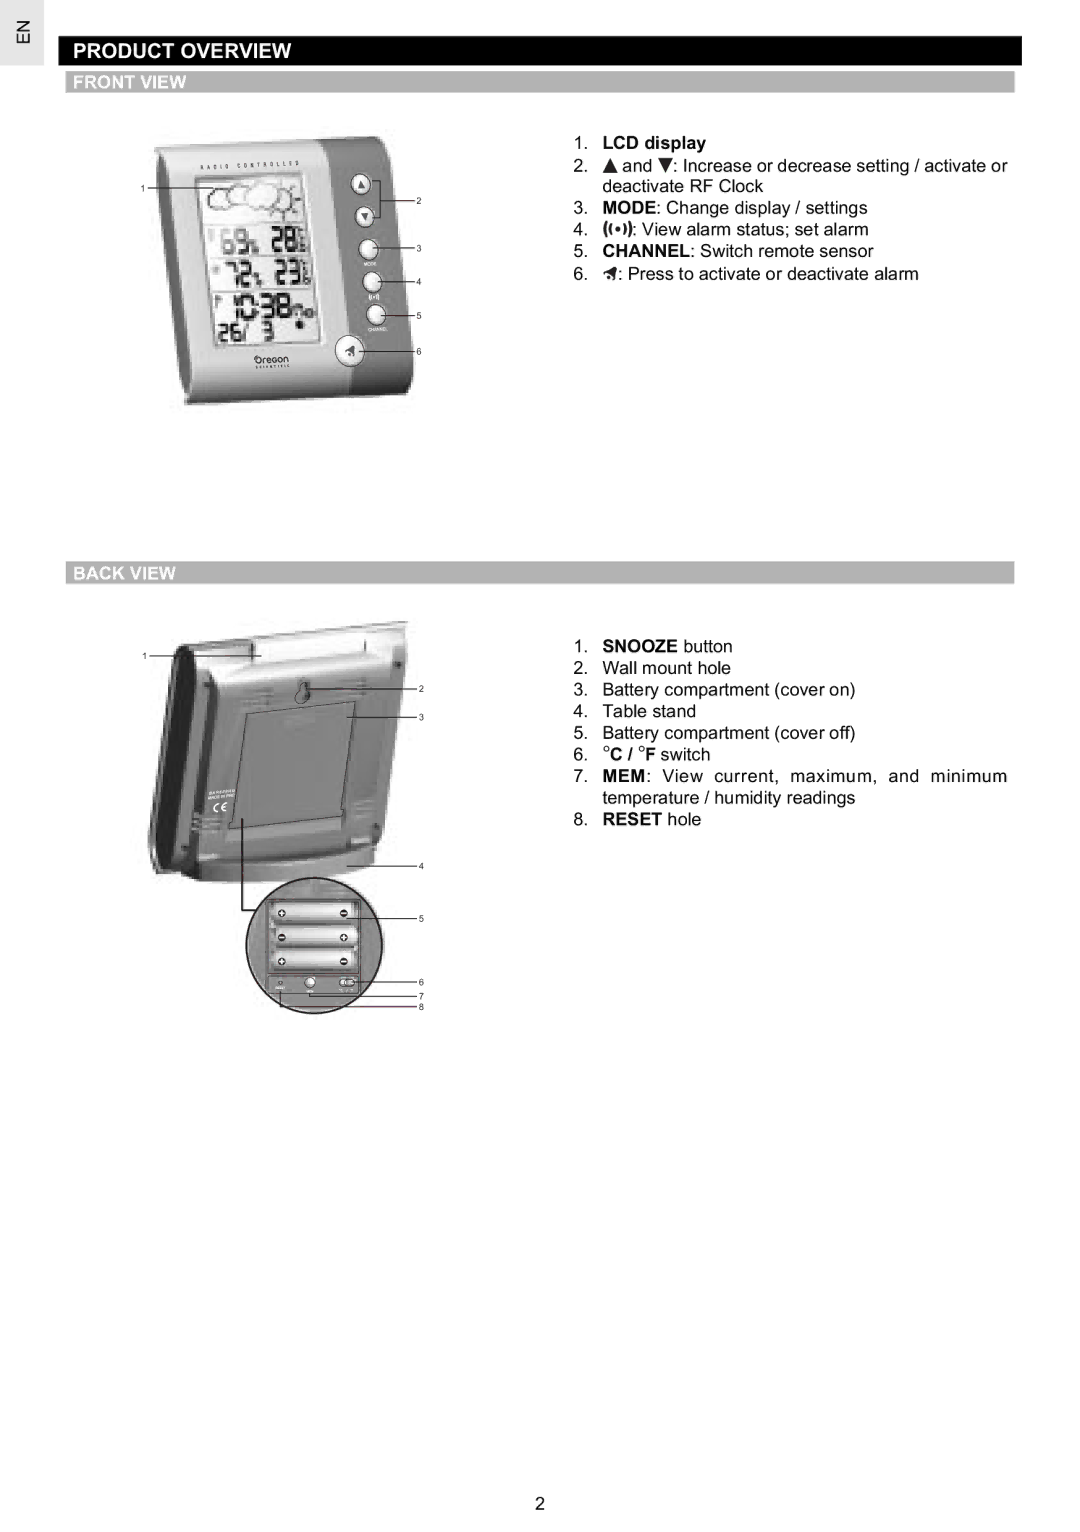
1.LCD display
2.![]() and
and ![]() : Increase or decrease setting / activate or deactivate RF Clock
: Increase or decrease setting / activate or deactivate RF Clock
3.MODE: Change display / settings
4.![]()
![]()
![]() : View alarm status; set alarm
: View alarm status; set alarm
5.CHANNEL: Switch remote sensor
6.![]() : Press to activate or deactivate alarm
: Press to activate or deactivate alarm
1.SNOOZE button
2.Wall mount hole
3.Battery compartment (cover on)
4.Table stand
5.Battery compartment (cover off)
6.°C / °F switch
7.MEM: View current, maximum, and minimum temperature / humidity readings
8.RESET hole
2
