EN
INTRODUCTION
Thank you for selecting the Oregon Scientific Sunrise
Wake-up Clock
Our body clock is often not in sync with the demands and rhythm of modern life.
Our biological clock is affected by external cues, such as sunlight. Light at dawn stimulates production of cortisol, which gets the body ready to work and wake up. By simulating dawn, Oregon Scientific’s Sunrise
Start your day better and feel energised to tackle the day. Wake up as nature intended!
Start your day better and feel energised to tackle the day. Wake up as nature intended!
NOTE Please keep this manual handy as you use your new product. It contains practical
IMPORTANT This device does not reduce the hours of sleep needed.
OVERVIE
FRONT VIEW
6 |
|
|
|
|
|
|
|
|
|
|
|
|
| 1 | |
|
|
|
|
|
|
| |
7 |
|
|
|
|
|
| 2 |
|
|
|
|
|
| ||
|
|
|
|
|
| 3 | |
8 |
|
|
|
|
|
| |
|
|
|
|
|
| ||
|
|
|
|
|
|
| |
|
|
|
|
|
|
| |
|
|
|
|
|
|
|
|
9 |
|
|
|
|
|
|
| 4 | ||||
|
|
|
|
| ||||||||
10 |
|
|
|
|
|
|
|
|
|
|
|
|
|
|
|
|
|
|
|
|
|
|
|
| |
|
|
|
|
|
|
|
|
|
|
| ||
|
|
|
|
|
|
|
|
|
|
|
| |
11 |
|
|
|
|
|
|
|
|
|
| 5 | |
|
|
|
|
|
|
|
|
|
| |||
12 |
|
|
|
|
| |||||||
|
|
|
|
|
|
|
|
|
|
|
| |
|
|
|
|
|
|
|
|
|
|
|
|
|
1.Lamp Holder
2.SNOOZE SENSOR: Motion sensor for snooze function
3.![]() /
/![]() : Adjust volume (only when radio / nature sound is playing); change values of the setting
: Adjust volume (only when radio / nature sound is playing); change values of the setting
4.SLEEP: View remaining time; enable sleep function with radio / nature sound / light; set sleep timer
5.![]() RADIO TUNE
RADIO TUNE![]() : Enable
: Enable
6.NATURE SOUND: Toggle through selection (Crickets / Brook / Ocean / Rain)
7.SET CLOCK: Enter clock settings
8.SET ALARM: View alarm status; enter alarm settings
9.![]()
![]()
![]() /
/![]()
![]()
![]() : Adjust brightness (only when LAMP function has been activated)
: Adjust brightness (only when LAMP function has been activated)
10.LAMP: Turn on/off light
11.ALARM: Enable / disable alarm function
12.RADIO: Turn on / off radio
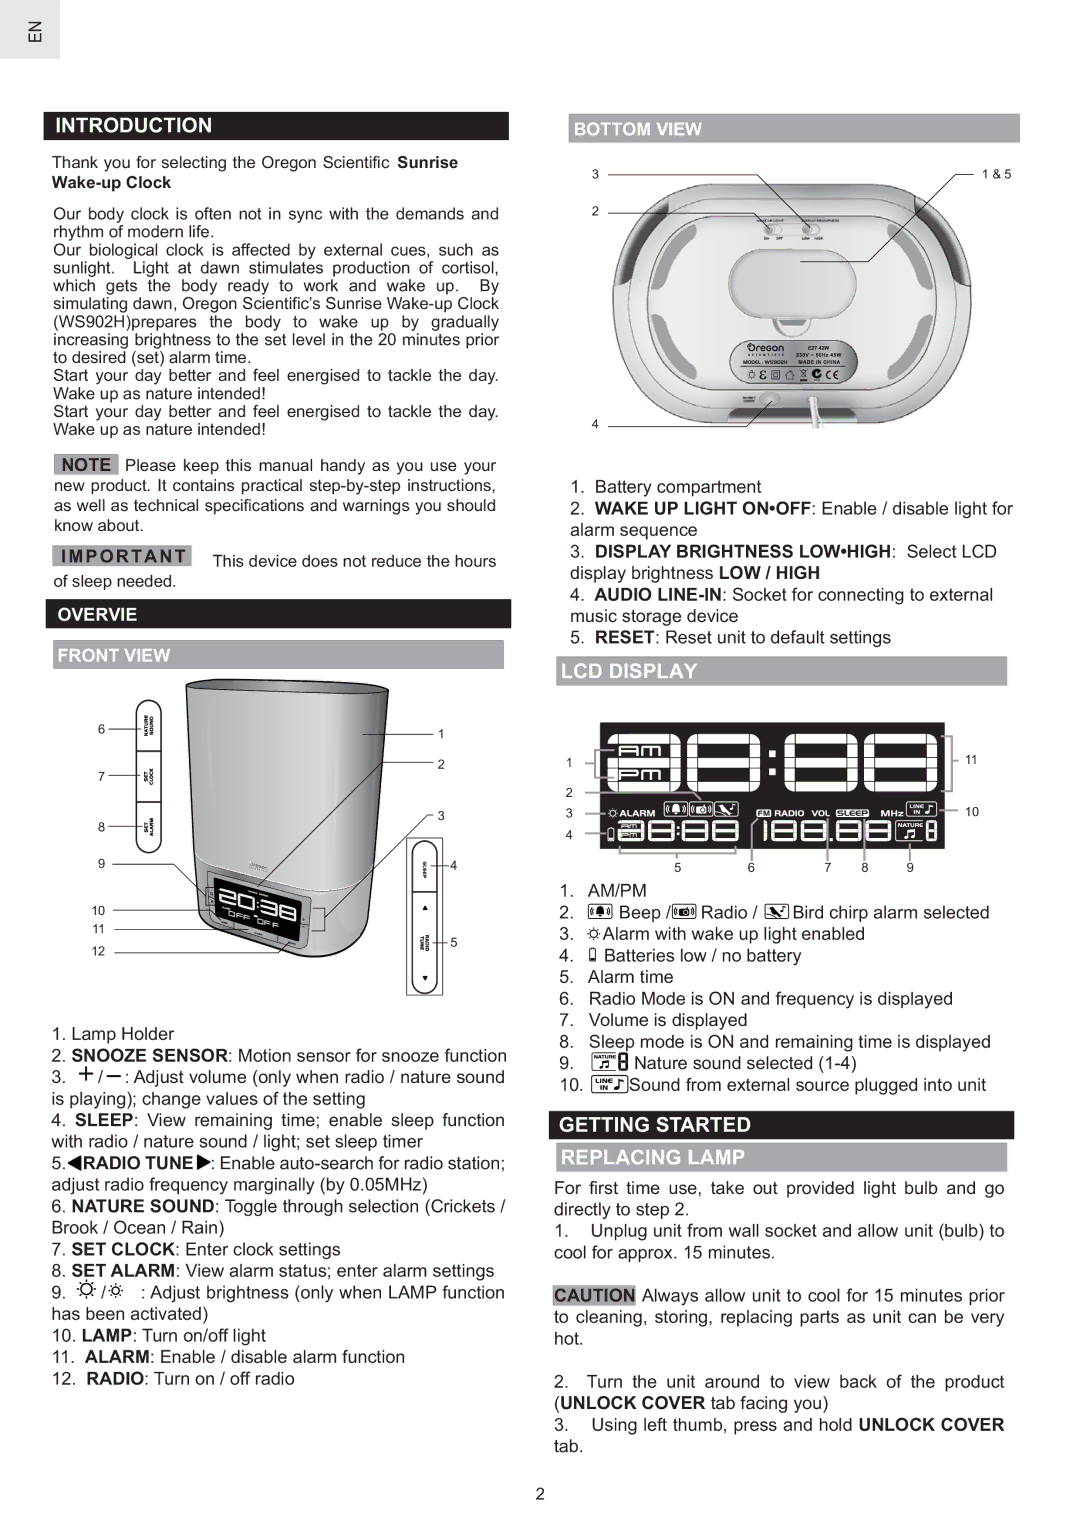
BOTTOM VIEW
3 | 1 & 5 |
2
4
1.Battery compartment
2.WAKE UP LIGHT ON•OFF: Enable / disable light for alarm sequence
3.DISPLAY BRIGHTNESS LOW•HIGH: Select LCD display brightness LOW / HIGH
4.AUDIO
5.RESET: Reset unit to default settings
LCD DISPLAY
1 |
|
|
| 11 |
2 |
|
|
|
|
3 |
|
|
| 10 |
4 |
|
|
|
|
5 | 6 | 7 | 8 | 9 |
1.AM/PM
2.![]() Beep /
Beep /![]() Radio /
Radio / ![]() Bird chirp alarm selected
Bird chirp alarm selected
3.![]()
![]()
![]() Alarm with wake up light enabled
Alarm with wake up light enabled
4.![]() Batteries low / no battery
Batteries low / no battery
5.Alarm time
6.Radio Mode is ON and frequency is displayed
7.Volume is displayed
8.Sleep mode is ON and remaining time is displayed
9.![]()
![]()
![]()
![]() Nature sound selected
Nature sound selected
10.![]() Sound from external source plugged into unit
Sound from external source plugged into unit
GETTING STARTED
REPLACING LAMP
For first time use, take out provided light bulb and go directly to step 2.
1.Unplug unit from wall socket and allow unit (bulb) to cool for approx. 15 minutes.
CAUTION Always allow unit to cool for 15 minutes prior to cleaning, storing, replacing parts as unit can be very hot.
2.Turn the unit around to view back of the product (UNLOCK COVER tab facing you)
3.Using left thumb, press and hold UNLOCK COVER
tab.
2