➌➋
➊
➍➐
➎
➑
➏
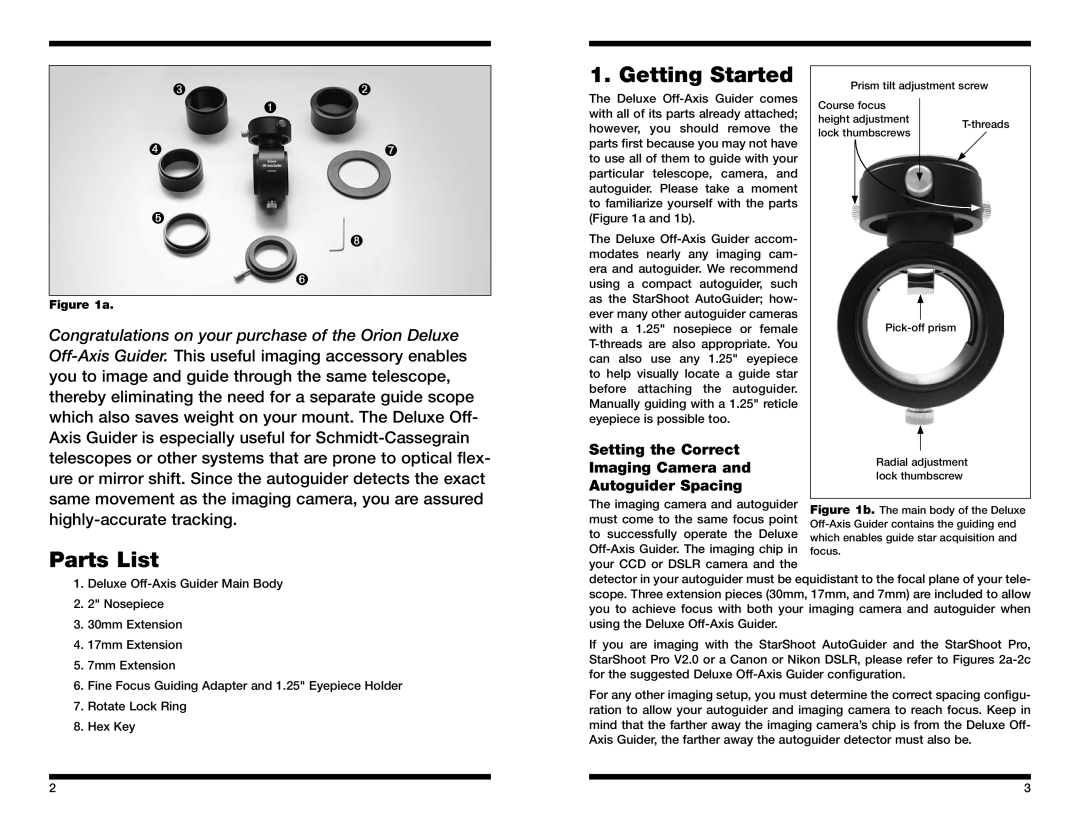
Figure 1a.
Congratulations on your purchase of the Orion Deluxe
Parts List
1.Deluxe
2.2" Nosepiece
3.30mm Extension
4.17mm Extension
5.7mm Extension
6.Fine Focus Guiding Adapter and 1.25" Eyepiece Holder
7.Rotate Lock Ring
8.Hex Key
1. Getting Started |
|
|
|
| |||
Prism tilt adjustment screw | |||||||
The Deluxe | |||||||
Course focus |
|
| |||||
|
| ||||||
with all of its parts already attached; |
|
| |||||
height adjustment |
| ||||||
however, you should remove the |
| ||||||
lock thumbscrews |
| ||||||
|
| ||||||
parts first because you may not have |
|
| |||||
|
|
|
| ||||
to use all of them to guide with your |
|
|
|
| |||
particular telescope, camera, and |
|
|
|
| |||
|
|
|
| ||||
autoguider. Please take a moment |
|
|
|
| |||
to familiarize yourself with the parts |
|
|
|
| |||
(Figure 1a and 1b). |
|
|
|
|
| ||
The Deluxe |
|
|
|
| |||
modates nearly any imaging cam- |
|
|
|
| |||
era and autoguider. We recommend |
|
|
|
| |||
using a compact autoguider, such |
|
|
|
| |||
as the StarShoot AutoGuider; how- |
|
|
|
| |||
|
|
|
| ||||
ever many other autoguider cameras |
|
|
|
| |||
with a | 1.25" nosepiece | or female |
|
| |||
|
|
|
| ||||
can also use any 1.25" eyepiece |
|
|
|
| |||
to help visually locate a guide star |
|
|
|
| |||
before | attaching the | autoguider. |
|
|
|
| |
Manually guiding with a 1.25" reticle |
|
|
|
| |||
eyepiece is possible too. |
|
|
|
|
| ||
Setting the Correct
Imaging Camera and
Autoguider Spacing
The imaging camera and autoguider must come to the same focus point to successfully operate the Deluxe
detector in your autoguider must be equidistant to the focal plane of your tele- scope. Three extension pieces (30mm, 17mm, and 7mm) are included to allow you to achieve focus with both your imaging camera and autoguider when using the Deluxe
If you are imaging with the StarShoot AutoGuider and the StarShoot Pro, StarShoot Pro V2.0 or a Canon or Nikon DSLR, please refer to Figures
For any other imaging setup, you must determine the correct spacing configu- ration to allow your autoguider and imaging camera to reach focus. Keep in mind that the farther away the imaging camera’s chip is from the Deluxe Off- Axis Guider, the farther away the autoguider detector must also be.
2 |
| 3 |