Orion® Imaging Flip Mirror | Nosepiece |
#5523
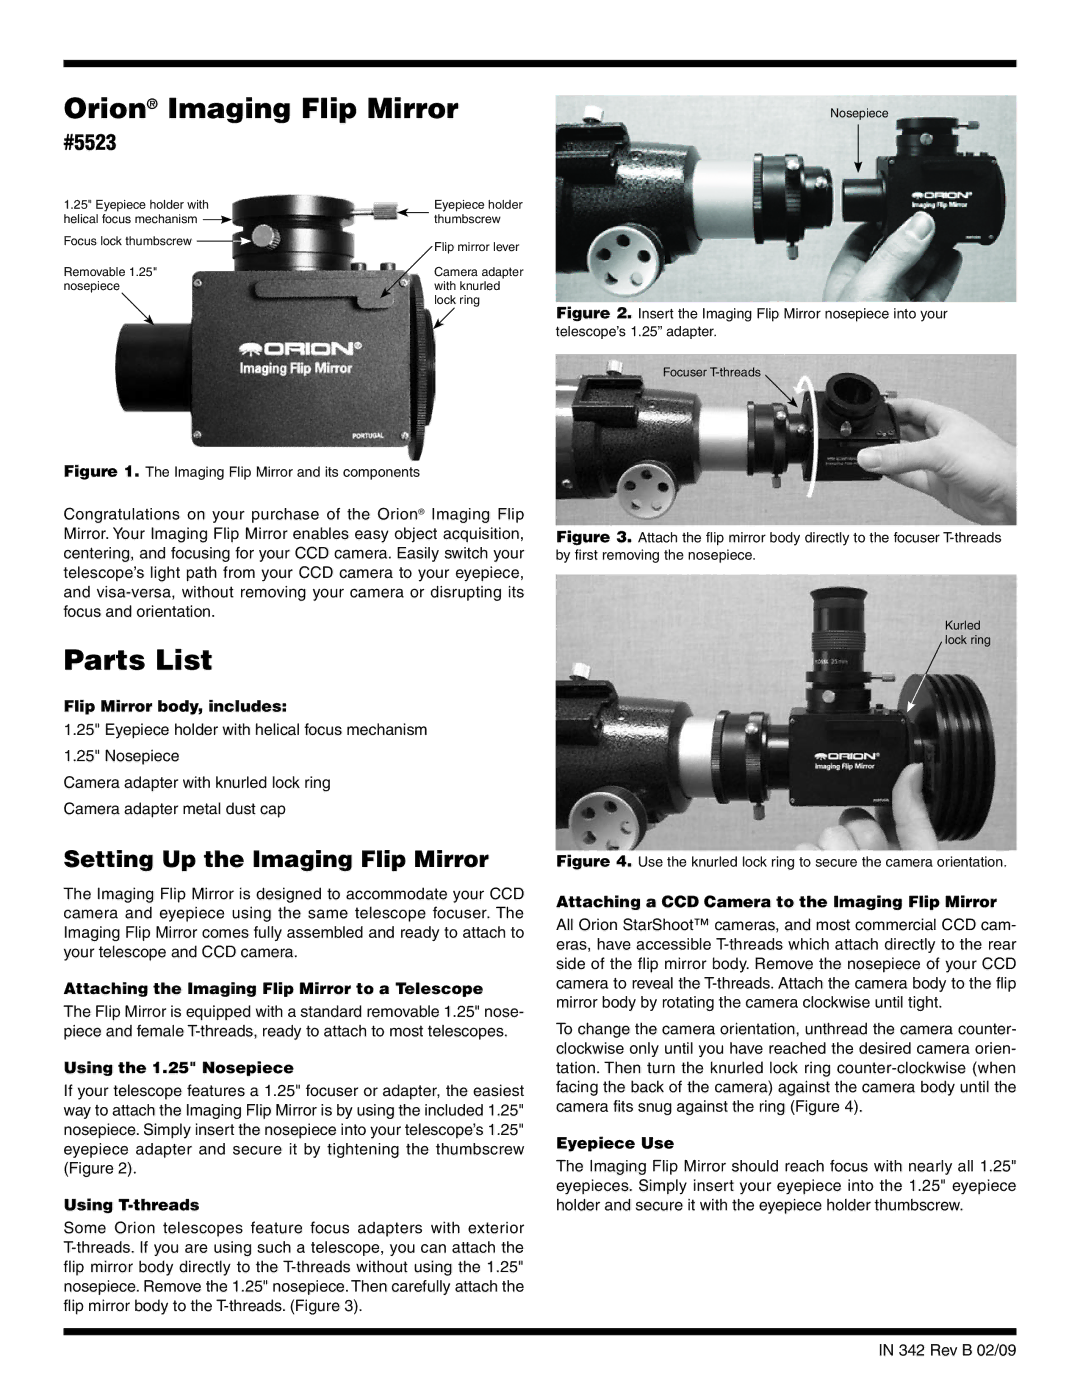
1.25" Eyepiece holder with |
|
|
| Eyepiece holder | ||
helical focus mechanism |
|
|
|
| thumbscrew | |
| ||||||
Focus lock thumbscrew |
|
|
|
| Flip mirror lever | |
|
|
|
| |||
|
|
|
|
|
| |
Removable 1.25" |
|
|
| Camera adapter | ||
nosepiece |
|
|
| with knurled | ||
|
|
|
|
|
| lock ring |
Figure 1. The Imaging Flip Mirror and its components
Congratulations on your purchase of the Orion® Imaging Flip Mirror. Your Imaging Flip Mirror enables easy object acquisition, centering, and focusing for your CCD camera. Easily switch your telescope’s light path from your CCD camera to your eyepiece, and
Parts List
Flip Mirror body, includes:
1.25" Eyepiece holder with helical focus mechanism 1.25" Nosepiece
Camera adapter with knurled lock ring Camera adapter metal dust cap
Setting Up the Imaging Flip Mirror
The Imaging Flip Mirror is designed to accommodate your CCD camera and eyepiece using the same telescope focuser. The Imaging Flip Mirror comes fully assembled and ready to attach to your telescope and CCD camera.
Attaching the Imaging Flip Mirror to a Telescope
The Flip Mirror is equipped with a standard removable 1.25" nose- piece and female
Using the 1.25" Nosepiece
If your telescope features a 1.25" focuser or adapter, the easiest way to attach the Imaging Flip Mirror is by using the included 1.25" nosepiece. Simply insert the nosepiece into your telescope’s 1.25" eyepiece adapter and secure it by tightening the thumbscrew (Figure 2).
Using T-threads
Some Orion telescopes feature focus adapters with exterior
Figure 2. Insert the Imaging Flip Mirror nosepiece into your telescope’s 1.25” adapter.
Focuser
Figure 3. Attach the flip mirror body directly to the focuser T-threads by first removing the nosepiece.
Kurled lock ring
Figure 4. Use the knurled lock ring to secure the camera orientation.
Attaching a CCD Camera to the Imaging Flip Mirror
All Orion StarShoot™ cameras, and most commercial CCD cam- eras, have accessible
To change the camera orientation, unthread the camera counter- clockwise only until you have reached the desired camera orien- tation. Then turn the knurled lock ring
Eyepiece Use
The Imaging Flip Mirror should reach focus with nearly all 1.25" eyepieces. Simply insert your eyepiece into the 1.25" eyepiece holder and secure it with the eyepiece holder thumbscrew.
IN 342 Rev B 02/09