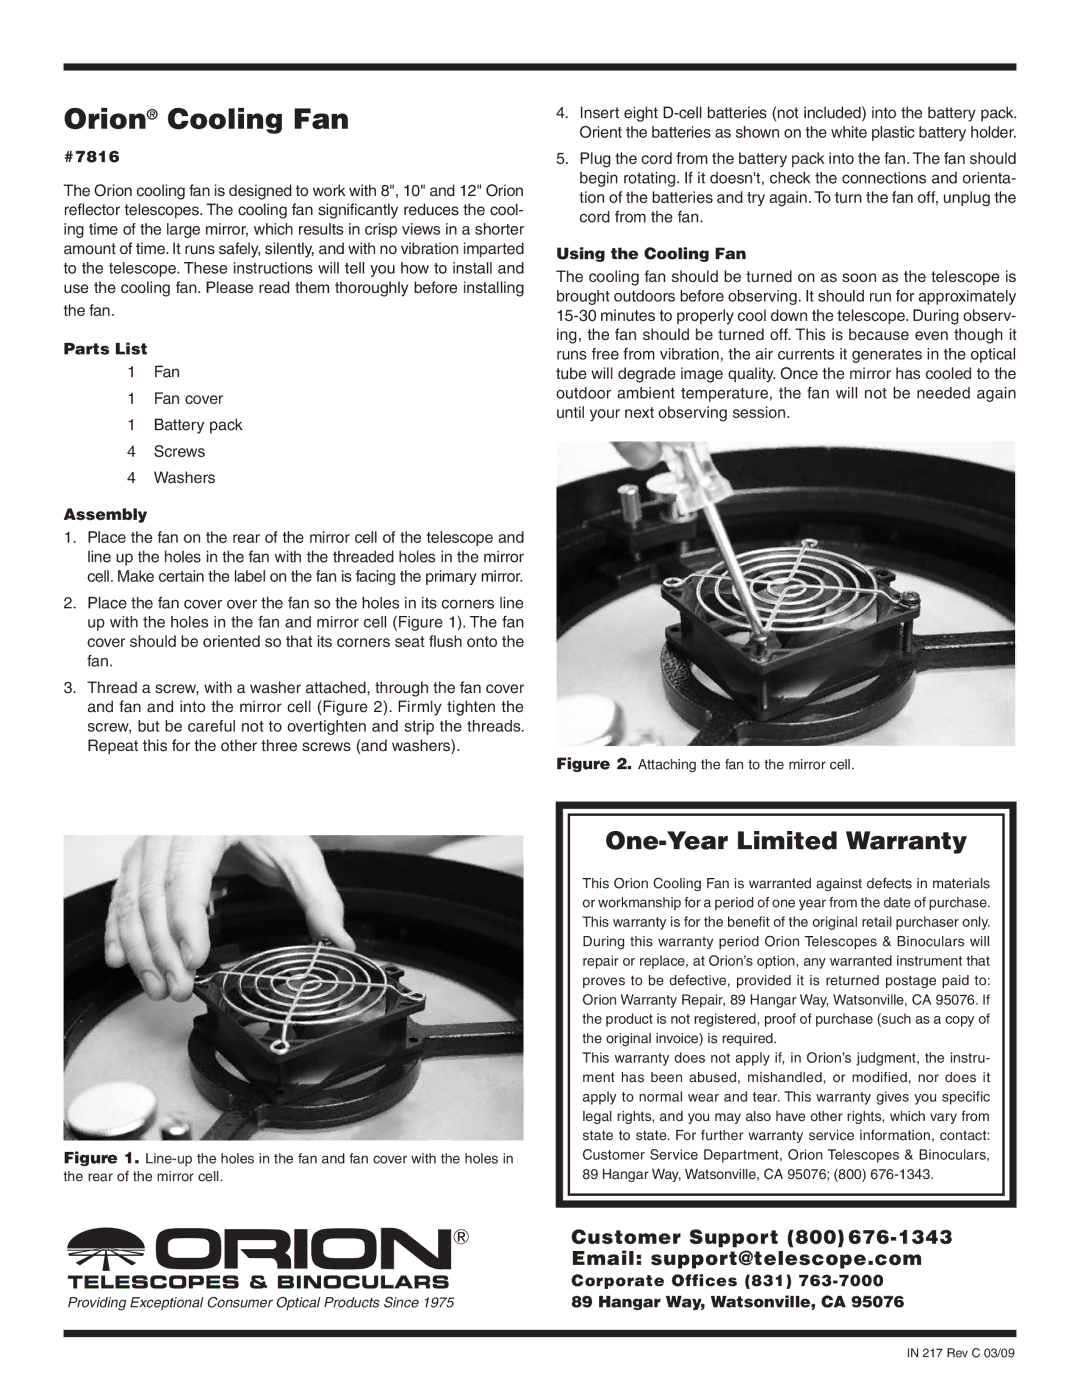
7816 specifications
Orion 7816 is a cutting-edge microprocessor card designed for a variety of applications, particularly in the fields of telecommunications, security, and IoT (Internet of Things). This smart card is known for its robust performance, durability, and enhanced security features, catering to the increasing demands of modern digital transactions.One of the main features of the Orion 7816 is its compatibility with ISO 7816 standards, which ensures that it can work seamlessly with numerous card readers and systems worldwide. This standardization makes it an ideal choice for organizations looking for a reliable and versatile smart card solution. The card supports both contact-based and contactless interfaces, allowing for diverse applications, from secure access control to mobile payments.
In terms of technology, the Orion 7816 incorporates advanced cryptographic algorithms, such as AES (Advanced Encryption Standard) and RSA (Rivest–Shamir–Adleman), providing a high level of data protection and ensuring that sensitive information remains secure. The card includes a secure microprocessor that is resistant to tampering and hacking attempts, making it suitable for applications requiring stringent security measures.
The Orion 7816 also boasts an impressive memory capacity, offering sufficient space for storing applications, user data, and security keys. This feature enables it to support multiple applications on a single card, making it a cost-effective solution for organizations looking to streamline their operations.
Furthermore, the card's durability is noteworthy. Made from high-quality materials, the Orion 7816 is resistant to wear and tear, ensuring its longevity even in demanding environments. Its operating temperature range and resilience against physical damage contribute to its reliability, making it an ideal choice for industries where cards are frequently used, such as transportation and retail.
Compatibility with various software platforms enhances the Orion 7816's flexibility, allowing for easy integration into existing systems. This interoperability is crucial for businesses that aim to adopt smart card technology without extensive overhauls of their infrastructure.
In summary, the Orion 7816 is a versatile and secure microprocessor card designed for a range of applications. Its adherence to ISO 7816 standards, advanced security features, significant memory capacity, and durability make it a leading choice in the smart card market, poised to meet the evolving demands of digital security and identity management in a rapidly advancing technological landscape.