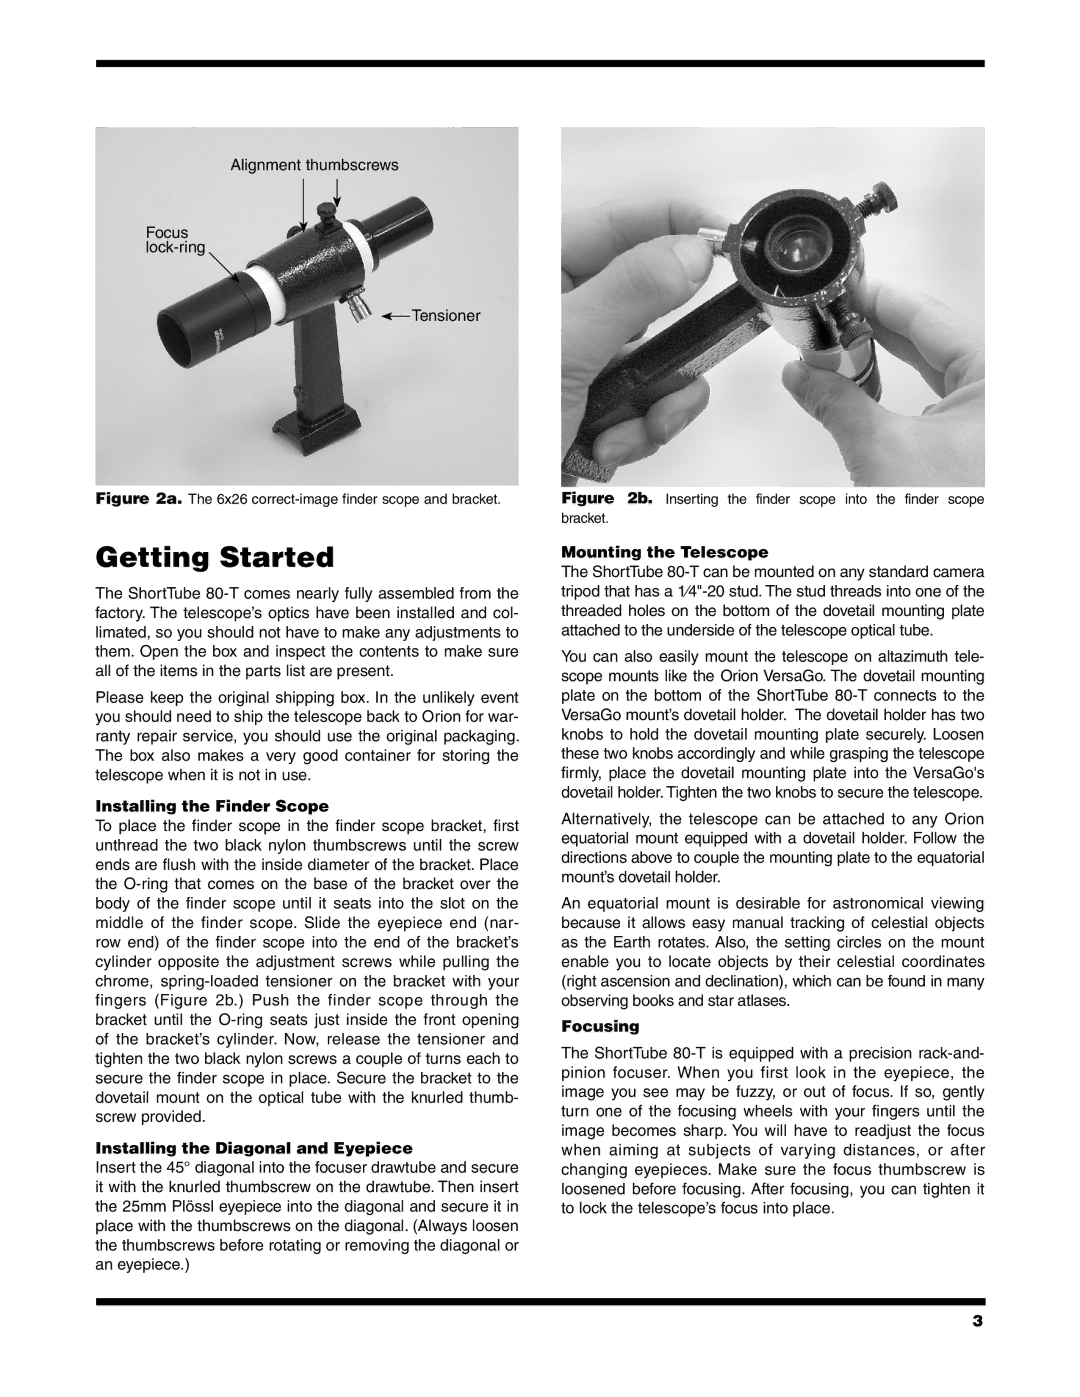
Alignment thumbscrews
Focus lock‑ring
 Tensioner
Figure 2a. The 6x26 correct-image finder scope and bracket.
Getting Started
The ShortTube 80-T comes nearly fully assembled from the factory. The telescope’s optics have been installed and col- limated, so you should not have to make any adjustments to them. Open the box and inspect the contents to make sure all of the items in the parts list are present.
Please keep the original shipping box. In the unlikely event you should need to ship the telescope back to Orion for war- ranty repair service, you should use the original packaging. The box also makes a very good container for storing the telescope when it is not in use.
Installing the Finder Scope
To place the finder scope in the finder scope bracket, first unthread the two black nylon thumbscrews until the screw ends are flush with the inside diameter of the bracket. Place the O-ring that comes on the base of the bracket over the body of the finder scope until it seats into the slot on the middle of the finder scope. Slide the eyepiece end (nar- row end) of the finder scope into the end of the bracket’s cylinder opposite the adjustment screws while pulling the chrome, spring-loaded tensioner on the bracket with your fingers (Figure 2b.) Push the finder scope through the bracket until the O-ring seats just inside the front opening of the bracket’s cylinder. Now, release the tensioner and tighten the two black nylon screws a couple of turns each to secure the finder scope in place. Secure the bracket to the dovetail mount on the optical tube with the knurled thumb- screw provided.
Installing the Diagonal and Eyepiece
Insert the 45° diagonal into the focuser drawtube and secure it with the knurled thumbscrew on the drawtube. Then insert the 25mm Plössl eyepiece into the diagonal and secure it in place with the thumbscrews on the diagonal. (Always loosen the thumbscrews before rotating or removing the diagonal or an eyepiece.)
Figure 2b. Inserting the finder scope into the finder scope bracket.
Mounting the Telescope
The ShortTube 80-T can be mounted on any standard camera tripod that has a 1⁄4"-20 stud. The stud threads into one of the threaded holes on the bottom of the dovetail mounting plate attached to the underside of the telescope optical tube.
You can also easily mount the telescope on altazimuth tele- scope mounts like the Orion VersaGo. The dovetail mounting plate on the bottom of the ShortTube 80-T connects to the VersaGo mount’s dovetail holder. The dovetail holder has two knobs to hold the dovetail mounting plate securely. Loosen these two knobs accordingly and while grasping the telescope firmly, place the dovetail mounting plate into the VersaGo's dovetail holder. Tighten the two knobs to secure the telescope.
Alternatively, the telescope can be attached to any Orion equatorial mount equipped with a dovetail holder. Follow the directions above to couple the mounting plate to the equatorial mount’s dovetail holder.
An equatorial mount is desirable for astronomical viewing because it allows easy manual tracking of celestial objects as the Earth rotates. Also, the setting circles on the mount enable you to locate objects by their celestial coordinates (right ascension and declination), which can be found in many observing books and star atlases.
Focusing
The ShortTube 80-T is equipped with a precision rack-and- pinion focuser. When you first look in the eyepiece, the image you see may be fuzzy, or out of focus. If so, gently turn one of the focusing wheels with your fingers until the image becomes sharp. You will have to readjust the focus when aiming at subjects of varying distances, or after changing eyepieces. Make sure the focus thumbscrew is loosened before focusing. After focusing, you can tighten it to lock the telescope’s focus into place.