1 Soft carry case
3Assembly tools (small wrench, Phillips head
screwdriver, triangular assembly tool)
3Leg attachment screws
3Leg lock knobs
3. Assembly
1.Lay the equatorial mount on its side. Attach the tripod legs, one at a time, to the base of the mount by sliding a tripod leg attachment screw through the top of a leg and through the holes in the base of the mount. The washers should be on the outside of the tripod legs. Secure the wing nuts
2.Install and tighten the leg lock knobs on the bottom braces of the tripod legs. For now, keep the legs at their shortest (fully retracted) length; you can extend them to a more desirable length later, after the tripod is completely assembled.
3.With the tripod legs now attached to the mount, stand the tripod upright (be careful!) and spread the legs apart enough to connect each end of the accessory tray brack‑ et to the attachment point on each leg. Use the screw and lock nut that come installed in each attachment point to do this. First, remove the screw using the supplied screw‑ driver and triangular assembly tool; hold the lock nut with the triangular assembly tool while turning the screw with the screwdriver. Then, line up one of the ends of the bracket with the attachment point and reinstall the screw.
4.Now, with the accessory tray bracket attached, spread the tripod legs apart as far as they will go, until the bracket is taut. Connect the accessory tray to the accessory tray bracket with the three wing screws already installed in the tray. This is done by pushing the wing screws up through the holes in the accessory tray bracket and threading them into the holes in the accessory tray.
5.Tighten the screws at the tops of the tripod legs, so the legs are securely fastened to the mount. Use the provided screwdriver and your fingers to do this.
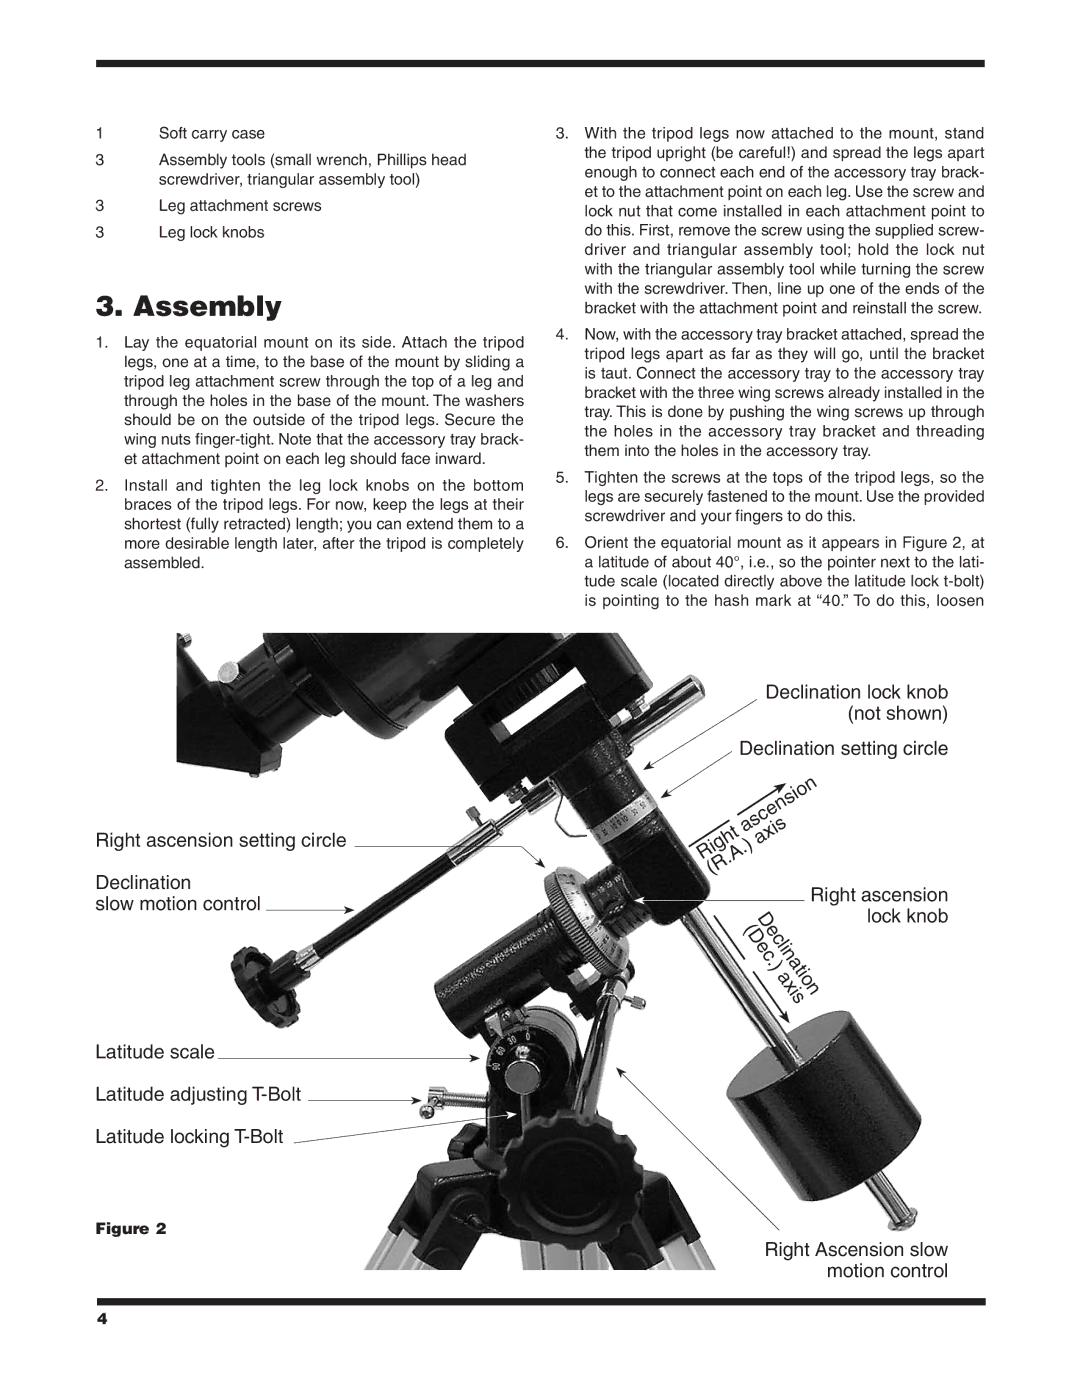
6.Orient the equatorial mount as it appears in Figure 2, at a latitude of about 40°, i.e., so the pointer next to the lati‑ tude scale (located directly above the latitude lock
Right ascension setting circle
Declination
slow motion control ![]()
Latitude scale
Latitude adjusting ![]() Latitude locking
Latitude locking ![]()
Figure 2
Declination lock knob (not shown)
Declination setting circle
| ascension | |
Right. |
| axis |
) | ||
. |
| |
A |
| |
(R |
|
|
Right ascension lock knob
(Dec Declination. )
axis
Right Ascension slow motion control
4