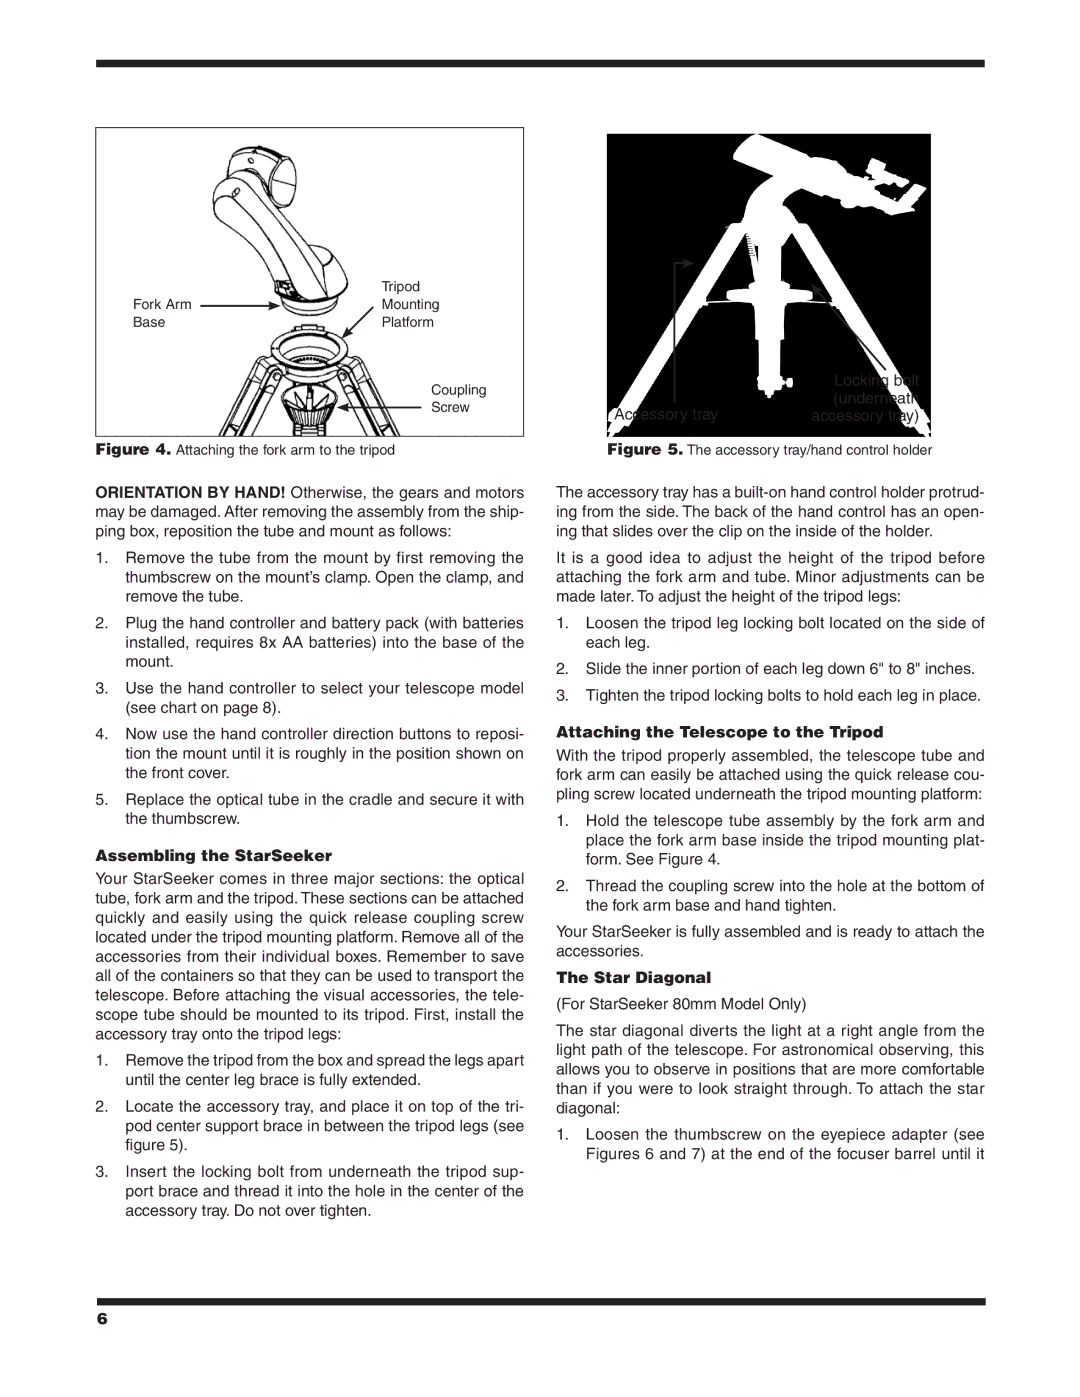
9536, 9535, 9533 specifications
Orion 9533, 9535, and 9536 are advanced devices that showcase a remarkable integration of innovative technologies and user-centric features, setting a new standard in their respective market segments. These models are designed to cater to various applications in both commercial and industrial settings, ensuring that users get the most out of their investment.One of the main features of the Orion 9533, 9535, and 9536 is their robust design. Built to withstand challenging environments, these models feature durable housings that protect internal components from dust, moisture, and temperature fluctuations. This ruggedness makes them ideal for applications in manufacturing, logistics, and outdoor settings, where traditional devices might falter.
In terms of technology, the Orion series incorporates advanced connectivity options. They support multiple communication protocols including Wi-Fi, Bluetooth, and Ethernet, enabling seamless integration into existing networks. This connectivity allows for real-time data transmission and monitoring, facilitating efficient operations and timely decision-making. Additionally, these devices come equipped with cloud capabilities, enabling users to access data from anywhere, enhancing remote management and analysis.
The user interface of the Orion 9533, 9535, and 9536 is designed with simplicity and efficiency in mind. Featuring intuitive touchscreens and customizable dashboards, users can easily navigate through various functions and settings. The devices also support multiple languages, making them accessible to a global audience.
Performance-wise, these models are powered by high-efficiency processors that ensure swift data processing and responsive operation. This ensures that users do not experience lag during demanding tasks. The Orion series also boasts impressive battery life, combining energy-efficient technology with powerful performance, allowing for extended use without frequent recharging.
Another key characteristic of the Orion 9533, 9535, and 9536 is their versatility. They come equipped with a variety of sensors and ports, which enable compatibility with a wide range of peripherals and accessories. This makes them suitable for various applications, from data collection and analysis to real-time monitoring and control systems.
In summary, Orion 9533, 9535, and 9536 are a fusion of durability, cutting-edge technology, and user-focused design. Their advanced features and capabilities make them valuable tools for businesses looking to enhance productivity, ensure reliability, and streamline operations across various industries.