Getting Started
The Apex telescopes come nearly fully assembled from the factory. The optics have been installed and collimated, so you should not have to make any adjustments to them. Open the box and inspect the contents to make sure all of the parts listed above are present. Refer to Figure 1 to see what the parts look like, and how they will connect togther; the Apex 102mm is shown, but all models have similar components.
Please keep the original shipping box. In the unlikely event you should need to ship the telescope back to Orion for war- ranty repair service, you should use the original packaging. The box also makes a very good container for storing the tele- scope when it is not in use.
Alignment thumb screw (3)
Finder scope eyepiece
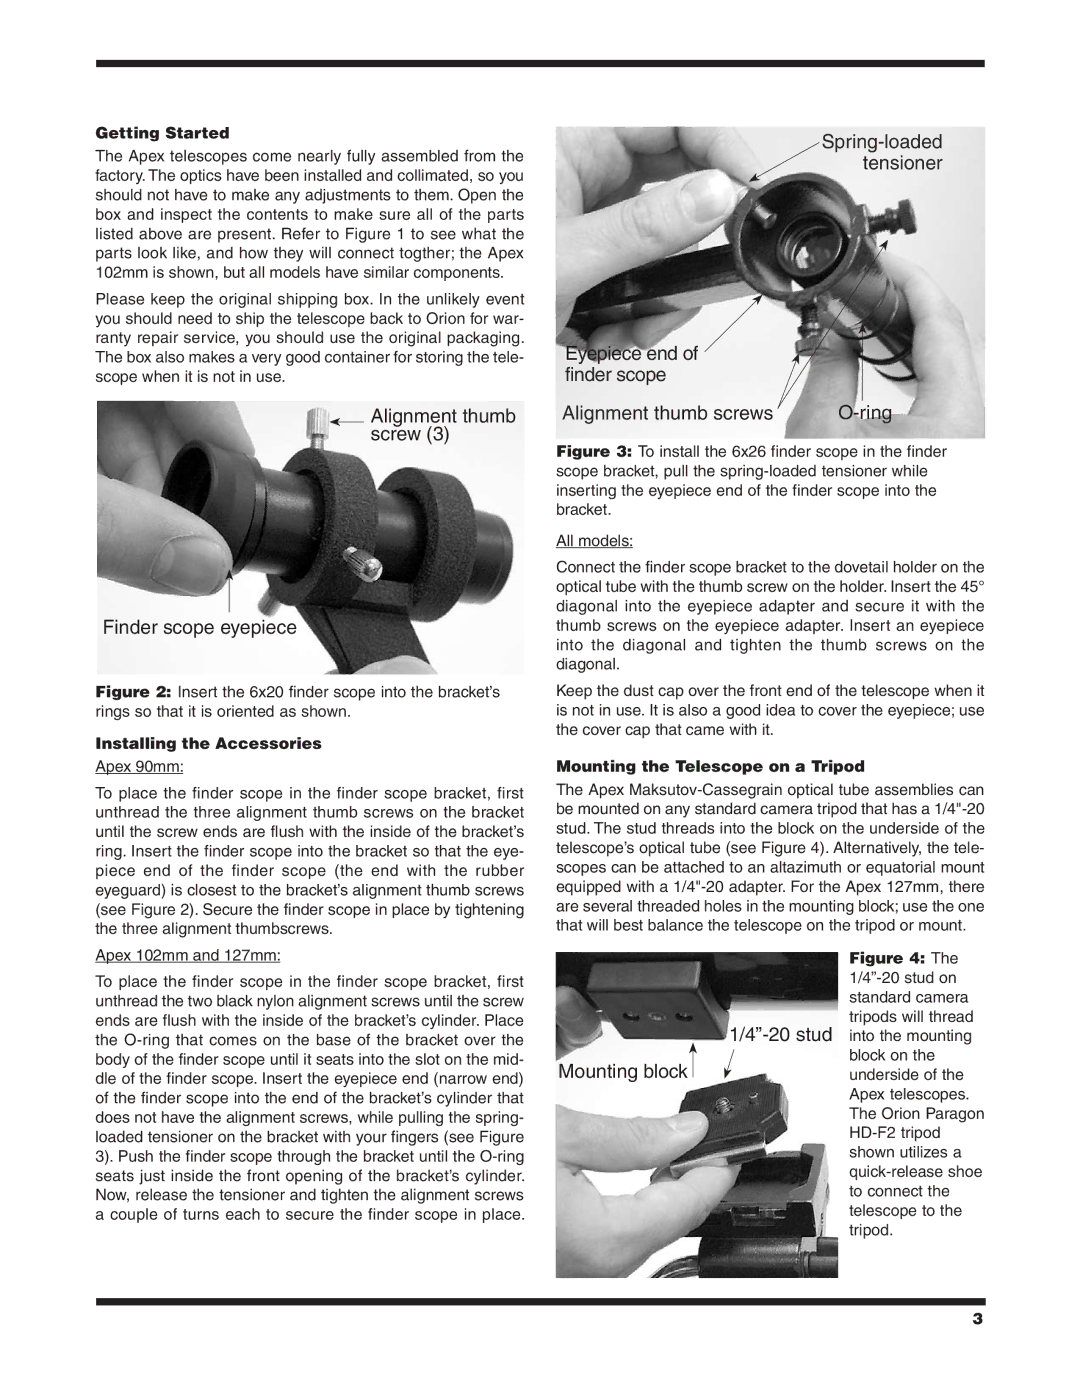
Figure 2: Insert the 6x20 finder scope into the bracket’s rings so that it is oriented as shown.
Installing the Accessories
Apex 90mm:
To place the finder scope in the finder scope bracket, first unthread the three alignment thumb screws on the bracket until the screw ends are flush with the inside of the bracket’s ring. Insert the finder scope into the bracket so that the eye- piece end of the finder scope (the end with the rubber eyeguard) is closest to the bracket’s alignment thumb screws (see Figure 2). Secure the finder scope in place by tightening the three alignment thumbscrews.
Eyepiece end of ![]() finder scope
finder scope
Alignment thumb screws |
Figure 3: To install the 6x26 finder scope in the finder scope bracket, pull the spring-loaded tensioner while inserting the eyepiece end of the finder scope into the bracket.
All models:
Connect the finder scope bracket to the dovetail holder on the optical tube with the thumb screw on the holder. Insert the 45° diagonal into the eyepiece adapter and secure it with the thumb screws on the eyepiece adapter. Insert an eyepiece into the diagonal and tighten the thumb screws on the diagonal.
Keep the dust cap over the front end of the telescope when it is not in use. It is also a good idea to cover the eyepiece; use the cover cap that came with it.
Mounting the Telescope on a Tripod
The Apex
Apex 102mm and 127mm:
To place the finder scope in the finder scope bracket, first unthread the two black nylon alignment screws until the screw ends are flush with the inside of the bracket’s cylinder. Place the
Mounting block
Figure 4: The 1/4”-20 stud on standard camera
tripods will thread
block on the
underside of the Apex telescopes. The Orion Paragon
3
