Congratulations on your purchase of an Orion
Unpacking Your Scope
Use case when unpacking the shipping carton. We recom- mend keeping the boxes and all original packaging materi- als. In the event that the telescope needs to be shipped to another location, or returned for warranty repair, having the proper packaging will ensure that your telescope will survive the journey intact. Returns for refund or exchange will not be accepted without the original packaging.
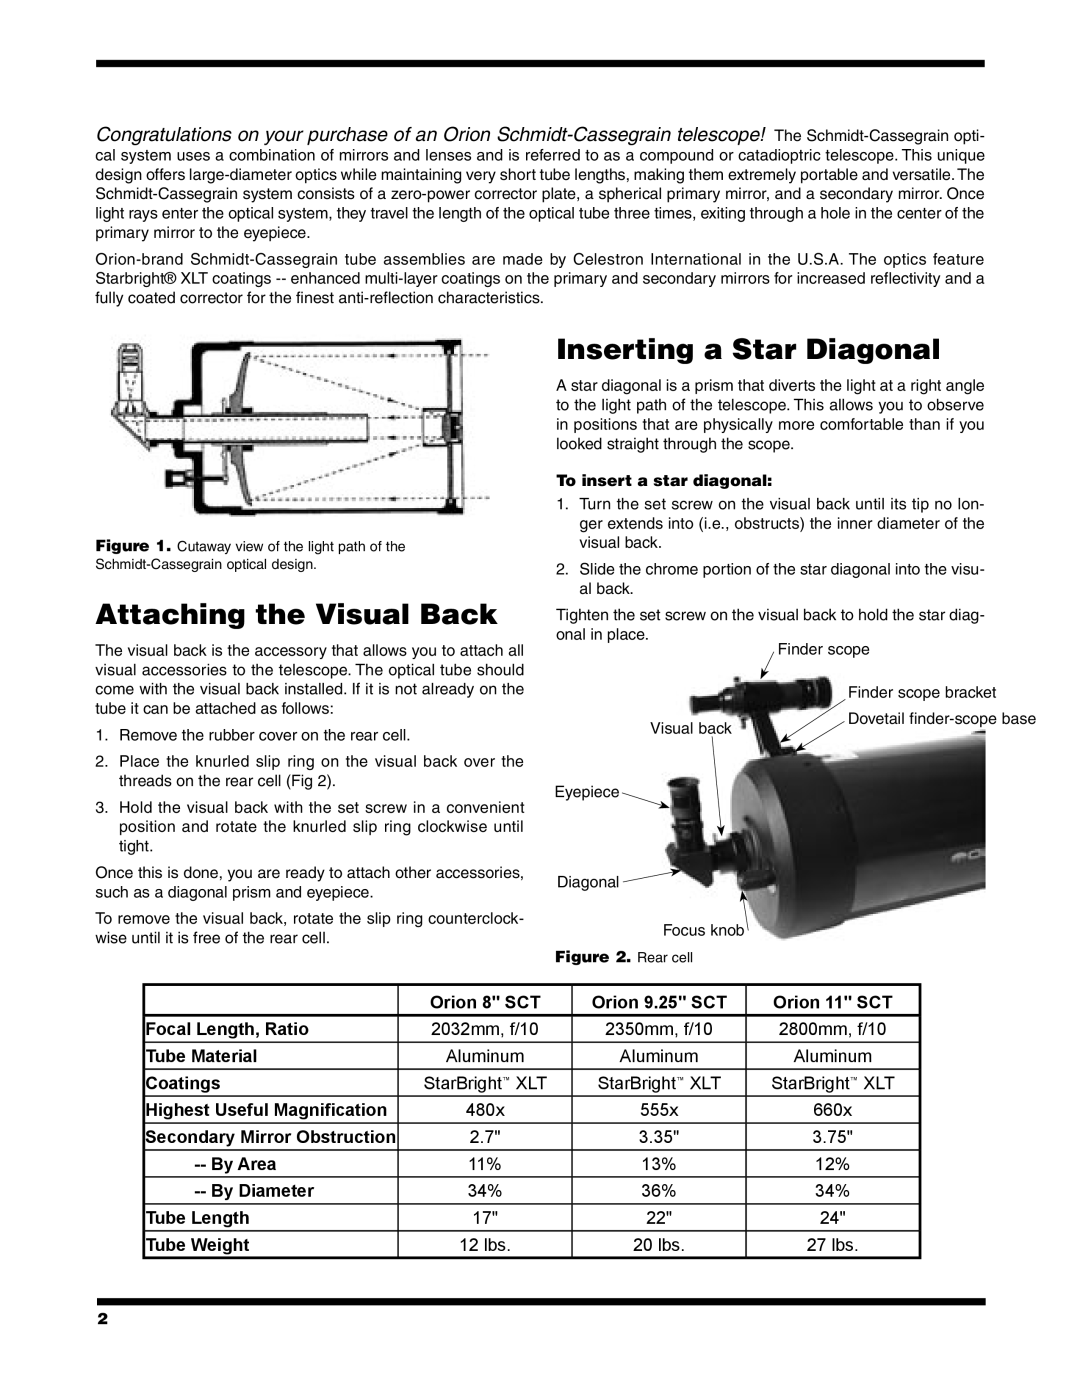
Figure 1. Cutaway view of the light path of the
Schmidt-Cassegrain optical design.
Attaching the Visual Back
The visual back is the accessory that allows you to attach all visual accessories to the telescope. The optical tube should come with the visual back installed. If it is not already on the tube it can be attached as follows:
1.Remove the rubber cover on the rear cell.
2.Place the knurled slip ring on the visual back over the threads on the rear cell (Fig 2).
3.Hold the visual back with the set screw in a convenient position and rotate the knurled slip ring clockwise until tight.
Once this is done, you are ready to attach other accessories, such as a diagonal prism and eyepiece.
To remove the visual back, rotate the slip ring counterclock- wise until it is free of the rear cell.
Inserting a Star Diagonal
A star diagonal is a prism that diverts the light at a right angle to the light path of the telescope. This allows you to observe in positions that are physically more comfortable than if you looked straight through the scope.
To insert a star diagonal:
1.Turn the set screw on the visual back until its tip no lon- ger extends into (i.e., obstructs) the inner diameter of the visual back.
2.Slide the chrome portion of the star diagonal into the visu- al back.
Tighten the set screw on the visual back to hold the star diag-
onal in place.
Finder scope
| Finder scope bracket |
Visual back | Dovetail |
|
Eyepiece
Diagonal ![]()
Focus knob![]()
Figure 2. Rear cell
| Orion 8" SCT | Orion 9.25" SCT | Orion 11" SCT |
Focal Length, Ratio | 2032mm, f/10 | 2350mm, f/10 | 2800mm, f/10 |
|
|
|
|
Tube Material | Aluminum | Aluminum | Aluminum |
|
|
|
|
Coatings | StarBright™ XLT | StarBright™ XLT | StarBright™ XLT |
|
|
|
|
Highest Useful Magnification | 480x | 555x | 660x |
|
|
|
|
Secondary Mirror Obstruction | 2.7" | 3.35" | 3.75" |
|
|
|
|
11% | 13% | 12% | |
|
|
|
|
34% | 36% | 34% | |
|
|
|
|
Tube Length | 17" | 22" | 24" |
|
|
|
|
Tube Weight | 12 lbs. | 20 lbs. | 27 lbs. |
|
|
|
|
2