Inserting an Eyepiece
An eyepiece magnifies the image focused by the telescope. The eyepiece fits into either the visual back directly or the star diagonal. To install an eyepiece:
1.Loosen the set screw on the star diagonal until the tip no longer extends into the inner diameter of the eyepiece end of the diagonal.
2.Slide the chrome portion of the eyepiece into the star diag- onal.
3.Tighten the set screw on the star diagonal to hold the eye- piece in place.
To remove the eyepiece, loosen the setscrew on the star diagonal and slide the eyepiece out. You can replace it with another eyepiece (purchased separately).
Eyepieces are commonly referred to by focal length and bar- rel diameter. The focal length of each eyepiece is printed on the eyepiece barrel. The longer the focal length (i.e., the larger the number) the lower the eyepiece magnification, the shorter the focal length (i.e., the smaller the number) the higher the magnification. Generally, you will use low to moderate pow- ers when viewing. For more information on how to determine power, see the section on “Calculating Magnification.”
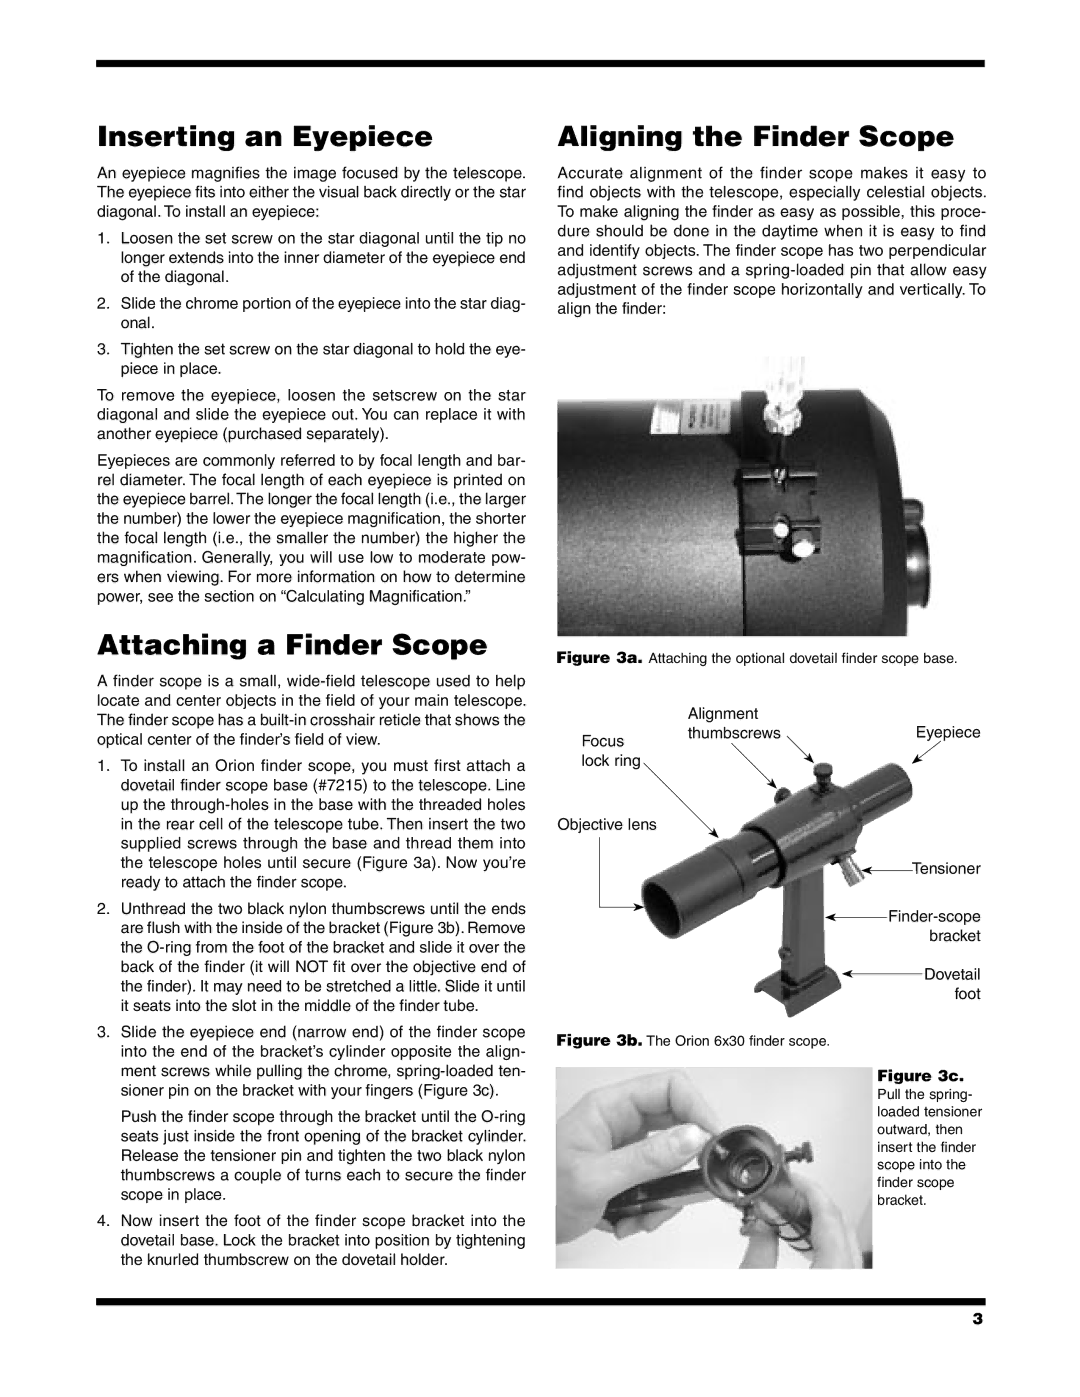
Attaching a Finder Scope
A finder scope is a small,
1.To install an Orion finder scope, you must first attach a dovetail finder scope base (#7215) to the telescope. Line up the
2.Unthread the two black nylon thumbscrews until the ends are flush with the inside of the bracket (Figure 3b). Remove the
3.Slide the eyepiece end (narrow end) of the finder scope into the end of the bracket’s cylinder opposite the align- ment screws while pulling the chrome,
Push the finder scope through the bracket until the
4.Now insert the foot of the finder scope bracket into the dovetail base. Lock the bracket into position by tightening the knurled thumbscrew on the dovetail holder.
Aligning the Finder Scope
Accurate alignment of the finder scope makes it easy to find objects with the telescope, especially celestial objects. To make aligning the finder as easy as possible, this proce- dure should be done in the daytime when it is easy to find and identify objects. The finder scope has two perpendicular adjustment screws and a
Figure 3a. Attaching the optional dovetail finder scope base.
| Alignment |
|
|
|
| ||
Focus | thumbscrews |
|
| Eyepiece | |||
|
|
|
|
|
|
| |
lock ring |
|
|
|
|
|
|
|
Objective lens |
|
|
|
|
|
|
|
|
|
|
|
|
| Tensioner | |
|
|
|
|
|
| ||
|
|
|
|
| |||
|
|
|
|
| |||
|
|
|
|
|
|
| bracket |
|
|
|
|
|
|
| Dovetail |
|
|
|
|
|
|
| |
|
|
|
|
|
|
| foot |
Figure 3b. The Orion 6x30 finder scope. |
|
|
|
| |||
|
|
|
| Figure 3c. | |||
|
|
|
| Pull the spring- | |||
|
|
|
| loaded tensioner | |||
|
|
|
| outward, then | |||
|
|
|
| insert the finder | |||
|
|
|
| scope into the | |||
|
|
|
| finder scope | |||
|
|
|
| bracket. | |||
3