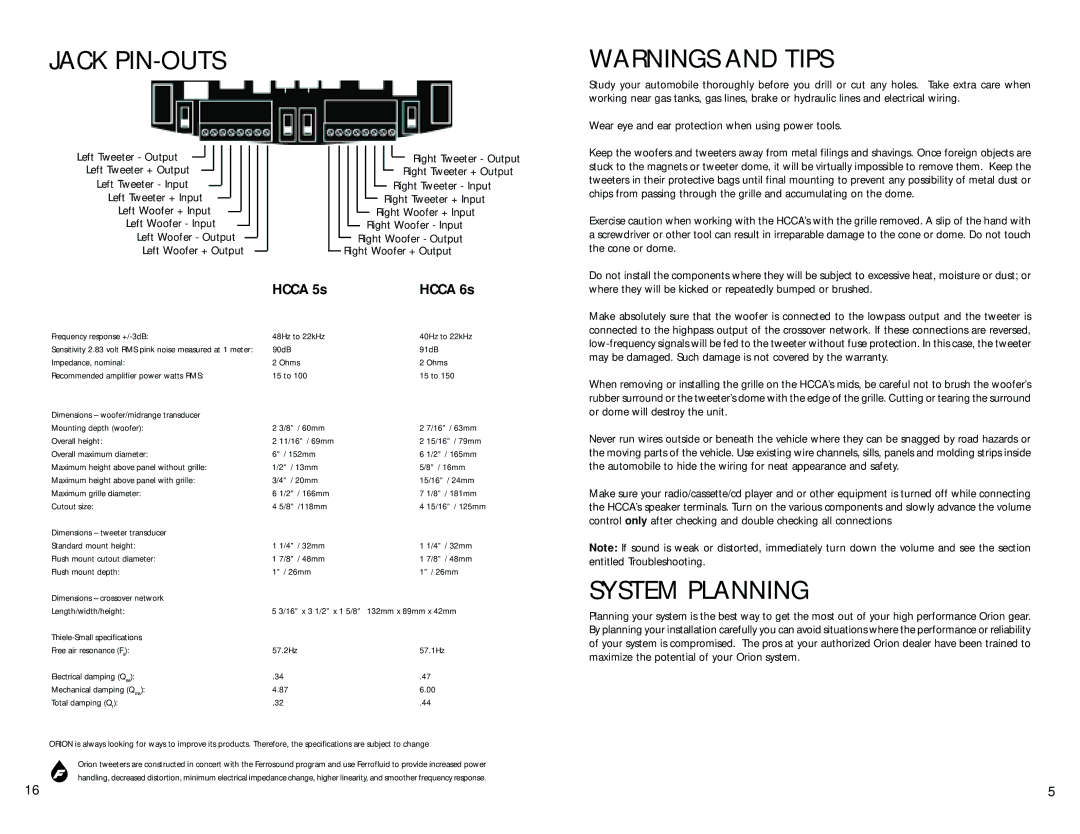
JACK PIN-OUTS
WARNINGS AND TIPS
Study your automobile thoroughly before you drill or cut any holes. Take extra care when working near gas tanks, gas lines, brake or hydraulic lines and electrical wiring.
Wear eye and ear protection when using power tools.
Left Tweeter - Output
Left Tweeter + Output
Left Tweeter - Input
Left Tweeter + Input
Left Woofer + Input
Left Woofer - Input
Left Woofer - Output
Left Woofer + Output
Right Tweeter - Output
Right Tweeter + Output
Right Tweeter - Input
Right Tweeter + Input
Right Woofer + Input
Right Woofer - Input
Right Woofer - Output
Right Woofer + Output
Keep the woofers and tweeters away from metal filings and shavings. Once foreign objects are stuck to the magnets or tweeter dome, it will be virtually impossible to remove them. Keep the tweeters in their protective bags until final mounting to prevent any possibility of metal dust or chips from passing through the grille and accumulating on the dome.
Exercise caution when working with the HCCA’s with the grille removed. A slip of the hand with a screwdriver or other tool can result in irreparable damage to the cone or dome. Do not touch the cone or dome.
| HCCA 5s | HCCA 6s | ||
Frequency response | 48Hz to 22kHz | 40Hz to 22kHz | ||
Sensitivity 2.83 volt RMS pink noise measured at 1 meter: | 90dB | 91dB | ||
Impedance, nominal: | 2 | Ohms | 2 | Ohms |
Recommended amplifier power watts RMS: | 15 to 100 | 15 to 150 | ||
Dimensions – woofer/midrange transducer |
|
|
|
|
Mounting depth (woofer): | 2 | 3/8” / 60mm | 2 | 7/16” / 63mm |
Overall height: | 2 | 11/16” / 69mm | 2 | 15/16” / 79mm |
Overall maximum diameter: | 6” / 152mm | 6 | 1/2” / 165mm | |
Maximum height above panel without grille: | 1/2” / 13mm | 5/8” / 16mm | ||
Maximum height above panel with grille: | 3/4” / 20mm | 15/16” / 24mm | ||
Maximum grille diameter: | 6 | 1/2” / 166mm | 7 | 1/8” / 181mm |
Cutout size: | 4 5/8” /118mm | 4 | 15/16” / 125mm | |
Dimensions – tweeter transducer |
|
|
|
|
Standard mount height: | 1 | 1/4” / 32mm | 1 | 1/4” / 32mm |
Flush mount cutout diameter: | 1 | 7/8” / 48mm | 1 | 7/8” / 48mm |
Flush mount depth: | 1” / 26mm | 1” / 26mm | ||
Dimensions – crossover network |
|
|
|
|
Length/width/height: | 5 3/16” x 3 1/2” x 1 5/8” | 132mm x 89mm x 42mm | ||
|
|
|
| |
Free air resonance (Fs): | 57.2Hz | 57.1Hz | ||
Electrical damping (Qes): | .34 | .47 | ||
Mechanical damping (Qms): | 4.87 | 6.00 | ||
Total damping (Qt): | .32 | .44 | ||
ORION is always looking for ways to improve its products. Therefore, the specifications are subject to change
Orion tweeters are constructed in concert with the Ferrosound program and use Ferrofluid to provide increased power handling, decreased distortion, minimum electrical impedance change, higher linearity, and smoother frequency response.
Do not install the components where they will be subject to excessive heat, moisture or dust; or where they will be kicked or repeatedly bumped or brushed.
Make absolutely sure that the woofer is connected to the lowpass output and the tweeter is connected to the highpass output of the crossover network. If these connections are reversed,
When removing or installing the grille on the HCCA’s mids, be careful not to brush the woofer’s rubber surround or the tweeter’s dome with the edge of the grille. Cutting or tearing the surround or dome will destroy the unit.
Never run wires outside or beneath the vehicle where they can be snagged by road hazards or the moving parts of the vehicle. Use existing wire channels, sills, panels and molding strips inside the automobile to hide the wiring for neat appearance and safety.
Make sure your radio/cassette/cd player and or other equipment is turned off while connecting the HCCA’s speaker terminals. Turn on the various components and slowly advance the volume control only after checking and double checking all connections
Note: If sound is weak or distorted, immediately turn down the volume and see the section entitled Troubleshooting.
SYSTEM PLANNING
Planning your system is the best way to get the most out of your high performance Orion gear. By planning your installation carefully you can avoid situations where the performance or reliability of your system is compromised. The pros at your authorized Orion dealer have been trained to maximize the potential of your Orion system.
16 | 5 |
