Step 5: Install tweeter in flush mount housing.
Step 6: Connect the speaker wires observing the correct polarity.
Step 7: Install tweeter and housing in the hole cut for mounting, so that the trim ring is flat with the front of the surface.
Step 8: Use the supplied X bracket & screw to secure the housing to the surface.
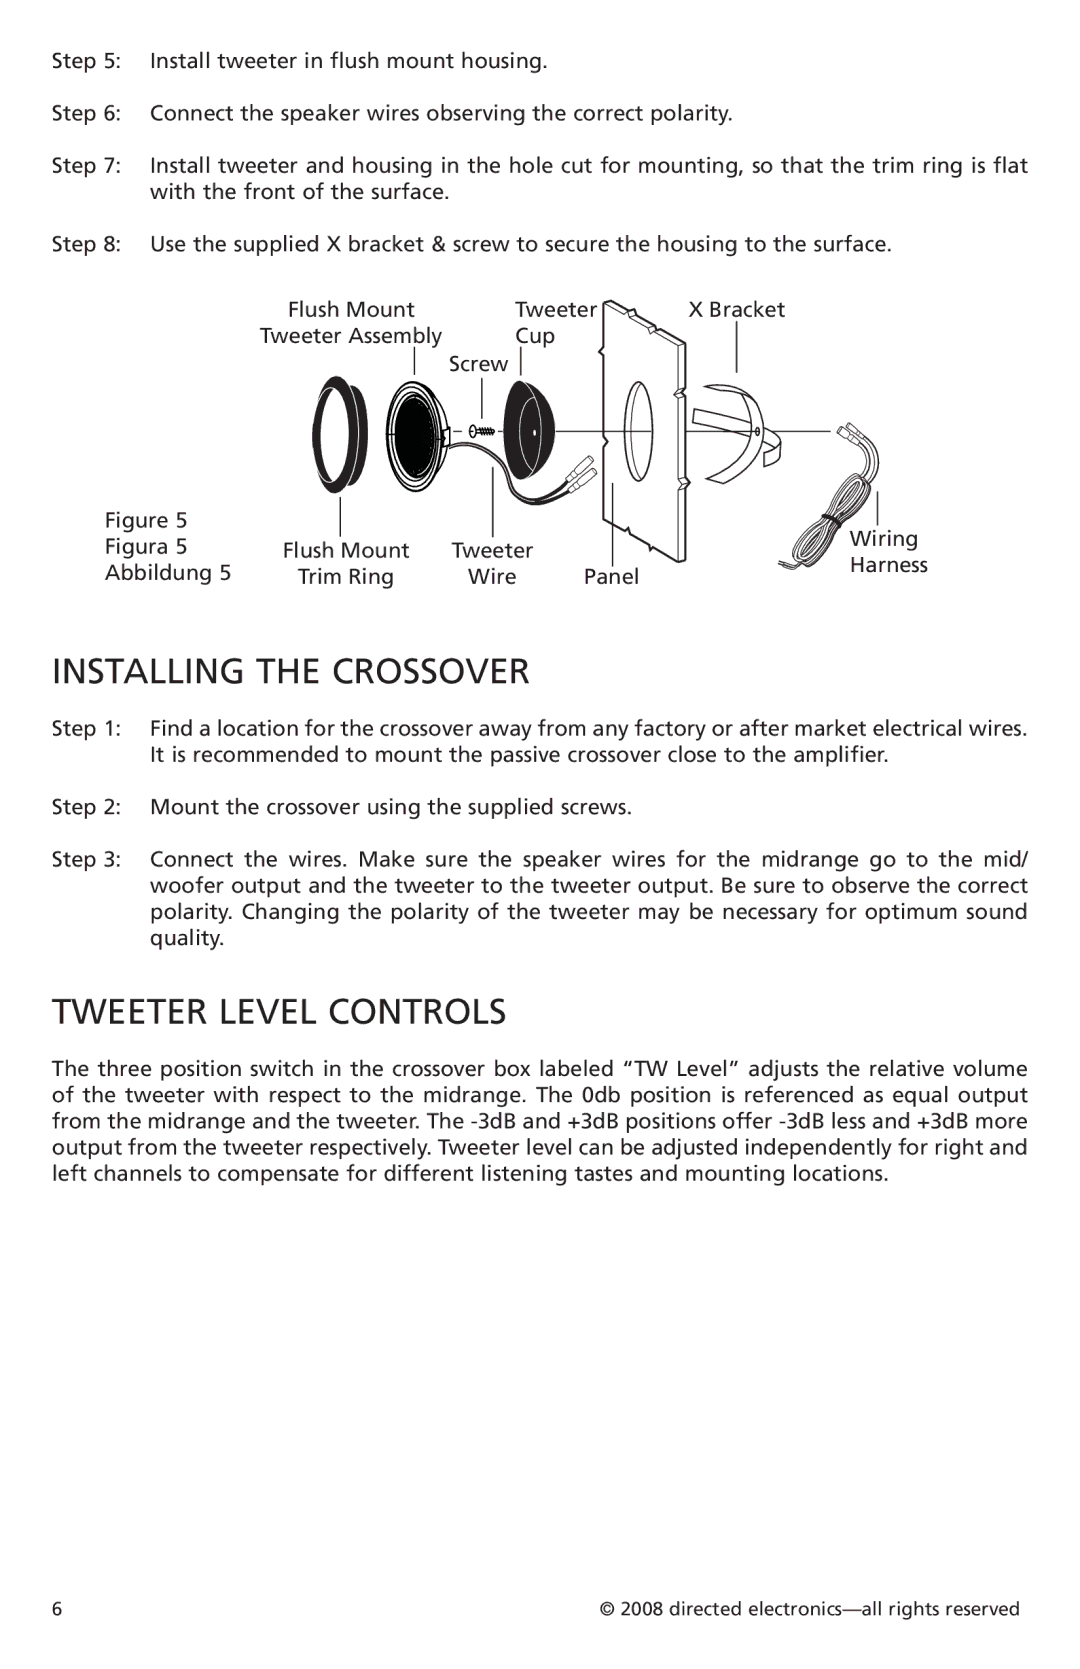
Flush Mount | Tweeter | X Bracket |
Tweeter Assembly | Cup |
|
| Screw |
|
Figure 5 |
|
|
| Wiring | |
Figura 5 | Flush Mount | Tweeter |
| ||
| Harness | ||||
Abbildung 5 | Trim Ring | Wire | Panel | ||
|
INSTALLING THE CROSSOVER
Step 1: Find a location for the crossover away from any factory or after market electrical wires. It is recommended to mount the passive crossover close to the amplifier.
Step 2: Mount the crossover using the supplied screws.
Step 3: Connect the wires. Make sure the speaker wires for the midrange go to the mid/ woofer output and the tweeter to the tweeter output. Be sure to observe the correct polarity. Changing the polarity of the tweeter may be necessary for optimum sound quality.
TWEETER LEVEL CONTROLS
The three position switch in the crossover box labeled “TW Level” adjusts the relative volume of the tweeter with respect to the midrange. The 0db position is referenced as equal output from the midrange and the tweeter. The
6 | © 2008 directed |