Using Your Blender
18 Speeds |
|
|
|
|
|
|
|
|
|
|
|
|
|
|
|
|
|
|
|
|
|
|
|
|
|
|
|
|
|
|
|
|
|
|
|
|
| ||
|
|
|
|
|
|
|
|
|
|
|
|
|
|
|
|
|
|
|
|
|
|
|
|
|
|
|
|
|
|
|
|
|
|
|
|
|
|
|
|
|
| 1 |
| 2 |
| 3 |
| 4 |
| 5 |
| 6 |
| 7 |
|
| 8 |
| 9 |
| 10 |
| 11 |
| 12 |
| 13 |
| 14 |
| 15 |
| 16 |
| 17 |
| 18 |
| |
PULSE |
| EASY CLEAN |
| SOUP |
| BABY FOOD |
| VEGGIE |
| SALSA |
| NUTS |
| BATTER |
| PULSE |
| JUICE |
| WHIP CREAM |
| SAUCES/DIPS |
| CHEESE |
| DRESSING |
| MILKSHAKE |
| COFFEE BEANS |
| SMOOTHIE |
| FROZEN DRINK |
| POWDER DRINK |
| ICE CRUSH |
|
|
|
|
|
|
|
|
|
|
|
|
|
|
|
|
|
|
|
|
| ||||||||||||||||||||
Clean blender according to the instructions in the “Cleaning and Storing Your Blender” section.
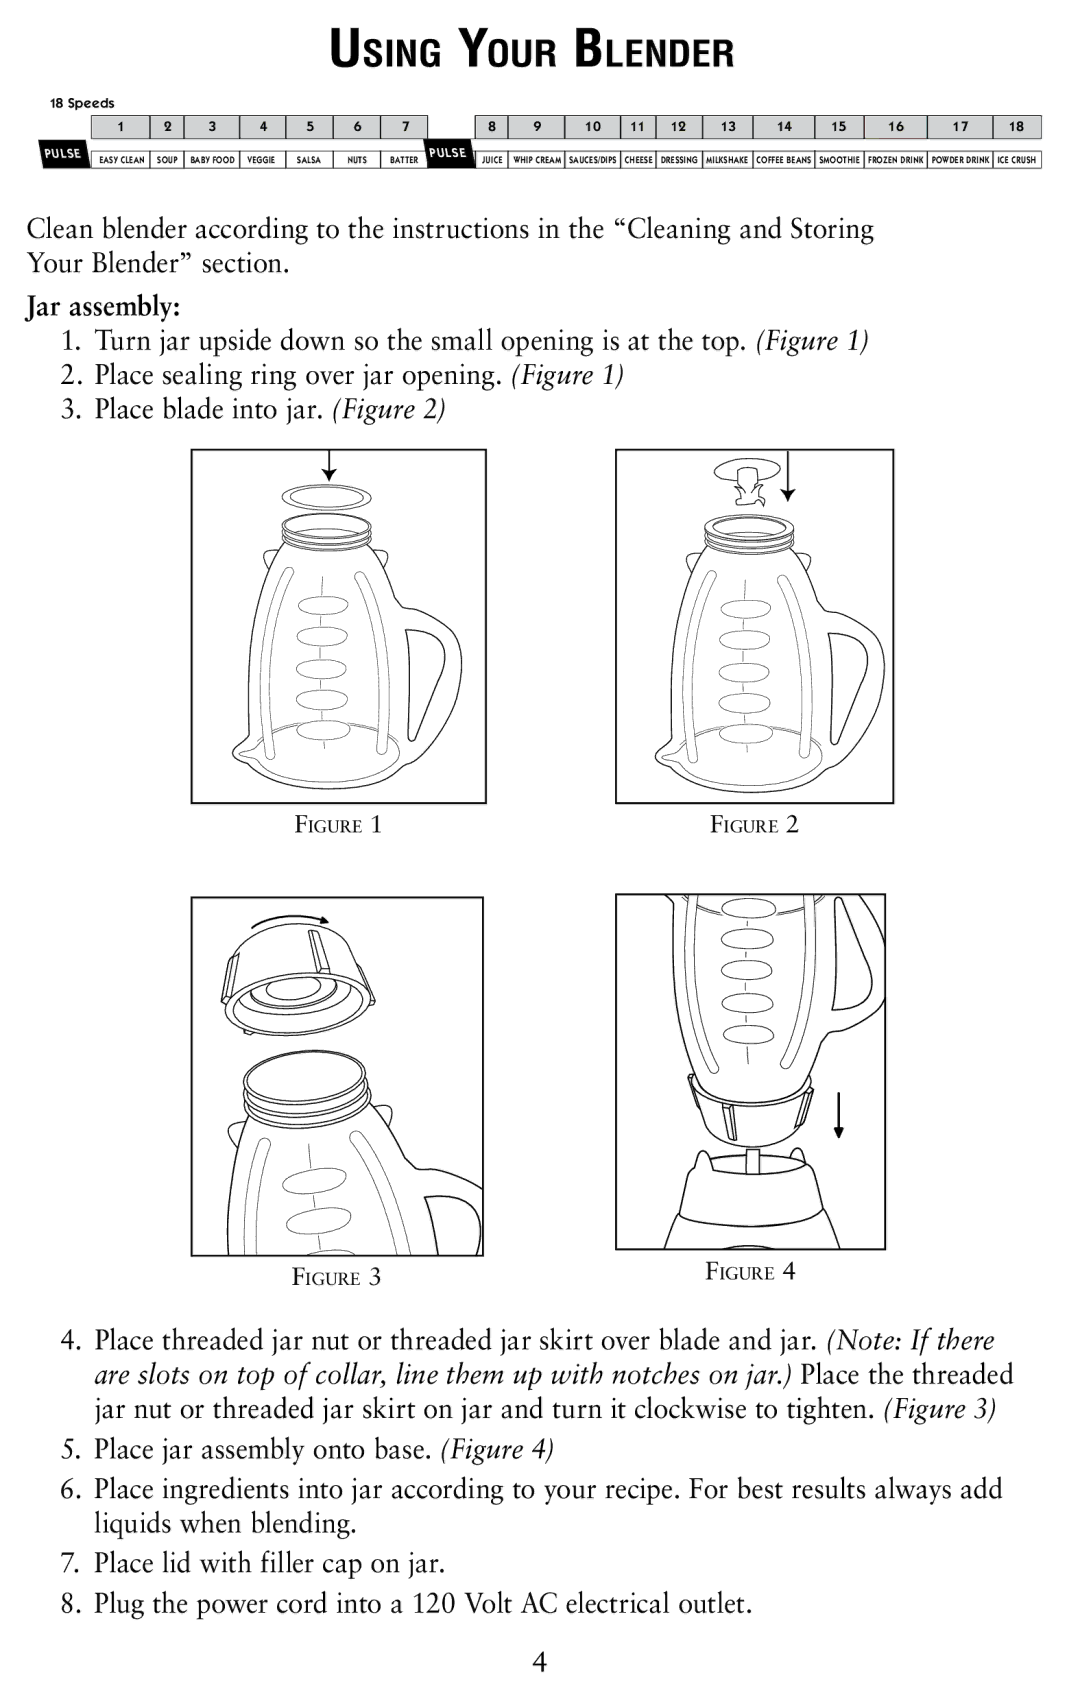
Jar assembly:
1.Turn jar upside down so the small opening is at the top. (Figure 1)
2.Place sealing ring over jar opening. (Figure 1)
3.Place blade into jar. (Figure 2)
Figure 1 | Figure 2 | |
|
|
|
|
|
|
|
|
|
|
|
|
Figure 3 | Figure 4 |
4.Place threaded jar nut or threaded jar skirt over blade and jar. (Note: If there are slots on top of collar, line them up with notches on jar.) Place the threaded jar nut or threaded jar skirt on jar and turn it clockwise to tighten. (Figure 3)
5.Place jar assembly onto base. (Figure 4)
6.Place ingredients into jar according to your recipe. For best results always add liquids when blending.
7.Place lid with filler cap on jar.
8.Plug the power cord into a 120 Volt AC electrical outlet.
4