OPTIMA 1438m
DPOF Settings
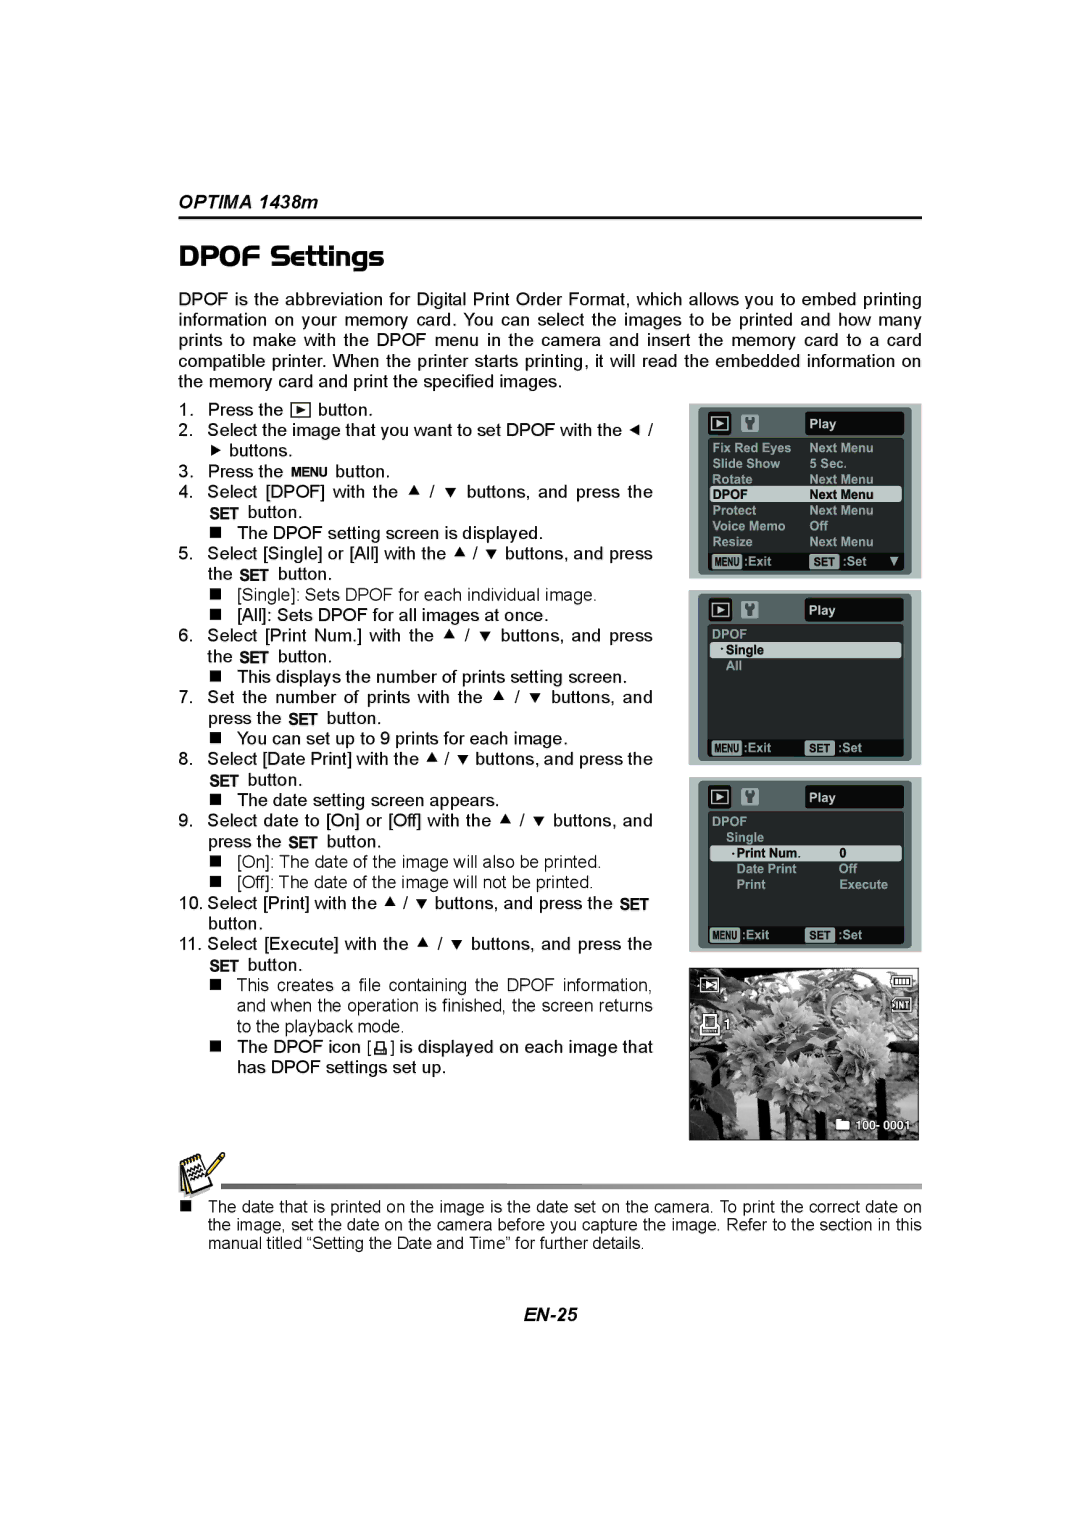
DPOF is the abbreviation for Digital Print Order Format, which allows you to embed printing information on your memory card. You can select the images to be printed and how many prints to make with the DPOF menu in the camera and insert the memory card to a card compatible printer. When the printer starts printing, it will read the embedded information on the memory card and print the specified images.
1.Press the ![]() button.
button.
2.Select the image that you want to set DPOF with the e / f buttons.
3.Press the ![]() button.
button.
4.Select [DPOF] with the c / d buttons, and press the
![]() button.
button.
The DPOF setting screen is displayed.
5.Select [Single] or [All] with the c / d buttons, and press
the ![]() button.
button.
[Single]: Sets DPOF for each individual image.
[All]: Sets DPOF for all images at once.
6.Select [Print Num.] with the c / d buttons, and press
the ![]() button.
button.
This displays the number of prints setting screen.
7.Set the number of prints with the c / d buttons, and
press the ![]() button.
button.
You can set up to 9 prints for each image.
8.Select [Date Print] with the c / d buttons, and press the
![]() button.
button.
The date setting screen appears.
9.Select date to [On] or [Off] with the c / d buttons, and
press the ![]() button.
button.
[On]: The date of the image will also be printed.
[Off]: The date of the image will not be printed.
10.Select [Print] with the c / d buttons, and press the ![]() button.
button.
11.Select [Execute] with the c / d buttons, and press the
![]() button.
button.
This creates a file containing the DPOF information, and when the operation is finished, the screen returns to the playback mode.
The DPOF icon [ ![]() ] is displayed on each image that has DPOF settings set up.
] is displayed on each image that has DPOF settings set up.
x
![]() 1
1
E100- 0001
The date that is printed on the image is the date set on the camera. To print the correct date on the image, set the date on the camera before you capture the image. Refer to the section in this manual titled “Setting the Date and Time” for further details.