
DMP-BDT220 specifications
The Panasonic DMP-BDT220 is a versatile and feature-rich Blu-ray Disc player that brings the cinematic experience to your living room. Known for its sleek design and advanced technology, this model combines exceptional video and audio performance with smart streaming capabilities, making it a popular choice among home theater enthusiasts.One of the standout features of the DMP-BDT220 is its ability to support a wide range of video formats. It offers Full HD 1080p playback for Blu-ray Discs, ensuring that movies are presented in stunning clarity and detail. Additionally, it supports 3D Blu-ray playback, allowing viewers to enjoy immersive 3D movies, provided they have a compatible 3D TV. The player also boasts the capability to upscale standard-definition DVDs to near-HD quality, enhancing older media for a better viewing experience.
In terms of connectivity, the DMP-BDT220 is equipped with Wi-Fi capability, enabling easy access to a variety of online streaming services such as Netflix, YouTube, and Hulu. This feature allows users to enjoy a vast library of content beyond traditional disc playback. The player also includes an Ethernet port for wired connections, ensuring a stable internet connection for continuous streaming.
The DMP-BDT220 supports BD-Live and BonusView, adding interactive features to Blu-ray Disc content. This compatibility means users can access additional content, such as trailers and behind-the-scenes footage, enriching their viewing experience. The inclusion of the VIERA Connect platform allows users to access various applications, making the device stand out as a multifunctional entertainment hub.
Panasonic has equipped the DMP-BDT220 with advanced audio technology, including support for high-definition audio formats like Dolby TrueHD and DTS-HD Master Audio. This ensures that users can enjoy cinema-quality sound that complements the visuals. The player also features a built-in audio decoder and can output lossless audio signals over HDMI, providing an exceptional audio experience.
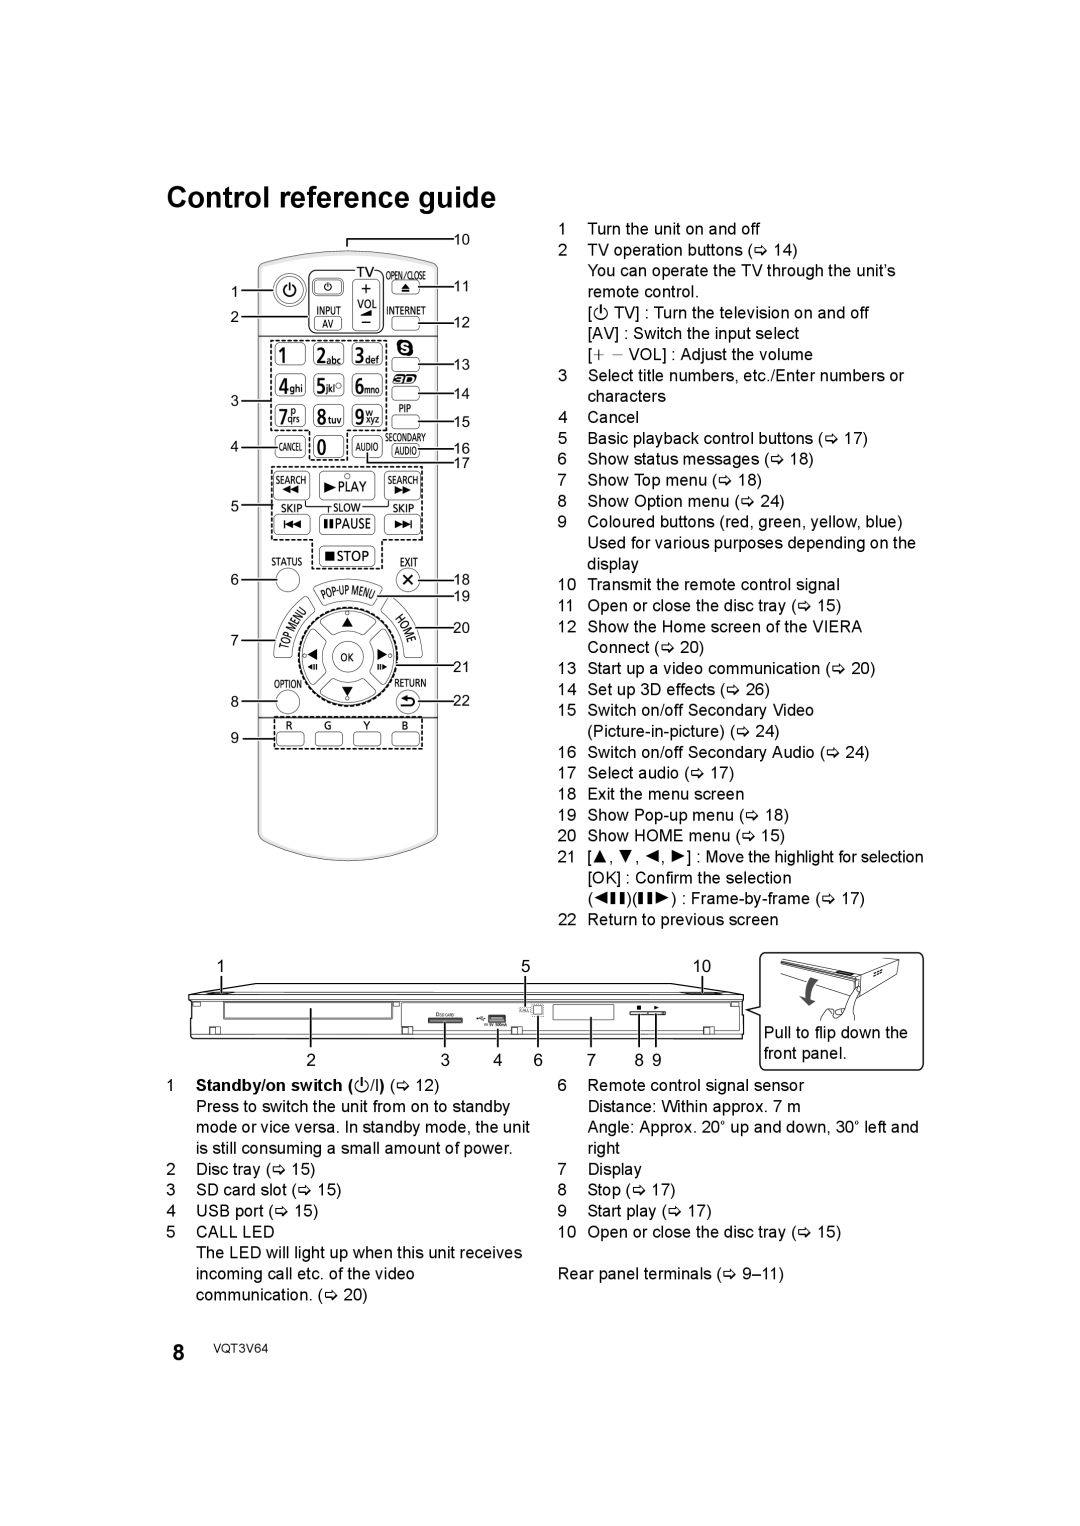
With its unique features, including a dedicated remote control, easy-to-navigate menus, and fast startup times, the Panasonic DMP-BDT220 represents an excellent option for those looking to enhance their home entertainment setup. Overall, the DMP-BDT220 stands out with its combination of high-quality video playback, smart capabilities, and superior audio performance, making it a valuable addition to any home theater system.