
DP-6000, DP-7000 specifications
The Panasonic DP-7000 and DP-6000 are high-performance multifunctional document imaging solutions designed to meet the demanding needs of modern offices. These devices stand out for their robust capabilities including printing, copying, scanning, and faxing, while also ensuring exceptional reliability and ease of use.The DP-7000 leads the lineup with impressive speed and quality. It boasts a printing speed of up to 70 pages per minute, making it suitable for high-volume environments. The DP-6000, while slightly slower, still offers competitive speed and is an ideal choice for medium-sized businesses. Both models deliver a resolution of 1200 x 1200 dpi, ensuring crisp text and vivid images that enhance professional presentations and documents.
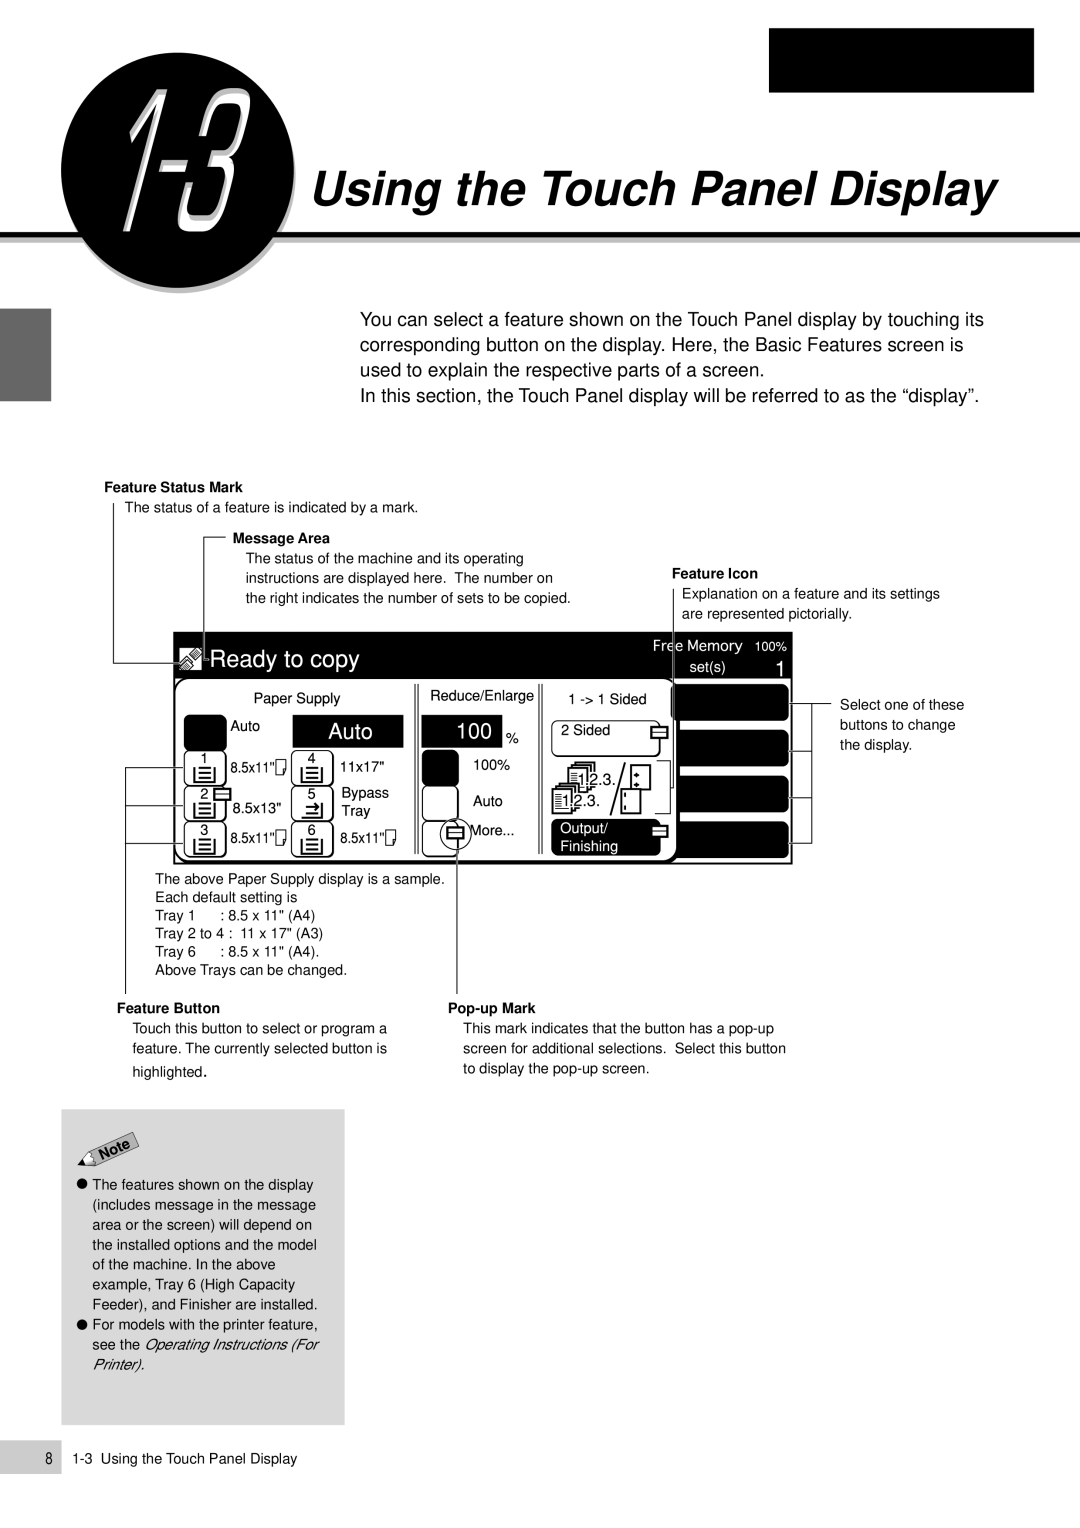
User experience is a focal point for both devices, featuring an intuitive touchscreen interface that simplifies operation. This color display provides easy access to frequently used functions, allowing users to seamlessly navigate through settings and options. The machines also support various paper sizes and media types, enhancing their versatility. Standard paper capacity is impressive, with the ability to expand with optional trays for increased output without constant reloads.
Another key feature is the advanced scanning capability. Both models include duplex scanning, which enables the simultaneous scanning of both sides of a document, significantly improving workflow efficiency. The scanning resolution can reach up to 600 x 600 dpi, ensuring high-quality digital copies of all documents.
Connectivity options are abundant with both the DP-7000 and DP-6000. They support USB, Ethernet, and Wi-Fi connections, alongside mobile printing technologies such as Apple AirPrint and Google Cloud Print. This flexibility allows users to print from various devices, whether at the office or on the go.
Security is also paramount in the design of these devices. They feature robust security protocols that safeguard sensitive information, making them suitable for industries where data protection is critical. Features like user authentication and secure printing help in managing access and protecting confidential documents.
In summary, the Panasonic DP-7000 and DP-6000 are reliable, high-speed multifunction printers ideal for businesses seeking efficient document management solutions. Their blend of advanced features, user-friendly design, and network connectivity establishes them as strong contenders in the competitive office equipment market. With these models, Panasonic continues to reinforce its reputation for quality and innovation in document imaging technology.