About the LED display
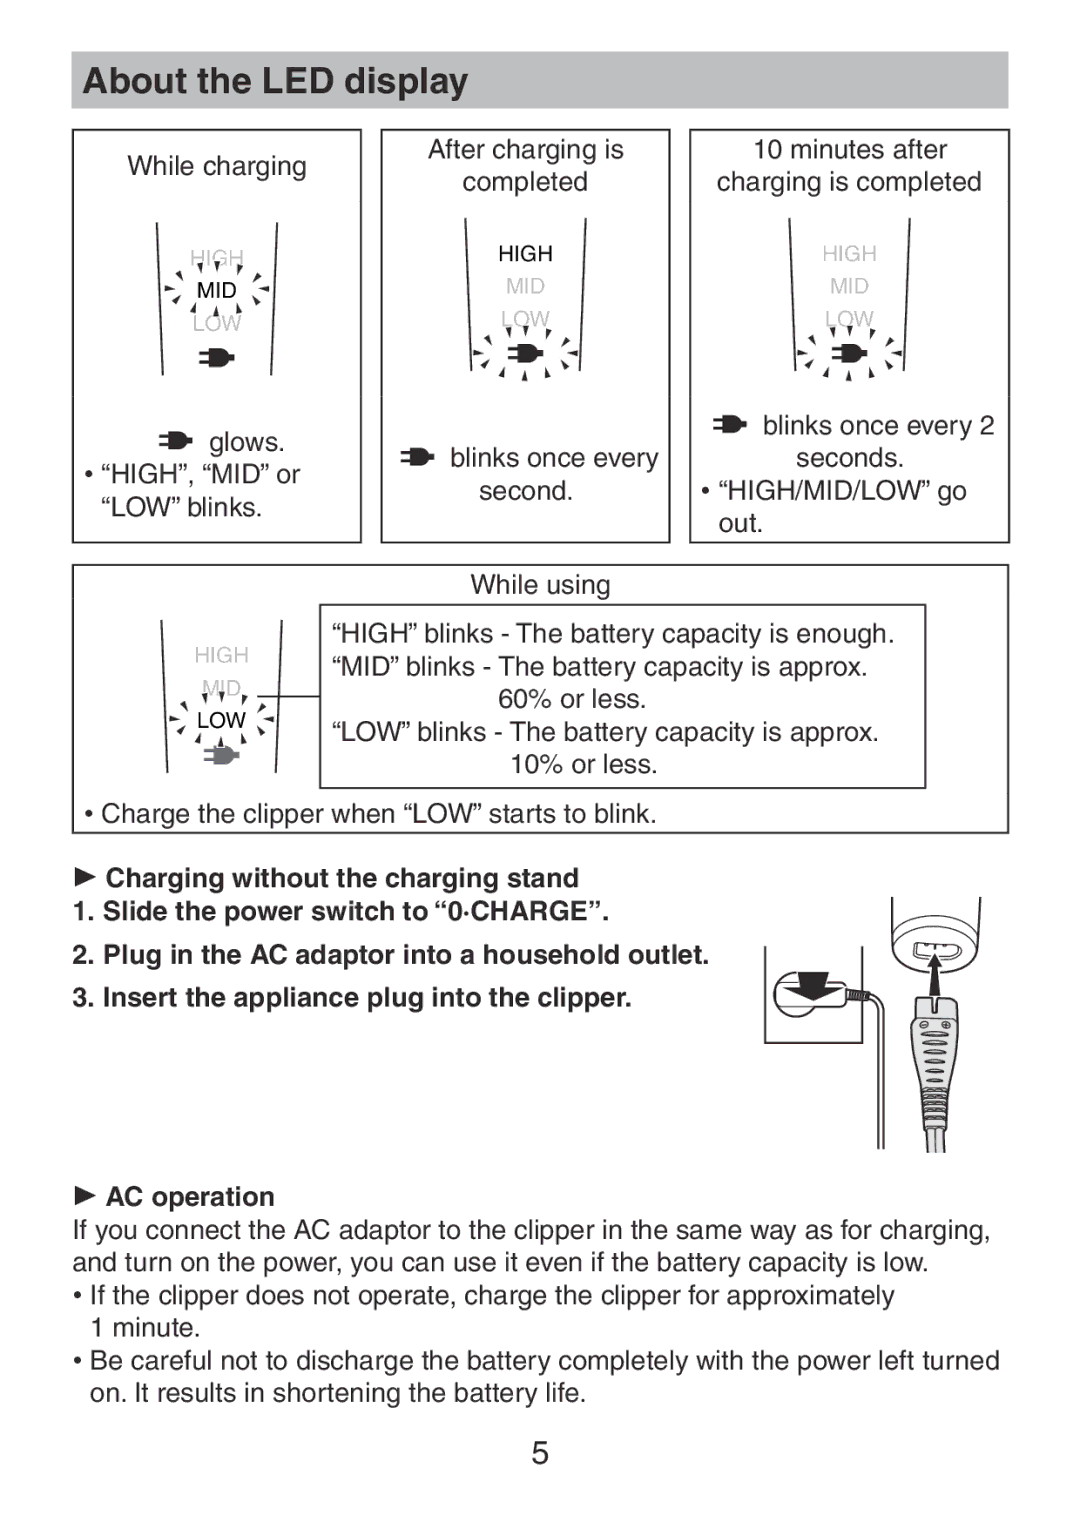
While charging |
| After charging is |
| 10 minutes after |
| completed |
| charging is completed | |
|
|
| ||
HIGH |
| HIGH |
| HIGH |
MID |
| MID |
| MID |
LOW |
| LOW |
| LOW |
glows. |
|
|
| blinks once every 2 |
| blinks once every |
| seconds. | |
• “HIGH”, “MID” or |
|
| ||
| second. |
| • “HIGH/MID/LOW” go | |
“LOW” blinks. |
|
| ||
|
|
| out. | |
|
|
|
| |
|
|
|
|
|
|
| While using |
|
|
HIGH
MID
![]() LOW
LOW ![]()
“HIGH” blinks - The battery capacity is enough. “MID” blinks - The battery capacity is approx.
60% or less.
“LOW” blinks - The battery capacity is approx. 10% or less.
•Charge the clipper when “LOW” starts to blink.
Charging without the charging stand
1. Slide the power switch to “0·CHARGE”.
2. Plug in the AC adaptor into a household outlet.
3. Insert the appliance plug into the clipper.
AC operation
If you connect the AC adaptor to the clipper in the same way as for charging, and turn on the power, you can use it even if the battery capacity is low.
•If the clipper does not operate, charge the clipper for approximately 1 minute.
•Be careful not to discharge the battery completely with the power left turned on. It results in shortening the battery life.
