Replacing the system outer foil and the inner blades
![]() appears on the LCD panel once a year. (This will differ depending on usage.) We recommend checking the system outer foil and the inner blades when it appears.
appears on the LCD panel once a year. (This will differ depending on usage.) We recommend checking the system outer foil and the inner blades when it appears.
•Press the OFF/ON switch for more than 30 seconds to delete ![]() .
.
system outer foil | once every year |
|
|
inner blade | once every two years |
|
|
Replacing the system outer foil
|
| 1. Press the foil frame release | ||
|
| buttons and lift the outer foil | ||
|
| section upwards as illustrated. | ||
|
| 2. Press the system outer foil | ||
|
| release buttons and pull down | ||
|
| the system outer foil as | ||
|
| illustrated. |
| |
|
| 3. Align the foil frame | mark | |
|
| and the system outer foil | ||
|
| mark and securely attach | ||
|
| together. |
| |
|
| • The system outer foil cannot | ||
2 | 3 | be reversely attached. | ||
• Always insert the system | ||||
|
| |||
|
| outer foil to the foil frame | ||
|
| when attaching to the shaver. | ||
|
| 4. After turning the | mark to | |
|
| the front, securely attach the | ||
|
| outer foil section to the shaver | ||
|
| until it clicks. |
| |
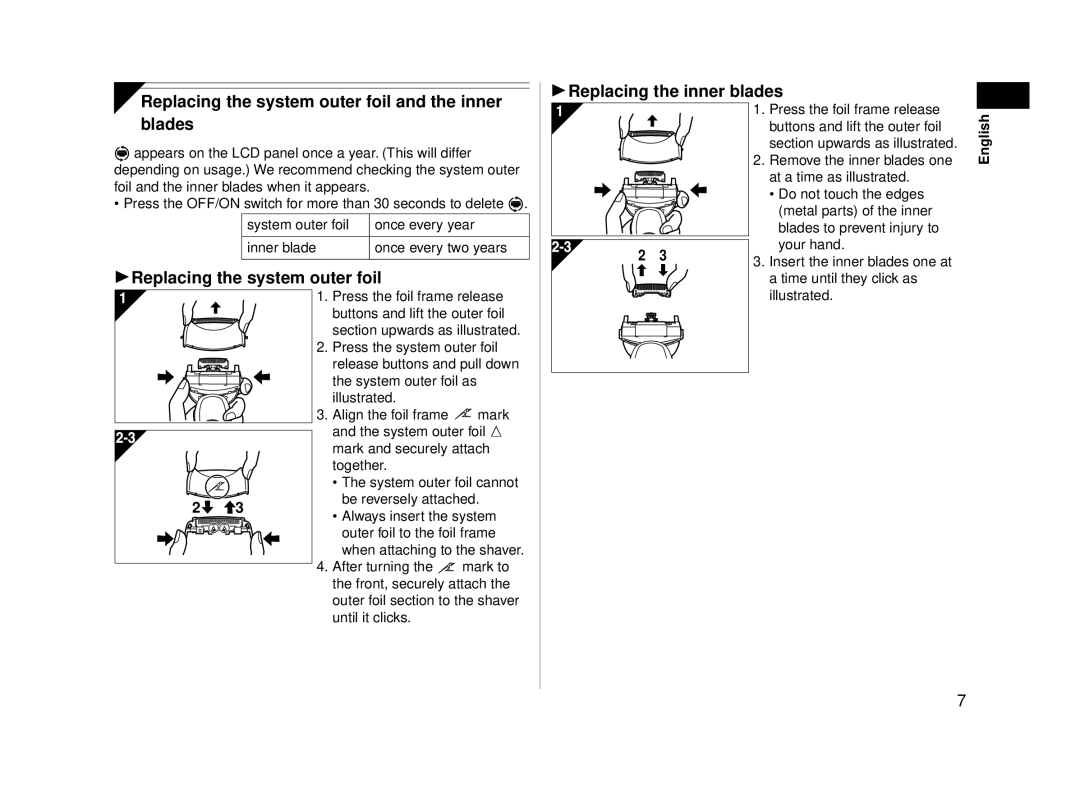
Replacing the inner blades
|
| 1. | Press the foil frame release | |
|
|
| buttons and lift the outer foil | |
|
|
| section upwards as illustrated. | |
|
| 2. | Remove the inner blades one | |
|
|
| at a time as illustrated. | |
|
|
| • Do not touch the edges | |
|
|
| (metal parts) of the inner | |
|
|
| blades to prevent injury to | |
2 | 3 |
| your hand. | |
3. | Insert the inner blades one at | |||
|
| |||
|
|
| a time until they click as | |
|
|
| illustrated. |
English
