FV-08vsl2 specifications
The Panasonic FV-08VSL2 is a high-performance, energy-efficient ventilation fan designed for residential settings. Renowned for its whisper-quiet operation, this model is particularly valued by homeowners who prioritize comfort and noise reduction. With its sleek design and efficient technology, the FV-08VSL2 is aimed at improving indoor air quality while being mindful of energy consumption.One of the standout features of the FV-08VSL2 is its ultra-quiet performance, operating at only 0.8 sones at 80 CFM. This is significantly quieter than many traditional bathroom fans, making it an ideal choice for spaces where noise levels need to be minimized, such as bathrooms or bedrooms. Users can enjoy effective ventilation without the disruptive sound typically associated with exhaust fans.
The FV-08VSL2 incorporates Panasonic's advanced ECM (Electronically Commutated Motor) technology. This energy-efficient motor not only consumes less electricity but also provides consistent airflow performance. The fan operates at multiple speed levels, allowing flexibility in ventilation based on specific needs. This adaptability makes it suitable for various areas within the home, such as laundry rooms or kitchens.
Another important characteristic of this model is its durable construction. The FV-08VSL2 features a robust housing made of high-quality materials, ensuring longevity and reliable performance. Furthermore, the fan includes a polymeric fan wheel that helps prevent corrosion, a common issue in humid environments like bathrooms.
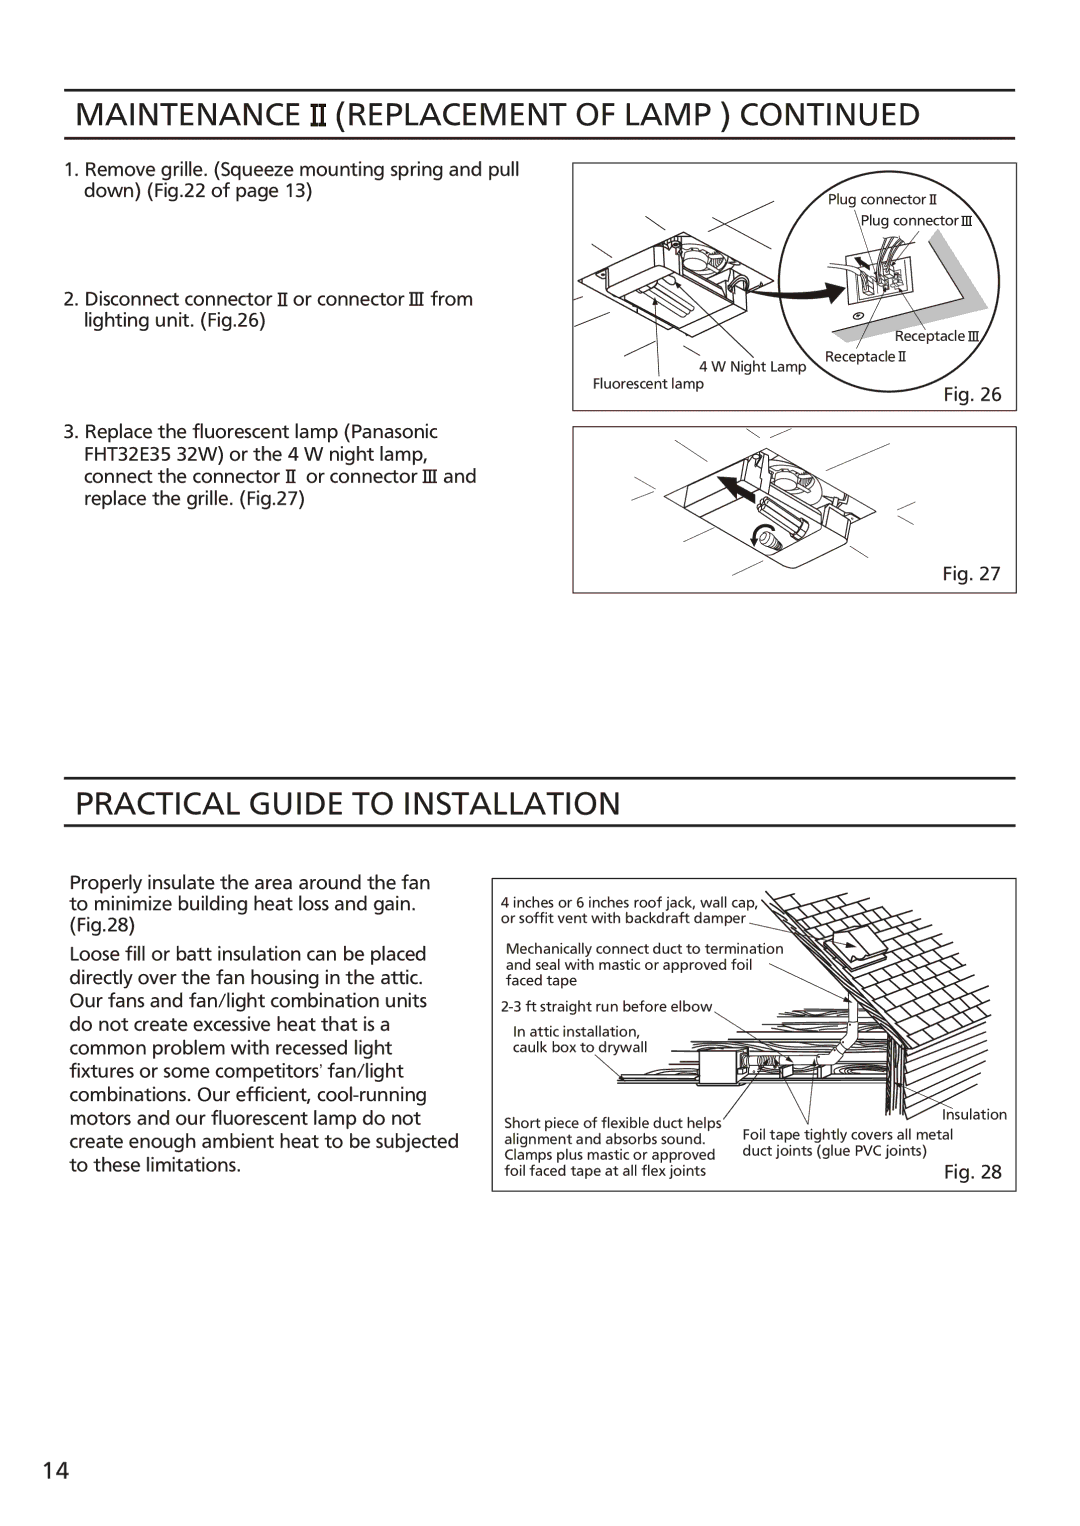
In terms of installation, the FV-08VSL2 is designed for easy setup. It can be flush-mounted and fits seamlessly into typical drywall applications, making it a convenient choice for both new builds and renovations. The included mounting brackets facilitate secure installation, providing homeowners with peace of mind.
The Panasonic FV-08VSL2 also promotes energy savings by meeting stringent energy-efficiency standards. It is ENERGY STAR certified, highlighting its capability to reduce energy consumption without sacrificing performance. This eco-friendly feature is increasingly important to homeowners looking to lower their carbon footprint and utility bills.
Overall, the Panasonic FV-08VSL2 combines efficiency, silence, and durability, making it an excellent choice for individuals in search of a reliable ventilation solution. Its advanced technologies and user-friendly features position it as a standout option in the market for ventilation fans, ultimately contributing to a healthier and more comfortable living environment.

